Deliver amazing EMS demos, Part 1: Build your demo environment

Authors Note: Since originally posting this blog, the demo tool has changes. This post reflects functionality as of April 2017. Most notably the provisioning process has been simplified by removing the requirement for a separate Azure subscription.
When I talk to partners that are building enterprise mobility practices, the common questions asked tend to center around two themes: setting up a demo environment for Enterprise Mobility + Security, and creating and conducting good EMS demos.
In this occasional blog series for Enterprise Mobility + Security Partners, I’ll share with you the resources you can use, and my tips and tricks, that will help you deliver powerful enterprise mobility demos to your customers.
Building your first EMS demo environment
You have a few options for building an EMS demo environment. I recommend Microsoft Demos.
Highlights of the Microsoft Demos site include:
- 100-user Azure AD with EMS trial license and key features preconfigured
- Office 365 E5 environment with trial license and demo-ready sample content (document libraries, emails, OneDrive contents, Yammer posts, etc.)
- Microsoft Intune environment pre-populated with apps, policies, and “fake” pre-enrolled devices that you can also enroll real devices against
- Azure RMS and Information Protection activated and preconfigured for key demo scenarios
- Cloud App Security service provisioned with key activities
- 90 day activation and up to 6 tenants at a time
Sign in as a Microsoft Partner using your MPN credentials. From there, it’s just a few steps to create a fully provisioned EMS and Office 365 demo tenant. You can create up to six environments per account.
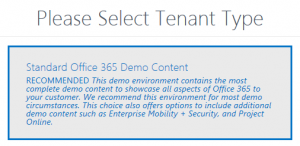
To get started click Tenants on the left-hand navigation bar. Then click Create in one of the available slots. Click the Quick Tenant option. When prompted to select a Tenant Type chose the Standard Office 365 Demo Content option as seen below and click Next.
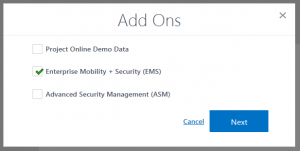
After selecting the Tenant Type you’ll be given the option for Add Ons. Select the Enterprise Mobility + Security (EMS) option and click Next. Review the Teams and Conditions and click Finish. Shortly after clicking Finish you will receive an email notification that the provisioning process has begun. Th entire process can take a few hours, so be patient.
Tips for getting the best results
Here are a few things I have learned while performing these provisioning steps:
- Don’t skip or change any steps, and when instructions say to create something new, do it.
- Keep track of all your usernames and passwords. When following the instructions, you’ll create a few new accounts during this process – be sure write them down in a safe place.
- Be patient. There will be a wait, and it may take up to 24 hours to fully provision.
- Wait for the completion email for your demo tenant before logging in and continuing configuration
If you encounter issues, click the support link in the demo portal to review the FAQ or Submit A Ticket.
Next up in this series
Look for my next post for tips about preparing the rest of the demo to make it really effective. Part 2 of this blog series is available here.

