Getting Started with Upgrade Readiness
Hello again. In my last post, I briefly touched upon the challenges application compatibility can present when planning a migration to a new version of Windows. We looked at how Upgrade Readiness provides the tools and insights to make moving to Windows 10 simpler and faster. Today, we'll look at some details on how to get started with Upgrade Readiness.
This post is intended to build on the great information that is already available on:
https://technet.microsoft.com/en-gb/itpro/windows/deploy/upgrade-analytics-get-started
Hopefully this post will give you a lot of screenshots and provide a visual reference to help you get started with using Upgrade Readiness.
Before you can start using Upgrade Readiness, you will need an active Azure subscription. Starting 8th November 2016, an Azure subscription was made mandatory for using Upgrade Readiness. If you have an existing Azure subscription, and would like to use that, you can do that. If you don’t have an existing Azure subscription or if you don’t want to use your existing Azure subscription, you can create new trial subscription (which is also probably a good idea, if you want to test this before deciding to widen the scope of usage of Upgrade Readiness). An Azure subscription can be created using the link below:
https://azure.microsoft.com/en-gb/free/?&wt.mc_id=AID529440_SEM_
Your Azure subscription will not incur any costs for any data being transferred for Upgrade Readiness. So, from a cost perspective, spinning up an Azure subscription should not be a cause for concern.
Once you have an Azure subscription, follow the steps below to get stared with Upgrade Readiness.
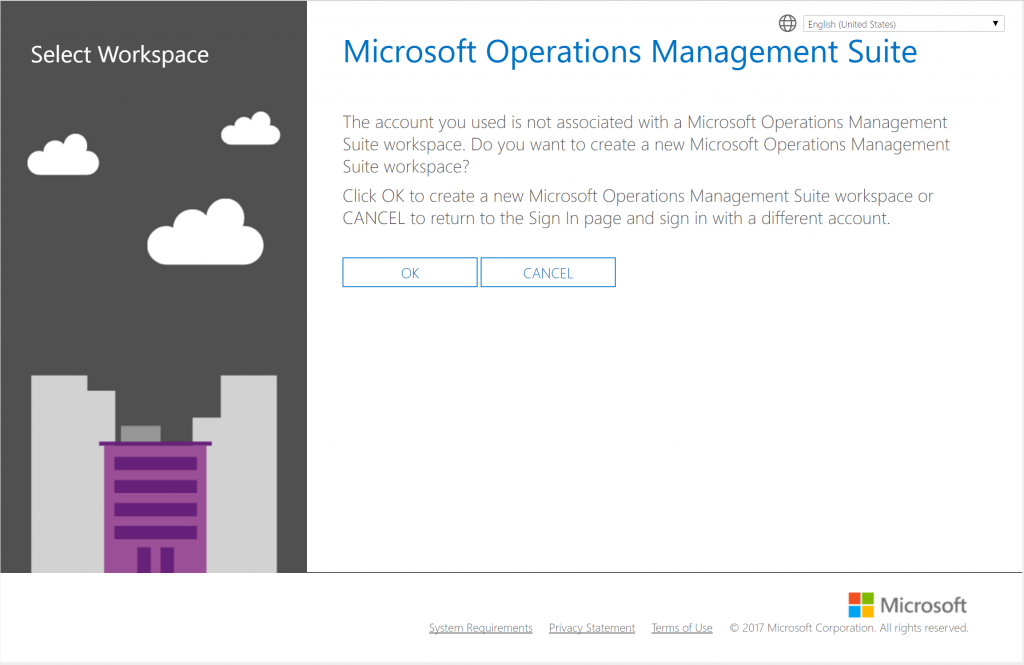
- Setup a subscription to Microsoft Operations Management Suite (OMS). To set up your subscription, use this link. During the initial registration, you can either login with a Microsoft account (@hotmail.com; @outlook.com) or an existing Azure AD account. You will see a message stating that your account is not associated with any workspace. If you are just starting out, this is expected. On this screen, click OK.
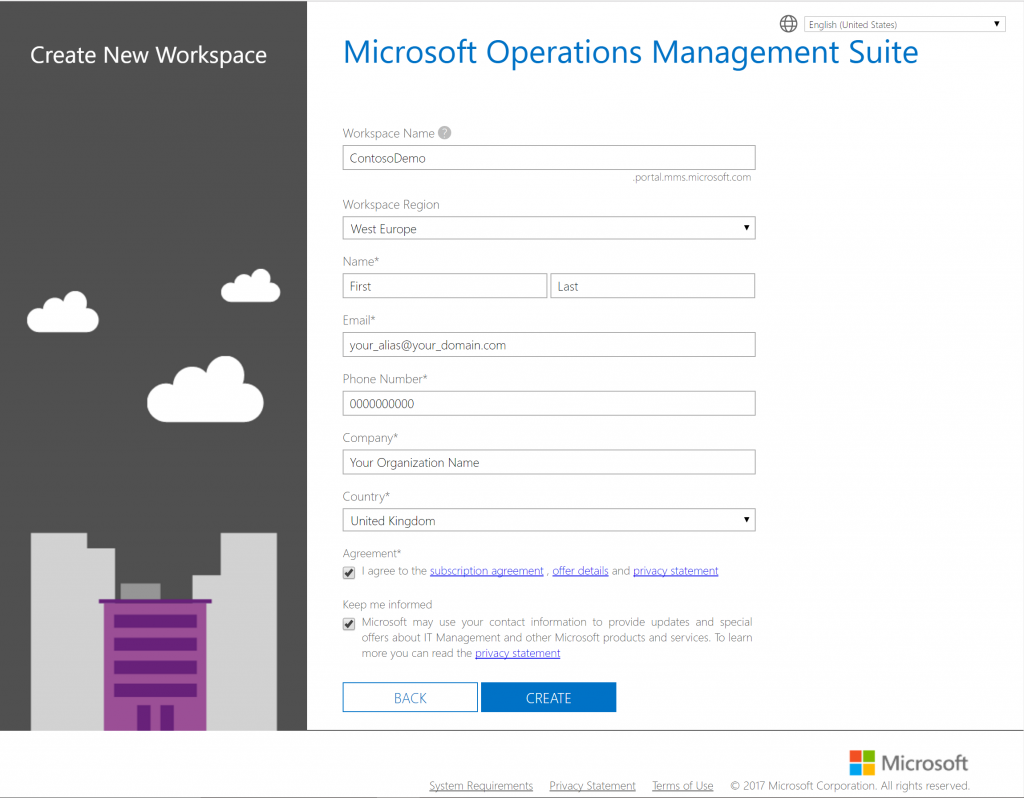
- On the next screen, provide the details you need to use. This includes a name for your workspace, which region the workspace will be hosted, your name and contact details, as well as information for your organisation. After filling the form, click CREATE.
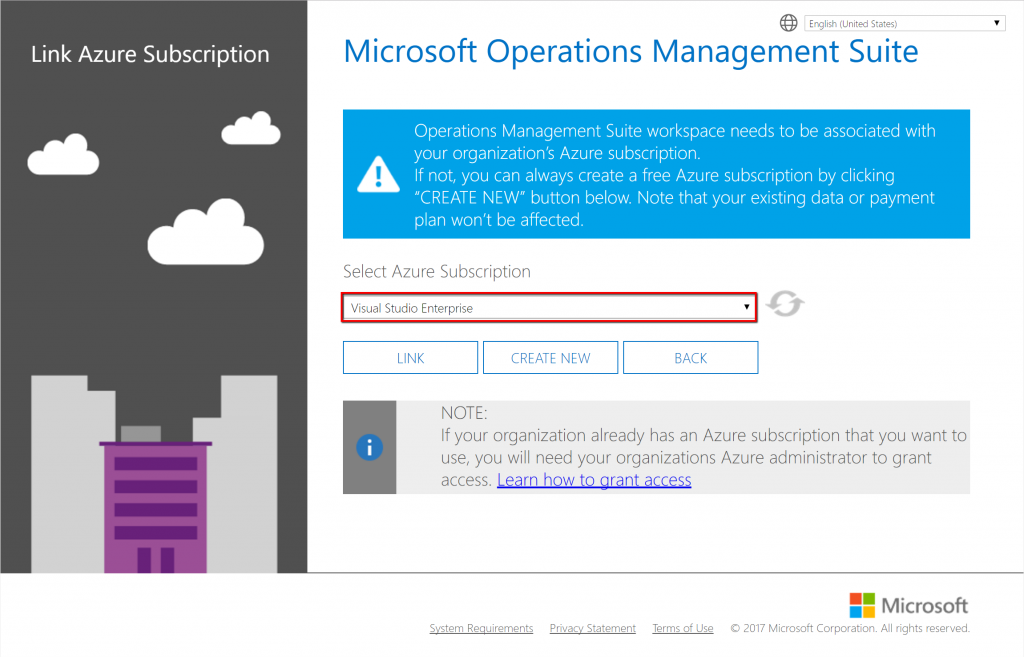
- Next, you will be prompted to link the OMS workspace to an Azure subscription. If you don’t have an existing Azure subscription, you can create a trial subscription using the CREATE NEW button. This will provide you with an option to setup a trial Azure subscription. The trial subscription gives you limited credit and a one-month trial period. If you already have an Azure subscription, go ahead and select this subscription. You might need to work with the team that manages your Azure subscription to get the right access. This blog post provides very good instructions on how to get this link set up. Click LINK once you have the subscription details ready. Note: Even if you use a Microsoft account (@hotmail.com; @outlook.com) to create your Microsoft OMS subscription, you will still need to link the OMS subscription to an Azure subscription. As mentioned previously, this is a mandatory requirement.
- Once the link with an Azure subscription is complete, your workspace should be ready and you will be redirected to your blank workspace.
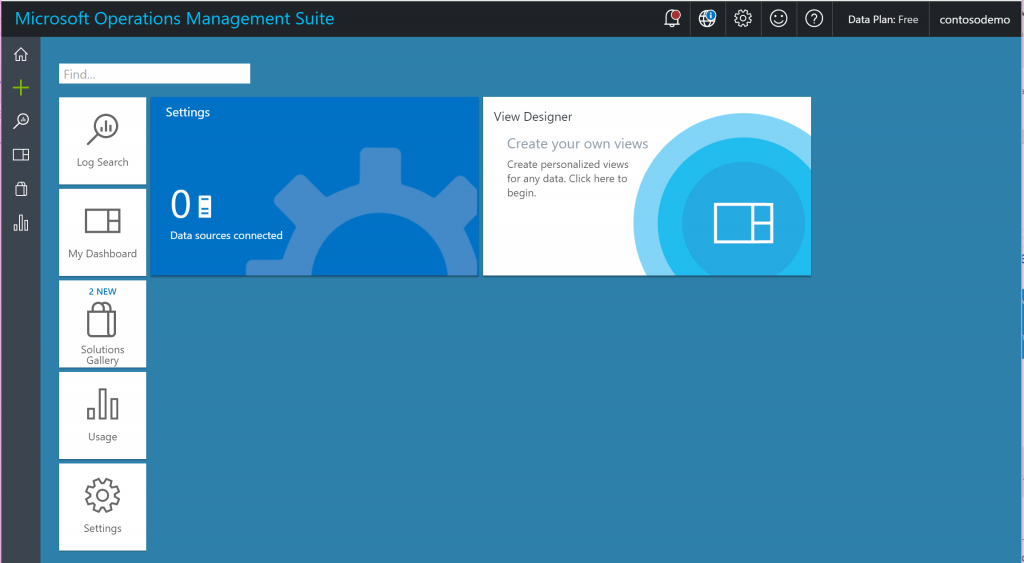
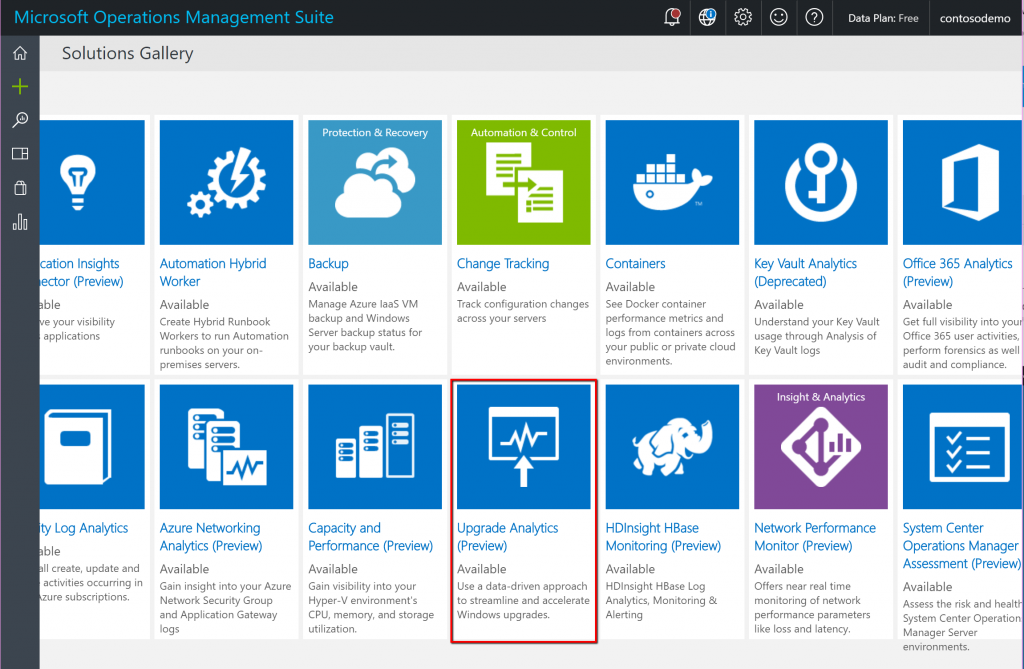
- Enable Upgrade Analytics. To do this, click on the Solutions Gallery In the Solutions Gallery page, scroll to the right to locate and select the Upgrade Analytics (Preview) tile.
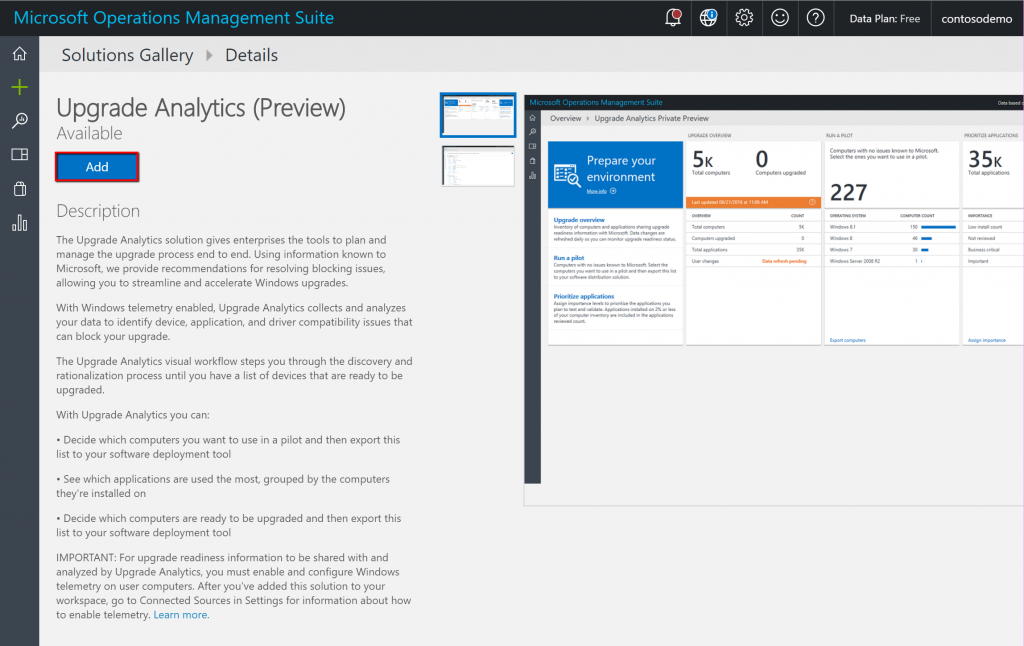
- You will be taken to the Details page for Upgrade Analytics. On this page, click on Add. You should see the page transition back to the home screen once the solution is successfully added to your workspace.
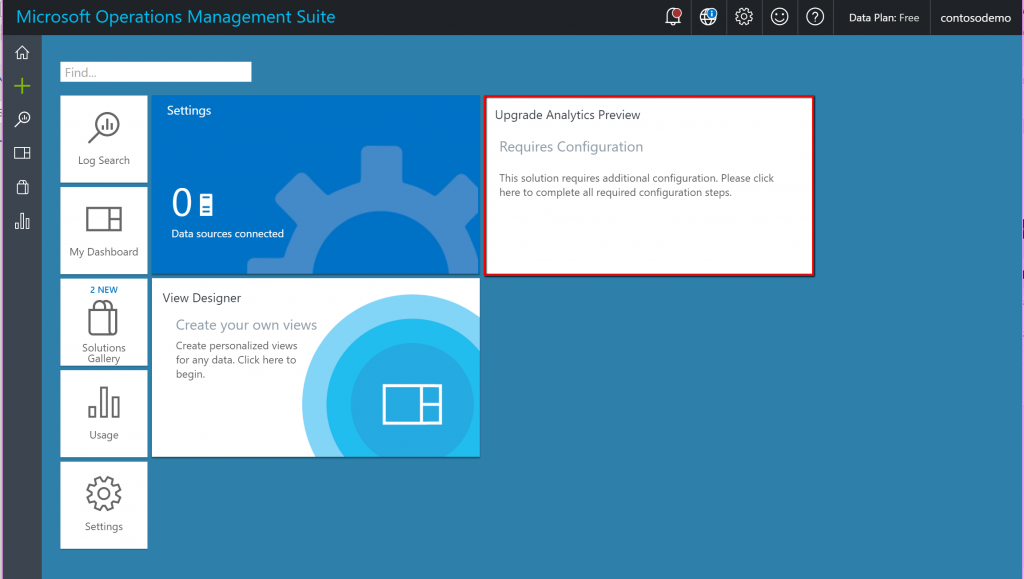
- Back on the OMS home screen, you will see a new tile for Upgrade Analytics Preview. The initial status should reflect that some configuration is still pending. Click the tile so you can complete configuring the solution.
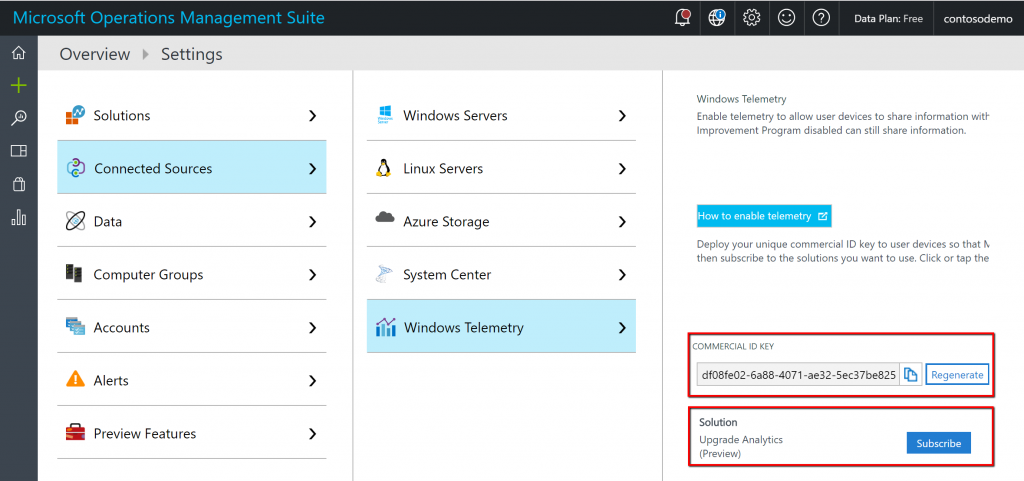
- On the Settings page, you should see two configurable options.
- Commercial ID Key: Your clients will be configured with the Commercial ID Key so that the telemetry data from your organization hits the right workspace. A value will be pre-generated and you can use that, or you can use the Regenerate button to create a new value. For your initial configuration, you should not need to bother with regenerating a new Commercial ID Key. Leave this as it is. Make a note of the Commercial ID key and save this for future use.
- Solution Details: For Upgrade Analytics to receive and display Upgrade Readiness data from Microsoft, subscribe your OMS workspace to Upgrade Analytics. Click Subscribe on this option to get started with Upgrade Analytics. Once you have subscribed to Upgrade Analytics, the button should change to Unsubscribe.
- Now, if you go back to your Overview dashboard, you should have some details on the Upgrade Analytics tile. You are now ready to start configuring your clients so data collection can be initiated.
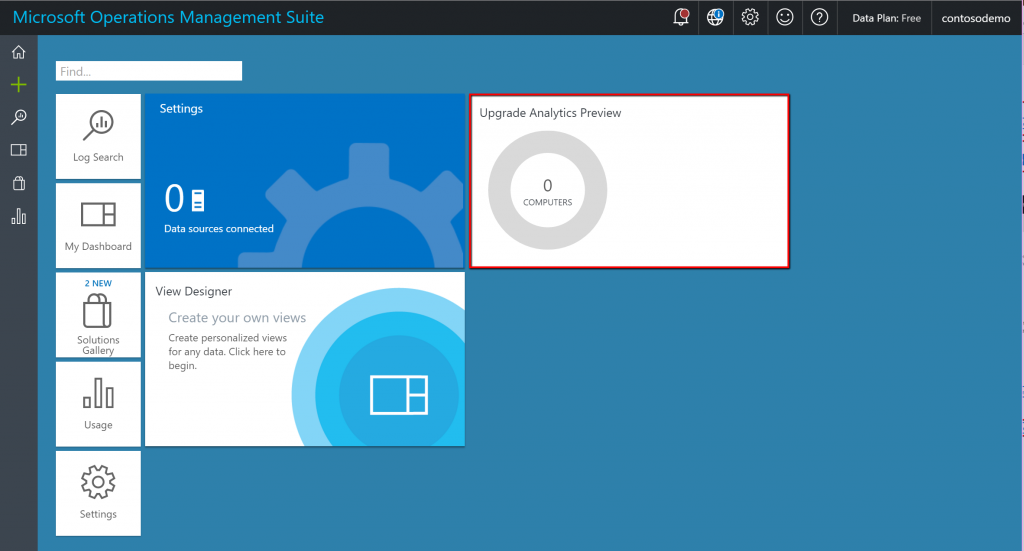
- Now that your Upgrade Analytics subscription is ready, the last requirement is to configure Upgrade Analytics with the details of which version of Windows 10 you are targeting. To do this, click on the tile for Upgrade Analytics Preview. On the Upgrade Analytics Preview page, click on the gear icon labelled Solution Settings.
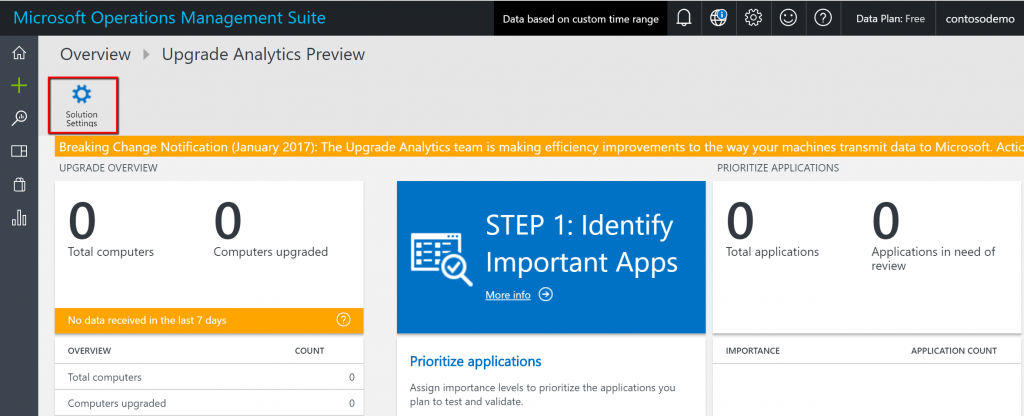
- On the Solution Settings page, set the Target build to be evaluated to the version you wish to test within your organization and then save your settings using the Save button at the top of the page. You can choose Windows 10 version 1507, 1511 or 1607 at this point, and as newer versions of Windows are released, the tool will be updated to include these.

After following these steps you should now have a fully configured Upgrade Readiness solution. The next step is configuring the clients. I will be back in a few days with the client configuration and some of the other work that is needed for the clients to be able to communicate with the Upgrade Readiness solution and the OMS workspace.
Nandan
Comments
- Anonymous
March 08, 2017
And here is the recorded session during last Ignite https://channel9.msdn.com/events/Ignite/Australia-2017/WIN321a