Upgrading to Windows Server 2012 - Part 2
Performing an in place upgrade
Hi Everyone,
Today, I want to walk you through the screens of performing an upgrade to Windows Server 2012, and talk about the logs you can look at in case an upgrade fails. Before performing the Upgrade, ensure that you check the pre-requisites, you can refer to the previous post: Upgrading to Windows Server 2012 – Part 1
To do an in place upgrade of a Server, insert the Windows Server 2012 media and run setup.exe from the root of the media. Unlike a clean install, upgrade installs do not prompt for language options because the current language setting will be used for the installation process. You will run through the following Phases when you perform an in place upgrade:
Down level Phase:
=============
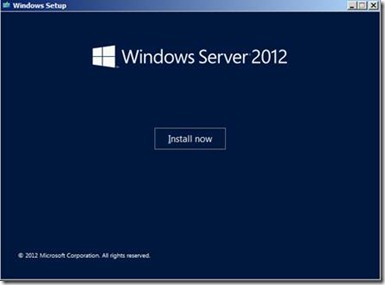
Select Install now to begin the update process
After you choose Install now, setup copies the required files to $Windows.~BT on the root of the C: drive and proceeds with the installation. The first screen (called Dynamic update) lets you download and install the latest hardware drivers and security updates before starting the upgrade process. Dynamic update will only work on systems that are connected to the Internet.
Dynamic update options
After Dynamic Update performs any driver or update processing, users are presented with the product key and edition selection screens. Windows Server 2012 can be installed either in the “Server with a Gui” configuration or a “Server Core” configuration.
Operating System Installation choices
- Server Core installations lack a user interface and takes the least amount of disk space. Server Core installations also have binaries of most features removed using the new Features on Demand process, allowing them to be installed later (or not at all).
- Server with a GUI installations give you the full user interface and stages the binaries for most roles or features, so that they are available post installation.
Windows Server 2012 has a restructured component model that allows you to switch between Server Core and Server with a Gui configuration or go to the Minimal Server Interface configuration by simply adding or removing the GUI shell and management tools. We will talk about this in a later post.
License Agreement
Once you choose the operating system you want to install, you will be presented with the License terms and setup will only proceed once you accept the agreement. If you purchased Windows Server from a retail distributor, it will also prompt you for a product key and you will not proceed beyond this page until the key in entered,
Next, you may choose whether you want to upgrade the current server - keeping files settings and applications (Upgrade: Install Windows and keep files, settings and applications), or install a fresh build of Windows Server 2012(Custom: Install Windows only).
Installation type
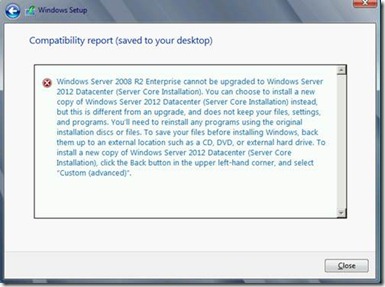
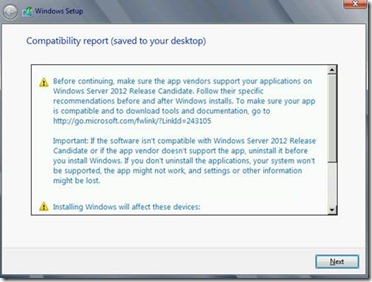
Once you choose the Upgrade option, Setup runs the compatibility checker to look for any potential compatibility issues. The result saves to the desktop as an “.htm” file. The report displays information about potential applications, roles, features, drivers and devices that will not or may not work when the upgrade is completed. The report is pretty verbose and will point out the issue right away. Here are a few screenshots of errors and warnings where setup complains that you are trying to upgrade a Server with a GUI to Server Core.
Errors when upgrading 2008 R2 Full Server to Server 2012 Server Core modes.
Compatibility report example where it points that devices may not be compatible
Once the compatibility report is reviewed and next is selected, the upgrade process begins. Next Setup collects information about installed roles files settings. Users can still cancel the upgrade process by selecting the red 'X'. This will roll them back to their earlier installation. Setup then copies bootable files to the system partition and make an entry in the BCD for Windows Setup, so that it can boot to this on the next reboot. After this activity is done, setup will reboot the server. Any logging until this point goes to the C:\Windows\Panther and C:\$WINDOWS.~BT\Sources\Panther\ locations.
Upgrade process
An entry is added to the BCD for the setup - before the reboot. This will show up during the following boot, Setup will resume automatically if there is no user interaction. If you choose to go back to the earlier installation at this point, you would have to manually delete the entry from the BCD. You can do this by running the msconfig,exe utility, choosing the Boot tab and deleting the entry here.
Continuing with the installation
After the reboot, the older operating system moves to Windows.old folder. Information collected from the older operating system is present in $Upgrade.~OS folder located in the root of the system drive. Before the machine reboots again, an entry is made in the BCD for Rollback. The machine reboots again and goes to the First Boot or Online Configuration phase. Till this point – the older operating system is completely restorable by choosing the rollback option during the reboot.
Roll back option
Online Configuration phase:
===================
After the all binaries are expanded to the destination drive, Windows will restart and begin device detection and installation. During this phase, a circular progress indicator is shown to users as device drivers are installed on the system.
Finalizing the Installation
If you run into an issue here, the following logs will be what you need to look at:
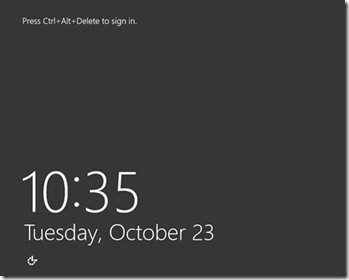
Welcome to Windows Server 2012!
When the device installation completes, you will be presented with the log on screen and the upgrade is now complete. Welcome to Windows Server 2012!
That completes today’s post, watch out for more posts in this series soon.
Regards
Vimal Shekar,
Beta Support Engineer,
Windows Core team @ Microsoft


