Upgrading to Windows 8 - Part 2
Hi again,
Welcome to the second part of this series. In this blog, we will run through a clean installation of Windows 8 by booting off the installation media. The aim of this post is to walk you through the screens that are new in Windows 8 and explain the settings and differences.
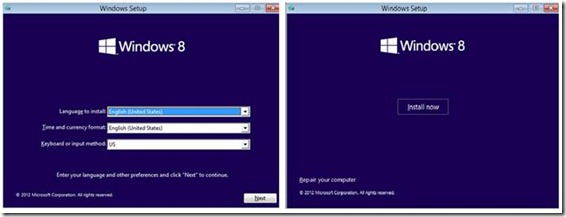
As with earlier versions of Windows, you can install Windows 8 from a bootable media like a DVD or a USB, or even using network based deployment options. The first few steps are not very different, you would be asked to choose the keyboard layout, and would normally choose the Install Now option.
Once that is done, you are prompted for the product key, presented the end user license agreement. Retail editions of Windows will not allow you to proceed until a product key is entered, volume licensing editions like Windows 8 Enterprise will skip the product key page.
You cannot choose to upgrade your current edition of Windows if you have booted off the media, the only option available is to perform a “Custom: Install Windows only (advanced)” installation. In the next screen, you should choose the hard drive where you want to install Windows.
Note: If this is a UEFI/EFI based machine – you may see three partitions created, including the EFI boot partition. We will cover changes in UEFI boot process in a later blog.
Once, the partition created, Windows begins to expand its files onto the partition. Logging at this point is available in the $Windows.~BT\Panther folder in the root of the boot drive. Quickest way of checking the log in case of any errors, is to use the <Shift><F10> key combination to launch a command prompt. Start Notepad and choose the File and Open dialog box to browse the drive. For more details on Windows setup log files, see the following Knowledge Base article:
Windows 7, Windows Server 2008 R2, and Windows Vista setup log file locations
https://support.microsoft.com/kb/927521/EN-US
Once the file expansion is finish, the machine will restart and boot into the newly installed Windows partition. During the first boot, Windows begins identifying the hardware and initializing the settings and take you through the Personalization pages. This is the point from where you will begin experiencing Windows 8’s wave of change.
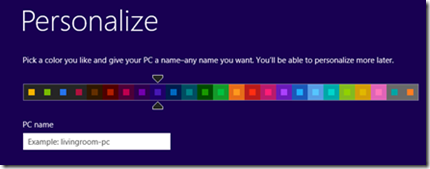
You start by choosing the color for the background of the Start Screen and provide a name for the PC.This can be changed at any time even after you log in – by launching the start charm, clicking settings and then clicking “Change PC Settings”.
Personalization of settings occurs after selecting the color pallet. Settings are available for items such as Windows Update, Customer Experience Program and content filtering. You can use either the default options or Customize, for this demo – I am choose the Customize option.
For computers with an active network connection, the Network Selection Screen would appear, from where you can choose to connect to a wired or wireless network. This replaces the previous network selection option from Windows Vista and Windows 7. The options included here are:
· Yes, turn on sharing and connect to devices: The same as choosing Work or Home as the network type in Windows Vista or Windows 7
· No, don’t turn on sharing or connect to devices: The same as choosing a Public network type in Windows Vista or Windows 7
The following screen will give you options to configure Windows Update, configure smart screen filtering for safer internet experience. Automatic Updates and Smart Screen filters are enabled by default. You can disable them if not required.
Windows update and Smart Screen protection
Customer Experience Improvement Program
The next screen gives you options to send Microsoft anonymous feedback through the Customer Experience Improvement Program. This helps us improve Apps, identify malicious activity, and provide better services in future.
Check online for solutions to problems
These settings allow the Windows Error Reporting service to collect data about system or application failures on a computer. Options here include the opt-in for the Windows Error Reporting service, allowing Windows to download the latest troubleshooter from the Internet when troubleshooting failures and using Internet Explorer Compatibility mode to improve online browsing experience. All settings are set to ON by default and can be modified by the user.
Using your Microsoft Account to Sign in
So then – let’s login to the PC. Oops, did I say Login, I meant Sign-in…
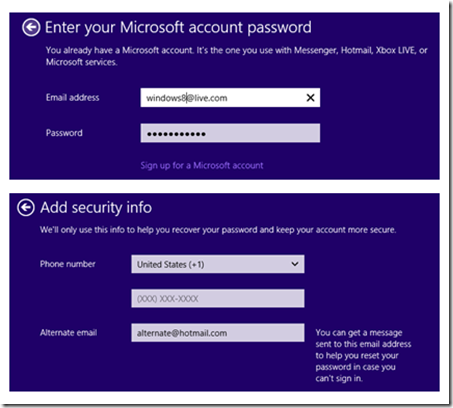
If your machine is connected to a network, then this is the screen that will let you enter your Microsoft Account details (enter your Hotmail, Windows Live or Outlook account).
Windows 8 has a bunch of cloud services offered through your Microsoft account - this includes SkyDrive, Windows Store, and many more. You can also connect multiple social networking sites like Facebook, Twitter, LinkedIn and Windows Live etc. and synchronize your contacts to the People App. This lets you follow updates from people you care about and post to multiple of these sites at the same time. Using a Microsoft account also lets you synchronize your PC settings like IE history and favorites, the Start screen and Desktop backgrounds, Contacts, App specific data etc. across your Windows Phone, Windows Tablets or other Windows PCs. You will not get these features with a local account, unless you decide to connect it with a Microsoft Account later. You can also convert a third party email id to a Microsoft account – in that case - you would run through a different set of screens that ask for a similar to the one below:
Creating a Microsoft Account using a different email
Creating a Local Account to Sign in
If you prefer not to use a Microsoft Account but go for a local account like the one you did on Windows 7 machine, you can choose the option at the bottom that says, “Sign in without a Microsoft Account”. If you wish to create a new Microsoft account, you can do that using the “Sign up for a new email address” option. If you do not have an active network connection, setup will failback and go to the local account page.
Additional Details prompted by a Connected Account.
First Time Sign in Animation
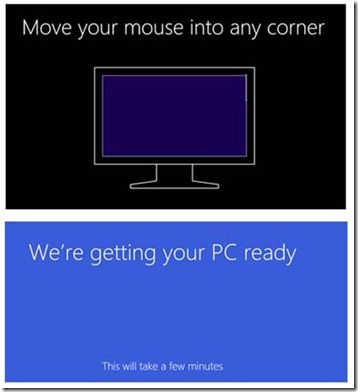
Once you fill in the additional details for your Microsoft Account, Setup will proceed with creating your user account and installing applications. You will see a startup animation during this process. When it’s done, you will be taken to the new Start Screen. This is your new home screen, the starting place for anything you want to do on Windows 8 – including searching the web, searching for apps, searching within apps, searching for people, news, music, photos, etc.
Welcome to Windows 8
Well, that’s it for now, we will be back with more tomorrow.
Regards,
Vimal Shekar
Beta Support Engineer
Windows Core Team @ Microsoft


