debugging native memory leaks
Debugging native memory leaks is one of the most difficult things to do - (at least for me). There are a few Escalation Engineers at Microsoft Product Support Services who are extremely good at debugging all kinds of issues. I learn a lot from these guys whenever I get an opportunity.
In this blog post, I am not going to talk about a specific issue, but rather a general approach to debugging native memory leaks. I work in the IIS/ASP support group and therefore some things I discuss may be more IIS/ASP specific at times.
To solve the problems of common debugging issues, Escalation Engineers in the IIS support group created a fantastic tool called Debug Diagnostics Tool. This link points you to to the 32 bit (x86 version). To obtain the 64 bit (x64) version, you need to call Microsoft Product Support at this time. What this tool allows you to do is inject a module called Leaktrack.dll into the target process so that it starts collecting allocation/de-allocation information. The concept is simple - create a heap where you track allocations from various memory managers. It works by hooking into the known Windows memory managers NTDLL, MSVCRT etc.
How it works
When a module makes an allocation request, it increments the count and also gets the size of allocation and also maintains a total size of allocation. When a de-allocation request is made by the same component, it reduces the count and updates the totals. For this to work effectively, you must inject leaktrack soon after you start the process. When the process has consumed memory in the upwards of 700 MB, you can dump out the process and then run Debug Diag’s inbuilt memory pressure analysis scripts against that dump file. Debug Diag is so cool that it will connect to the public Microsoft symbol server, download the symbols, analyze and create a nice report about the memory allocations and components responsible for those allocations. It is very easy to determine issues related to memory leaks & fragmentation with DebugDiag script. DebugDiag is very effective against issues in web applications hosted in IIS worker processes because it uses heuristics and is accurate many times. Below are the screen shots on how to setup a leak rule in Debug Diag.
NOTE: If you are debugging a web application hosted in IIS that is leaking memory, before you setup a memory leak rule, restart IIS and then send the first request to the application. This is to start tracking from the beginning of the life of the process and also to start the IIS worker process.
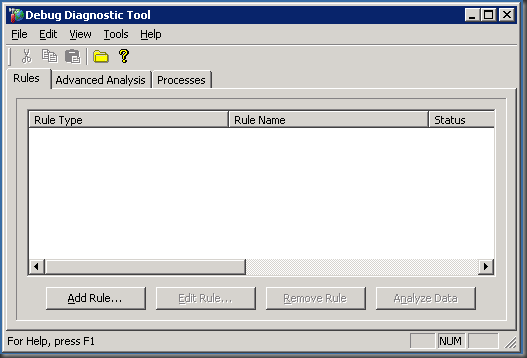
Step 1: Open Debug Diagnostics Tool
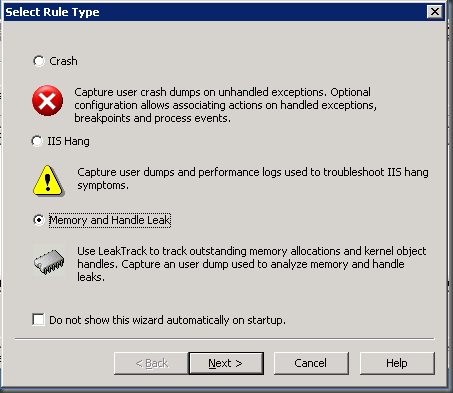
Step 2: If prompted to select a rule, select Memory & Handle Leak OR click Add Rule button to get to this screen
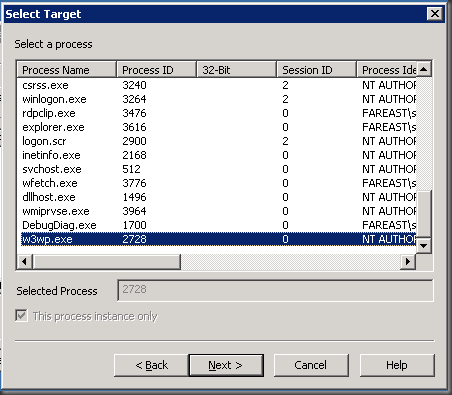
Step 3: Click Next to get to the Select Target Screen. Then select w3wp.exe if debugging IIS process or the process that you wish to debug. If you see multiple worker processes & is not sure which w3wp.exe instance to select, run the following command from a command prompt running as Administrator
CScript %windir%\system32\iisapp.vbs
The above script will output the IIS web application pool name and its corresponding PID value that you can use below.
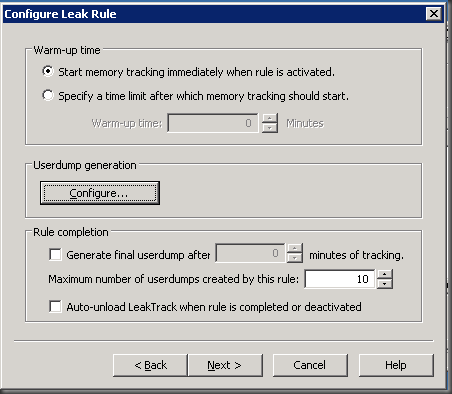
Step 4: Click Next, then click On the Configure button
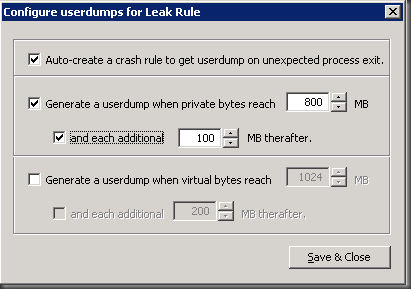
Step 5: Setup the rules as follows
- Generate a userdump when private bytes reach - (Enter value)
- And each additional 100 MB thereafter.
- Auto-create a crash rule to get userdump on unexpected process exit
Step 6: Click Save & Close and then the Next Button from the previous screen.
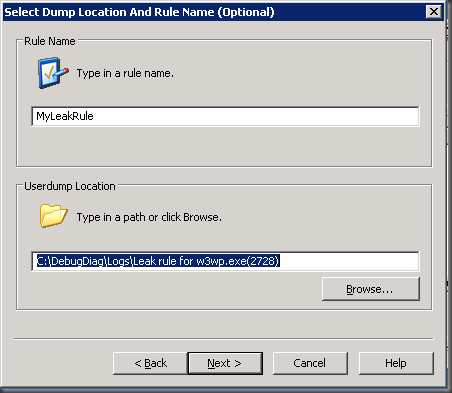
Step 7: Type in any name that you like for the rule and also type in the path where you want the dumps to be generated. This drive must have lots of disk space as each dump file will be equal to the size of the process when the dump is captured. So since we are capturing it at 800 MB upwards here as in this example, this will create 10 dumps (by default) of 800 MB or higher each.
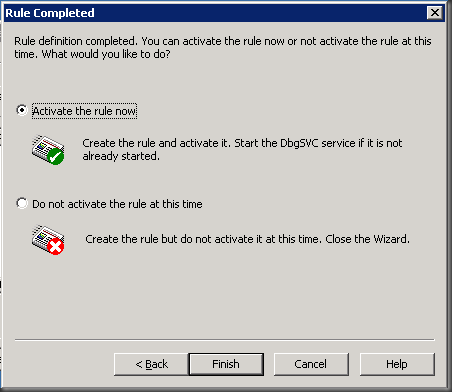
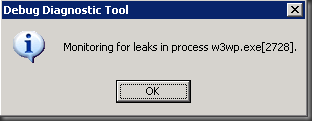
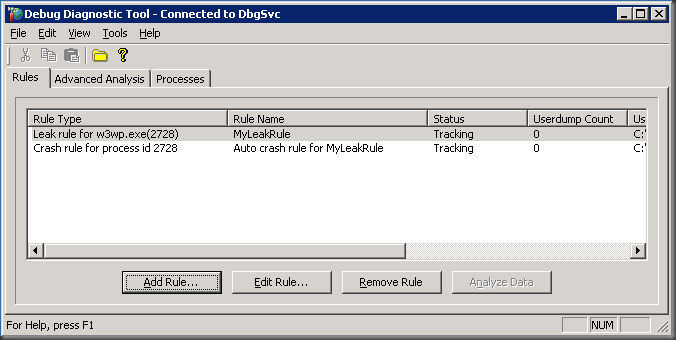
Step 8: Finish up the rule and activate it. Then make sure you see the information screen like below
You are done! You can see the rules that you just configured in the rules window. When a dump is captured, the userdump count column will have a value of 1 or more.
Next Post: Using Analysis Scripts.
