Pre-Staged Media the Flexible Way
Note: This article is not intended to demonstrate how to configure prestaged media deployments but, instead, to use prestaged media as another example of the great flexibility that can be achieved in OSD when you truly know how the system works.
When leveraging prestaged media in ConfigMgr the typical setup process is as follows:
· Identify which task sequence should be deployed by the prestaged process
· Use the Create Task Sequence Media wizard to generate the prestaged media WIM
Note: It is this step that also embeds the selected Windows PE version into the WIM. Windows PE is needed for the system to start up again after the prestaging actions are complete.
· Import the prestaged media WIM into the ConfigMgr console
· Create a basic task sequence to deploy the WIM
The keys steps in the process are to:
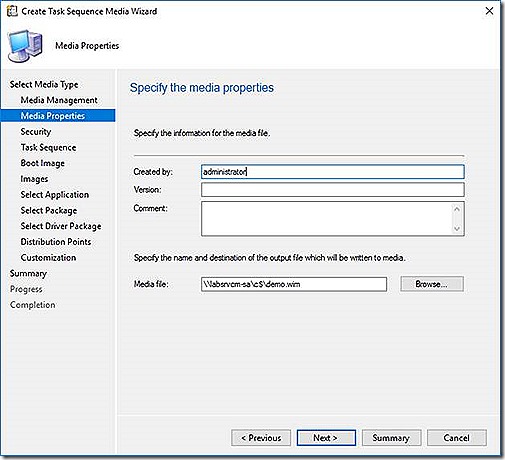
1. Specify the WIM file the prestaged wizard will build
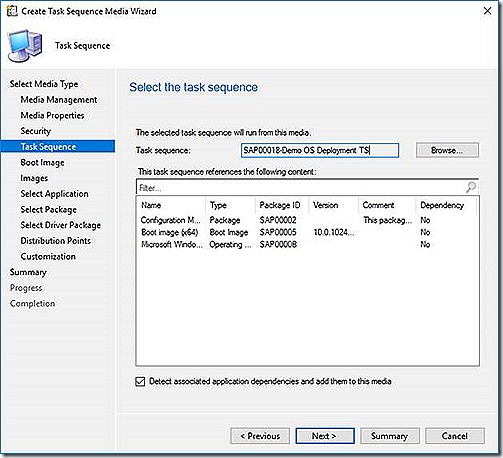
2. Select the task sequence to be used in the prestaged process
The task sequence option here is just for convenience. Choosing the task sequence does NOT ‘lock’ the process to just using this task sequence.
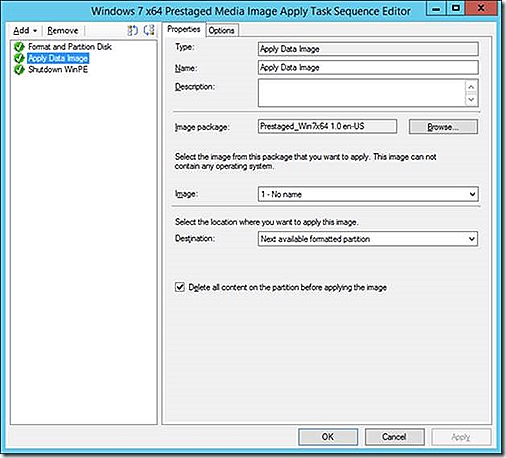
3. Create a task sequence to deploy the content contained in the WIM built using the prestaged media wizard and deploy as normal. Notice that the task used is Apply Data Image and NOT Apply Operating System Image.
All well and good. One small wrinkle. In order for the process to run successfully the assigned boot image between the prestaged task sequence and the task sequence actually being deployed must match. If not, the process will error. Why is this true? When the prestaged WIM is created the version of Windows PE assigned as part of the prestaged wizard is injected into the WIM. The end result is that when the system reboots after the prestaged WIM is applied it will boot back into whatever version of Windows PE is on the hard disk. This is different from what happens with standard imaging where the correct version of PE assigned to the task sequence will be downloaded on the fly in the event of a mismatch. Pretty small inconvenience really but the inconvenience becomes larger when trying to leverage the prestaged process in an enterprise build environment where both x86 and x64 systems need to be built. Wait, is this really a big deal? An x86 boot image can be used nicely to build an x64 system. Right but remember that little gotcha just mentioned. If the boot image associated with the task sequence doesn’t match the boot image associated with the prestaged media the process will error.
Another wrinkle. What if the build process is happening in the same enterprise build location and there is a desire to have flexibility in the process? Maybe one time it is of interest to select one image to build and the next a different image should be deployed. Using the standard prestaged process this flexibility is a bit more cumbersome. It would be nice to have a prestaged process that allows using multiple prestaged builds dynamically. In such a case it would be nice to have a process to allow dynamic choices at build time as well as to dynamically choose which version of Windows PE should be staged during build.
It's actually pretty easy to include this type of flexibility, even with prestaged media.
To build a solution that allows prestaging to work regardless of architecture type and assigned boot media we just need to adjust the process a bit.
Step 1 – Empty WIM
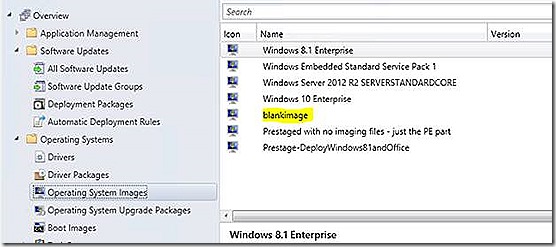
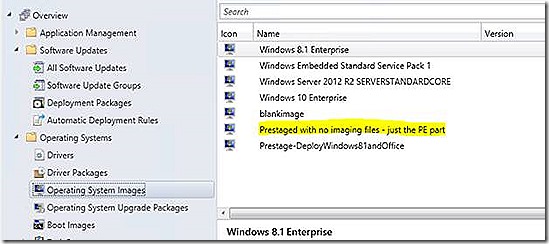
The first step is to create a completely empty WIM by capturing a blank disk. This is easily done using a VM with a blank disk and booted into Window PE. Once the WIM is create it will be imported into ConfigMgr.
Step 2 – Prepare a Fully Functional Prestaged PE ONLY WIM
With the blank WIM imported we now want to create a WIM that will only contain Windows PE. How do this? As referenced above the prestaged media wizard requires that a task sequence be specified before creating the prestaged WIM. By using a task sequence with a single Apply Operating System step referencing the imported empty WIM we effectively are able to leverage the prestaged media wizard to build a WIM containing only Windows PE that we can apply as needed.
Note: In order for the task sequence to show up in the prestaged media wizard it must have a boot image associated with it.
Once created the WIM is imported into ConfigMgr and used as part of the prestage media task sequence deployment. Applying this WIM will allow the system to reboot to a fully functional PE – just like happens in traditional Prestaged processing – while maintaining the flexibility needed in the process.
Step 3 – Create a Task Sequence to Deploy WIM Files
When creating the task sequence that will be used in this scenario the process will apply two WIM’s.
The first WIM applied is the one that contains the actual image of interest. The WIM is applied using the Apply Operating System Image task. Notice that the specific partition configuration is specified. Left alone the disk would be configured to load the image in the WIM after reboot. To make the process use the prestaged process we need to overlay the Windows PE only WIM created by the prestaged wizard.
The second imaging step deploys the Windows PE only WIM just created. This WIM is applied using the Apply Data Image task. Notice that the specific partition is specified and matches what was used in the Apply Operating System Image task. Also, the option to Delete all content is NOT enabled which will allow the first image applied to remain.
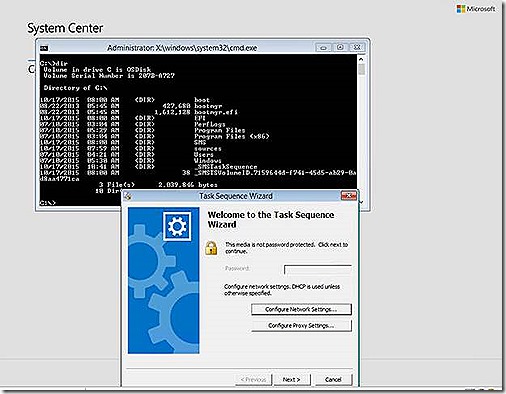
After applying the two images the system will be configured to shutdown. When powered back on the system will load Windows PE. If preferred the command shutdown /r could be used to cause the system to reboot instead of power off.
Step 4 – Apply Desired Image
When the PC restarts it will enter Windows PE just as would be expected if using the standard Prestaged process and the specific task sequence to use for imaging can be selected.
