Using SQL Always Encrypted with Azure Web App Service
Reviewed by: Dimitri Furman, Jakub Szymaszek, Sanjay Mishra, Kun Cheng, Mike Ruthruff
Background
A common scenario today involves migrating a web application (based on IIS) and the on-premises SQL Server database to either Azure SQL DB or Azure SQL VM. One of the important thoughts in the mind of customers embarking on such projects is about data security and privacy. The good news is, for data stored in the relational database, the Always Encrypted feature in Azure SQL Database (and SQL Server) offers a unique end-to-end way to protect sensitive data from hostile or accidental disclosure.
For the purposes of this post, it is assumed that you have some familiarity with how Always Encrypted works. If you are new to this subject, please first read more about the feature at the Always Encrypted page. If you are interested in security as it applies to Azure SQL Database in general, this page is a great place to start as it has links to other key features such as Auditing, Threat Detection etc.
Scenario
Azure App Service is the cloud platform for web applications in Azure. This is a Platform as a Service (PaaS) service, so when using a feature like Always Encrypted in SQL Server some considerations arise from an encryption key management perspective. As a quick reminder, Always Encrypted uses 2 keys:
- Column Encryption Key (CEK), which is resident in an encrypted format within the database itself
- Column Master Key (CMK), which is only present on authorized computers
The CMK is used by the application to decrypt the encrypted CEK received from the SQL instance. The decrypted CEK is in turn used to decrypt and encrypt actual data. This is the unique value proposition of Always Encrypted: the SQL instance never has access to the plaintext data. While there are options like Azure Key Vault or Hardware Security Modules (HSMs), quite commonly, the CMK is actually a certificate containing a private key.
For on-premises or VM based deployments of an application, it is fairly easy to manage the deployment of such a certificate which contains the CMK. However, in Azure App Service, which is a PaaS service, some simple steps are required to get the web application to ‘find’ the certificate containing the CMK.
Detailed Steps
To get the Azure web application to correctly work with Always Encrypted, here are the steps you need to do. Note that these steps assume that you have correctly encrypted the data in the column(s), if any, using a tool like SQL Server Management Studio or other methods like PowerShell / BulkCopy. We also assume that you have the certificate containing the CMK installed on your local machine. Finally, we also assume that you are using ASP.NET and referencing.NET Framework 4.6 or higher.
Locate the certificate using MMC
To begin, locate and export the certificate corresponding to your CMK. To do this, you need to use the Certificates MMC add-in. An important assumption here is that the certificate is stored in the ‘Current User’ store. This is because Azure App Service does not expose the equivalent of the ‘Local Machine’ store for web applications, and the default target certificate container is recorded within the certificate when it is exported.
Export the certificate
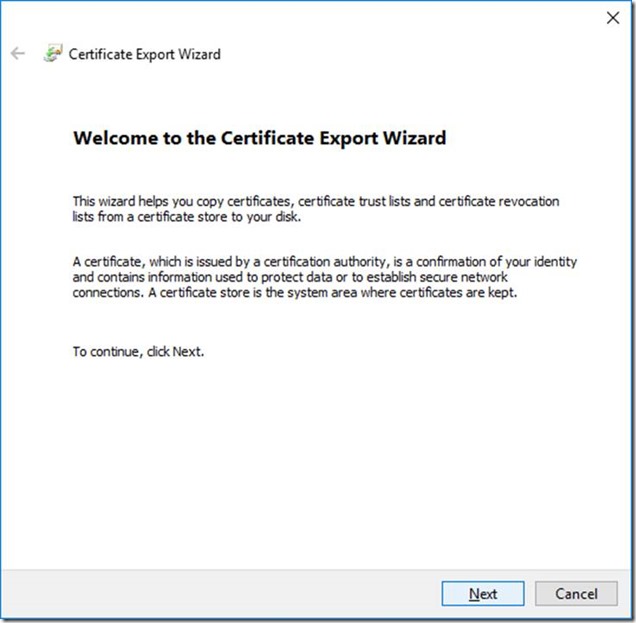
Next, we can proceed to export the certificate as a PFX file. To do this, right click on the correct certificate (located as per above steps) and click on Export.
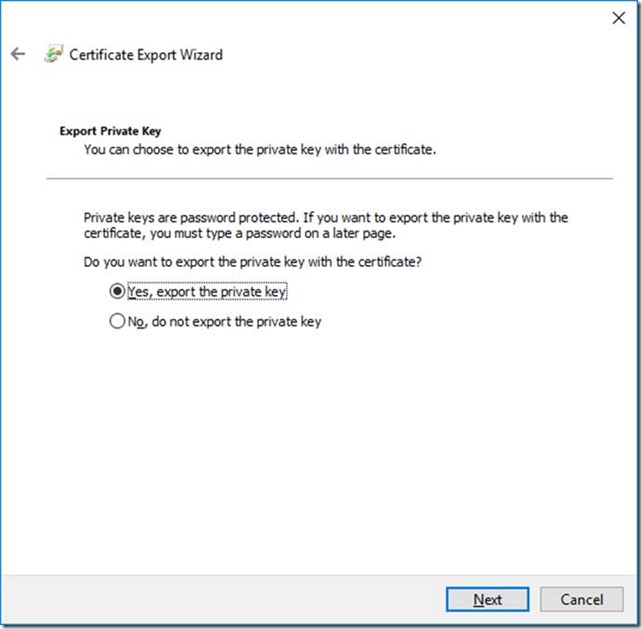
Make sure you select the option to export the private key:
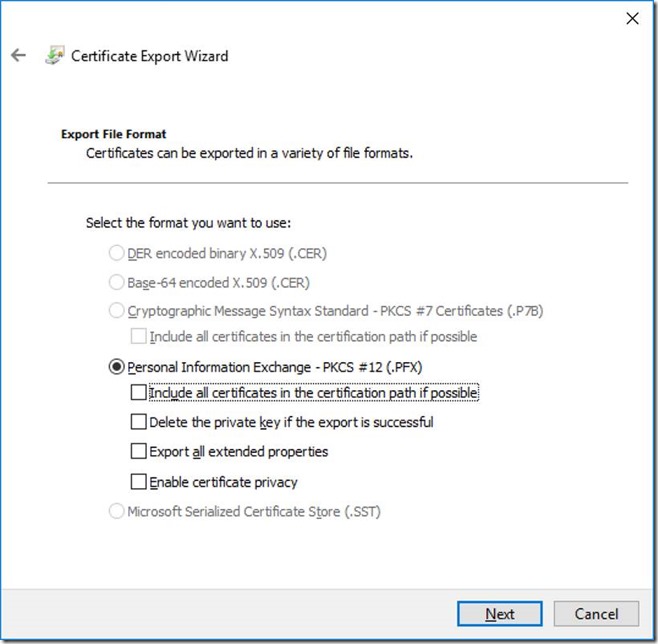
Select the PFX format:
Protect it with a secure password, and save it as a .PFX file on your local computer.
Upload and use the certificate
We can now upload this certificate (in the form of a .PFX file) to Azure. A pre-requisite for doing this is that your Web App must be in the Basic or higher App Service plan / tier (Free and Shared tiers do not permit the upload of certificates.)
Azure Portal
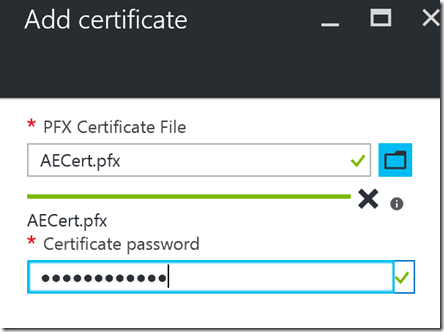
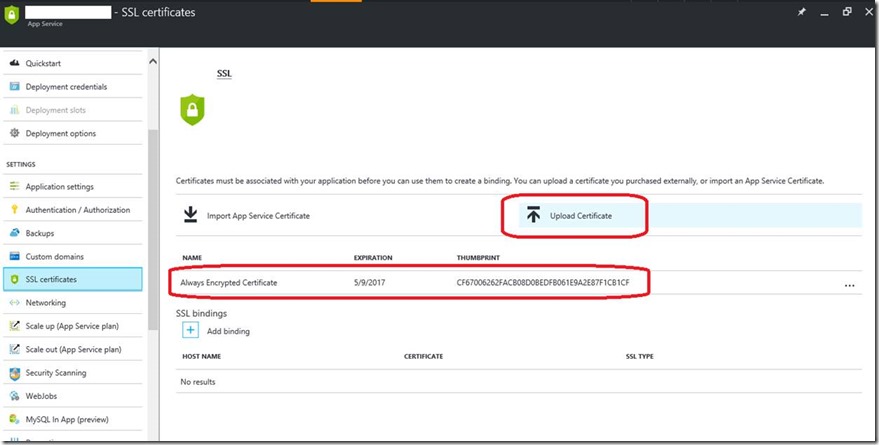
The easiest way is to use the current Azure Portal and navigate to the Web App under your App Service. Once you locate it, in the Application Settings for the Web App, you will find an option to define ‘SSL Certificates’ for the application. Here is where you can use the Upload Certificate button as shown below to upload the PFX file that we generated previously. Do note that you will have to supply the password used to protect the certificate:
Once the certificate was uploaded, do note down the ‘Thumbprint’ of the certificate somewhere – you will need it soon!
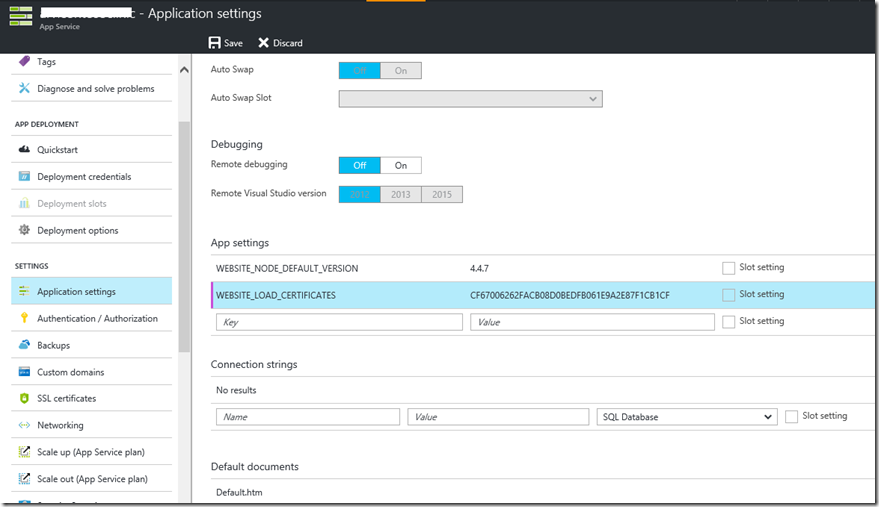
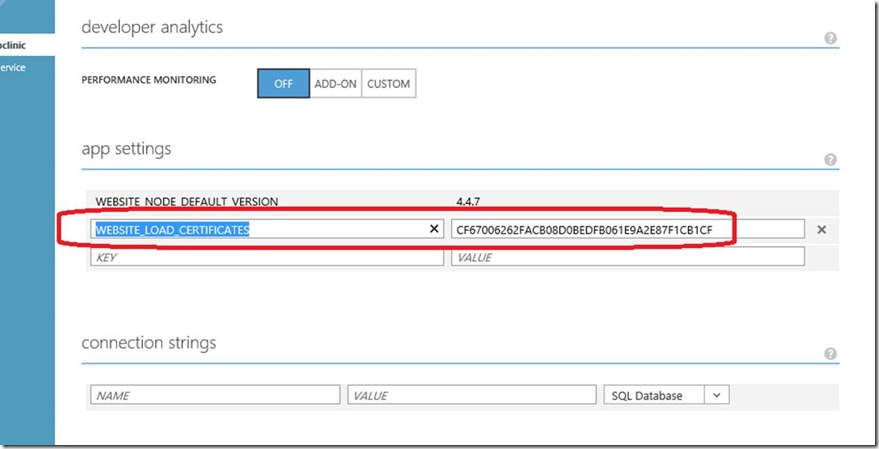
Once this is done, you also need to add a ‘WEBSITE_LOAD_CERTIFICATES’ setting with the thumbprint of the certificate that you noted previously. This setting is discussed in detail here.
Classic Azure Portal
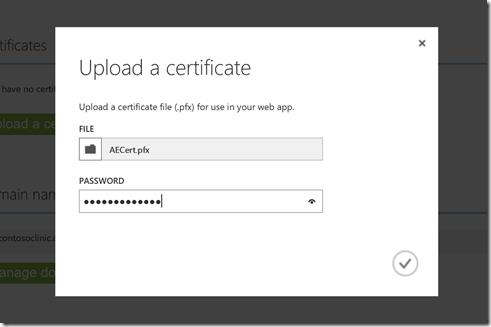
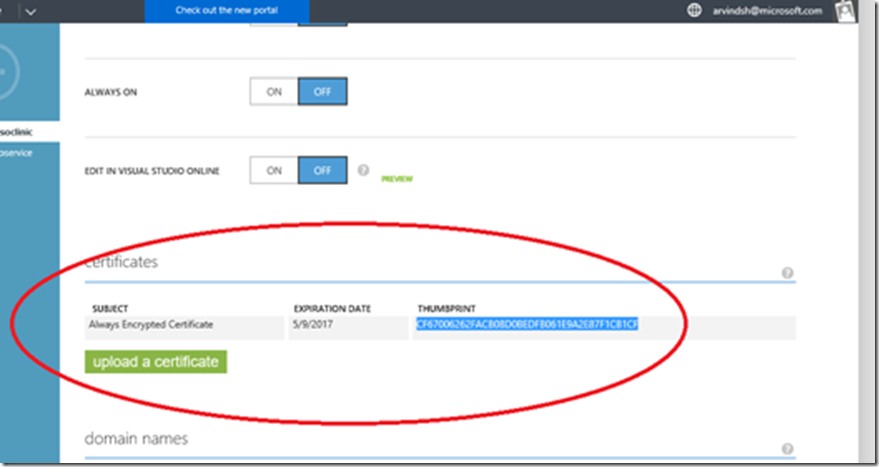
FYI, you can also do this in the ‘classic’ Azure portal as described here. Once in the Azure portal, select the web application and click on the Configure tab. There, you will find the Certificates section, where you can upload the PFX file which we just generated. Here too you have to supply the password which was used to protect the certificate:
The certificate will be uploaded when you click the ‘tick’ button.
Once the certificate has been uploaded, note the ‘Thumbprint’ for the same. This is the key identifier for the web application to later ‘load’ the certificate at runtime. To make the web application ‘load the certificate’ you must scroll down to the ‘app settings’ section and add a ‘WEBSITE_LOAD_CERTIFICATES’ setting with the thumbprint of the certificate. Make sure you click the SAVE button at the bottom of the screen after you do these changes – it’s easy to miss it otherwise!
Once this is done, the web application will be able to load the certificate when the Always Encrypted client driver code internally requests it. That’s it – your web application and data are a lot more secure now!
Handling CMK Rotation
If you already were using Always Encrypted, you probably know that rotating CMKs periodically is a common requirement. The process of CMK rotation is documented here. For example, if you do rotate your keys using SQL Management Studio (SSMS), you must ensure that the certificate corresponding to the new CMK is uploaded to the Azure portal as described above. The overall process would look like this:
- From an administrative workstation where SSMS is installed, create a new CMK stored in the local user certificate store
- Export the certificate corresponding to that CMK just as described in this article
- Follow the steps as shown above to import the new certificate into the portal, and add the new certificate’s thumbprint ID as well to the WEBSITE_LOAD_CERTIFICATES setting
- Note: use a comma character to separate the old and new thumbprint values. Do not leave any spaces in between
- At this point you would have both certificates uploaded to the Azure Portal and Azure Web App Service
- From the administrative workstation use SSMS to perform CMK key rotation; you can also use PowerShell cmdlets to do this
- Eventually after the key rotation has completed, use SSMS to perform cleanup of the CEKs associated with the old CMK
- Drop the old CMK from SQL DB – you can use T-SQL or the SSMS GUI to easily do this. You can also do this via the PowerShell cmdlet for Always Encrypted - specifically Remove-SqlColumnMasterKey
- Using the current Azure portal, delete the certificate containing the old CMK from the Web App
- Again in the Azure portal, navigate to App Settings and remove the old CMK’s thumbprint from the WEBSITE_LOAD_CERTIFICATES setting. Ensure that you remove the comma character as well!
In Closing
Always Encrypted is a unique feature which offers declarative encryption with little or no change to applications. Knowing how this feature operates in conjunction with other services, such as Azure Web Apps is very important to successful implementation. We hope you find the above steps useful. Do let us know if you have further questions and / or feedback. You can also reach us on Twitter if you prefer that!
Comments
- Anonymous
October 03, 2016
Can you please tell us how to use this new feature via node.js app in Azure App Service? - Anonymous
April 07, 2017
Would the same process be followed to support Encrypted Connections to SQL Server 2016 from Azure App Service apps (https://docs.microsoft.com/en-us/sql/database-engine/configure-windows/enable-encrypted-connections-to-the-database-engine) ?- Anonymous
April 07, 2017
Yes, it should work the same way. Please try it and let us know if it does not help.
- Anonymous
