OpenText: Multiple Instances or a Single Instance of SQL Server - Part 2: Moving Databases
In our last post, we described how random acts of installation may result in two or more instances of SQL Server on the same machine. If you are reading this post, you are likely the proud owner of such a machine. Moving SQL Server databases is a very rare event for most ISV database administrators. This post takes you through a visual step-by-step on how to move databases from one SQL Server instance to another SQL Server instance on the same machine.
How to move a database from one instance to another instance on the same machine
Before you move databases between instances, you should determine which services each instance is running. In the prior post, we saw several instances on our example machine as shown below.

In the above figure, you will see that one instance has:
- SQL Server Analysis Services
- SQL Server Reporting Services
The destination instance should be one that:
Has all of the services used by any instances
- You may need to run SQL Server setup to modify the installation.
Supports the most sockets or the number of sockets on the computer (SQL Server 2008 licensing is determined by sockets and not cores)
Retrieving File Locations
The first step is to record where the files associated with the databases are located. The steps are:
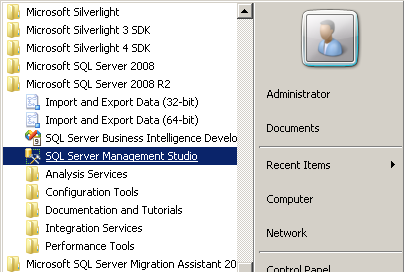
Open SQL Server Management Studio

Connect to one of the SQL Server instances above. If you do not know the password, then try using Windows Authentication.

- If this fails, then you may need to search the web to find out what may have created the database.
In this case, I discovered it was Microsoft Security Compliance Manager.
If it is not needed, then you may wish to uninstall it.
- Some products may leave the database instance behind -- don't worry about that, we will deal with those below.
If needed, it could be relocated to a different machine or may be moved to a different instance by uninstalling and reinstalling.
- If this fails, then you may need to search the web to find out what may have created the database.
Before starting, use the TSQL below to obtain where files are located.
SELECT db_name(database_id), Name, type_desc,physical_Name
FROM master.sys.master_files
WHERE db_name(database_id) NOT IN ('master','tempdb','model','msdb')The results will look like:

Copy these results to use as a reference for later in the process. Click on the top left corner. Do a right mouse click. Select Copy with Headers to the clipboard .

Open Microsoft Excel and do a paste from the clipboard (Control-V)
.
Detaching Databases from a Surplus Instance
The next step is to detach each of the databases. The steps to detach one database are shown below.
- Under databases, select the first database to move. In this case, it is one called Aditibus.
Right mouse click, select Tasks / Detach...

- The Detach Database dialog will now appear
.
- Click [OK]. The dialog will disappear and you will be returned to SSMS. The database will no longer be shown.

- Repeat until all of the databases are removed.
Attaching Databases to a Destination Instance
We have detached all of the databases above. The next step is to attach each one to the destination instance.
- Connect to the destination instance. Select Databases, then right click and select Attach...

- The Attach Databases dialog appears. We now need to know where the files we detached are located. Fortunately, we have this information sitting in Excel.

- Click [Add] and the Locate Database dialog will appear

- You can either navigate to the location by using the tree, or simply cut and paste from Excel, the file location. Click [OK].
- The dialog will reappear with the details possibly showing some "Not Found" messages.

- Click the [..] buttons next to the Not Found message. The Locate Database file dialogs will appear. Paste the location or navigate the tree to the appropriate files.

- The Attach Database dialog should now appear without any error message.

- Click [OK]. SSMS will reappear showing the newly attached database listed at the bottom.

- Repeat for the other detached databases.
Bottom Line
Moving databases is quick and easy. The typical problem that I have seen is people not recording locations of the databases' files and then spending time searching for them when it is time to attach. Retrieving the locations of these files at the start, and saving them to Excel should eliminate this issue and speed the moving of databases.
One more step is needed, updating connection strings to point to the correct instance. See your ISV offering installation documentation for instructions on making this change.