VNet to VNet connectivity - Microsoft Azure
Vnet to Vnet Communication
By default all VM’s within a VNET can communicate with each other, regardless what address space/subnet they belong to
By default communication between VNETs is blocked, you can establish communication between two or more virtual networks together and that too securely with IPsec/IKE S2S VPN tunnels
There could be several reasons why you want to enable communication between VNETS. e.g.
You want to setup a custom geo-replication or synchronization without going over internet
Company A wants to share specific data/web services with Company B in a secure way without going over internet or an inter org communication that are on multiple VNETS.
You want to setup SQL AO
In my scenario, I want to access:
A website hosted on a VM named “web1vnet2” in VNET “SatishVnet2” from from VM named “dc1vnet1” in VNET “SatishVnet1” or ViceVersa
- Windows Firewall enabled on every VM with required exceptions in place
- All endpoints for all VM’s are removed
- Web2Vnet2 is listening on port 80 only
I will follow following 6 key sections for this configuration:
1. Plan your IP address ranges
2. Create your virtual networks
3. Add local networks
4. Create the dynamic routing gateways for each VNet.
5. Connect the VPN gateways
6. Verify connectivity
1. Plan your IP address ranges. 2. Create your virtual networks
VNET1
VNET Name Cloud Service Name StorageAccountName Location
satishVnet1 satishVnet1cloudsvc satishvnet1sa East US
VM config
VNET2
VNET Name Cloud Service Name StorageAccountName Location
satishVnet2 satishVnet2cloudsvc satishvnet2sa West US
VM Config
3. Add local networks
Next we need to configure “Add Local Network” for cross
premises connectivity
From your portal click on
New->Network
Services->Virtual Network->Add Local Network
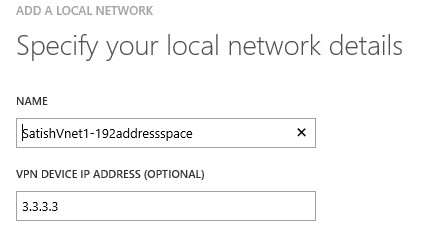
For VPN Device IP Address, use any dummy IP address for now, since we have not
created the gateway yet, once gateway is created we will upate the VPN Device
IP Address with the actual gateway IP
See picture below
and Next specify the address space
Repeat the steps again for VNET “SatishVnet2”
.
Next you’ll point each VNet to the other as a local network.
In this case I will point VNET “SatishVnet1” to “SatishVnet2” and point VNET “SatishVnet2” to “SatishVnet1”
In the Management Portal, go to the Configure page for VNET “SatishVnet”. Under site-to-site
connectivity, select Connect to the local network, then select SatishVnet2-172addressspace as the local network
and add VPN Gatewaysubnet and then click “Save”
See screen capture below
.
4. Create the dynamic routing gateways for each VNET
Go to “Networks”, Select VNET “SatishVnet1”, Select “Dashboard” and create the “Dynamic Routing”
See picture below
Go to “Networks”, Select VNET “SatishVnet2”, Select “Dashboard” and create the “Dynamic Routing”
See picture below
Wait for 15 to 20 minutes till gateway is created
See picture below (the gateway for SatishVnet1
Next we need to update the VPN Device IP address for each “Local Network” with this new gateway address
.
5. Connect the VPN gateways
Set the IPsec/IKE pre-shared keys to be the same. You can use it with REST API or PowerShell, in this example I am using azure PowerShell, see pic below
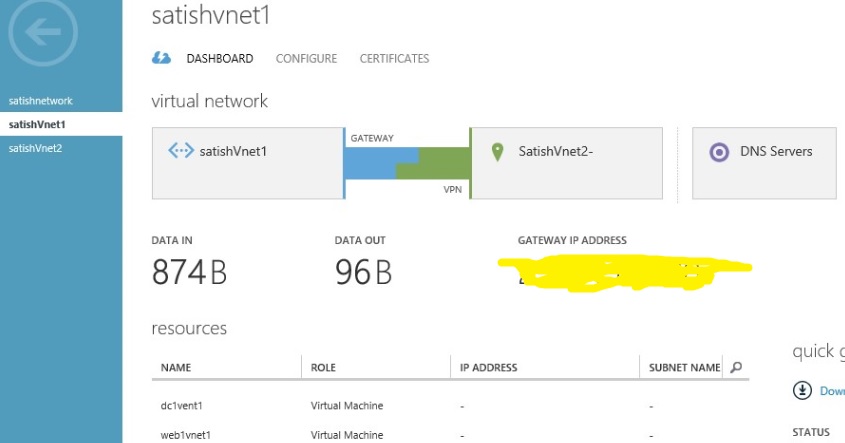
6. Verify connectivity is established using PowerShell or from portal
On Portal: Go to Networks-> select VNET “SatishVnet1”->Dashboard
See picture below
Launching website https://dc1vnet2 from VM dc1vnet1
DISCLAIMER: This posting is provided "AS IS" with no warranties and confers no rights
For more details go to : https://msdn.microsoft.com/en-us/library/azure/dn690122.aspx


