Setting up Audiences in SharePoint
This can be categorized into 3 steps:
Permission
User profile import
Audience setup
Permission
In order to setup Audiences if you are not going to use SharePoint system account, then the foremost thing needed is to have admin rights in SSP. In order to do that follow the below steps:
- Go to edit properties of the SSP
- In ‘Process Accounts with access to this SSP’ specify the account that will be used for setting up setting up audience
After the above is done ensure that you add the same account in ‘Process Accounts with access to this SSP’
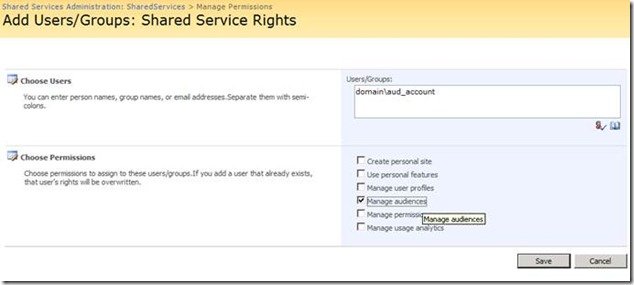
- Got to ‘Personalization services permissions’ of the SSP
- Click the ‘Add Users/Groups’
- Specify the account and select the permission as below
- Click ‘Save’
User profile import
Now we need to do one more important step before we jump into Audience creation, i.e. running a profile import ensuring that all the user accounts those will be there in the Audience are in the User Profile List.
Audience setup
Now you are ready to setup Audience
- Navigate to the SSP and click on ‘Audiences’
- This will take you to ‘Manage Audience’ [as in the below screen shot]
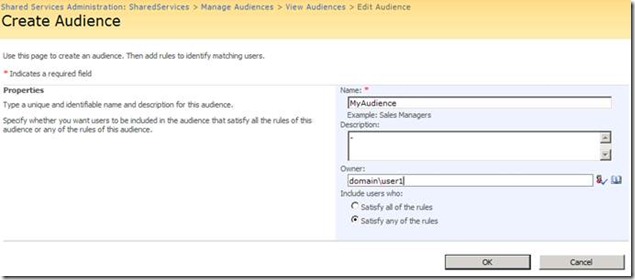
- Click on ‘Create Audience’ and specify the requested information [as in the below screen shot]
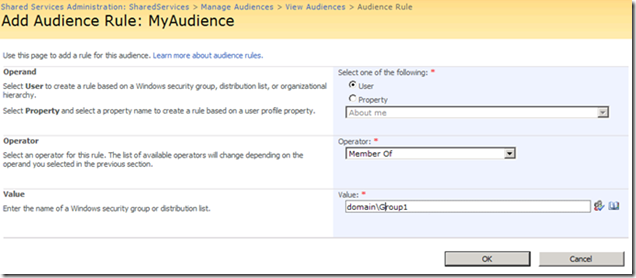
- The next step is to add the rules for the Audience. This can be done on the basis of User or various other properties in the user account. [In this example we will be doing for users member of a group]
- Now you can go ahead and use the configured in your site collections.


