SharePoint Provider Hosted App Walkthrough: Part 1 Preparation
SharePoint and office development model is changing to a new App model. This is the new development model for SharePoint. In this blog series I will walk you through creating a provider hosted SharePoint App that is hosted in an App part. This will show the following key features:
· How to prepare your environment for your App development?
· How to develop a provider hosted App that is hosted in Azure websites and linked to SharePoint Online?
· How to use the Client Object Model (CSOM) to read and write data back to SharePoint using the credentials of the logged in user?
· How to handle multi-tenancy in your App?
· How to package and sell your App on the market place?
In this blog post (which is first of the series) I will provide some introduction and then will walk you through how to prepare and test your development environment with your first hello world provider hosted App.
Introduction
So the question here is, why the new development model? Looking back at SharePoint 2010, the common development approaches had a few challenges associated with them.
With Farm Solutions, AKA Fully Trusted Solutions, custom code was deployed to the server. These types of solutions generally meant there were a lot of things to deploy to the server, even if they were all deployed in a SharePoint solution package. This also meant that most deployments required a server touch as an IT Pro with console access would need to upload the solution to the server’s solution store for deployment. In addition server outages and most SharePoint errors could usually be traced to custom code deployed to the server. These types of solutions are only available with on-prem deployments and not with hosted deployments that only allow sandbox solutions.
Sandbox solutions have their own challenges in that they are limited in the number of things you can do. Developers can work within a subset of the full server-side API and are blocked from making external database or web service calls.
Both of these options, farm & sandbox solutions, require the developer to have a solid understanding and be familiar with the SharePoint server-side API.
To address many of the challenges developers and site owners had in previous versions of SharePoint, Microsoft has introduced a new development option for SharePoint 2013: The SharePoint App Model.
In this new model apps do not necessary live within SharePoint. Instead the app’s business logic executes within the context of the client (browser) or externally from SharePoint. This external option could be another non-SharePoint Web server or a cloud server. Apps are also more secure in that when they need to access SharePoint resources such as lists and libraries they must be explicitly granted permissions to do so. This is implemented using OAuth. When an app is created, the developer specifies which permission the app needs in order to function. When the app is installed, the user installing the app is prompted to accept the permission requests the app needs (if they deny the permissions, the app is not installed). Once granted permissions, the apps can then talk to SharePoint using the Client Side Object Model (CSOM) or using some of the new OData services in SharePoint.
Developers can build apps and submit them to a marketplace making it easy for customers to acquire these applications.
Hosting Options
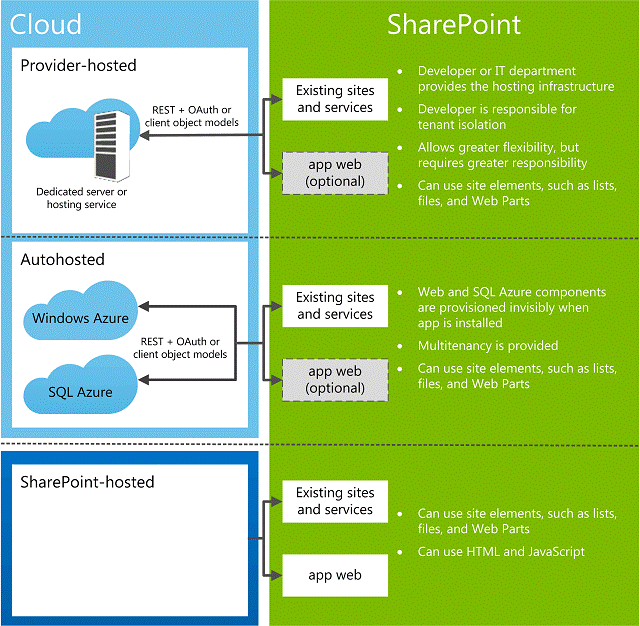
The Cloud App Model offers multiple hosting options for your app. You can choose your own web stack, have Microsoft provision Windows Azure and SQL Azure, or have it hosted on SharePoint, as shown in the Figure below.
For more details on the hosting options please refer to the MSDN link https://msdn.microsoft.com/en-us/library/fp179887.aspx.
In a nutshell the following figure illustrates the hosting options.
In this blog series I will focus only on the provider hosted model.
Preparing the Development Environment
Now let’s get into business J
To prepare your development environment you require a machine with Windows installed (of course) and Visual Studio 2012. The steps to prepare your environment are as follows.
1- Go to the web site: https://dev.office.com
2- Click on the big start button
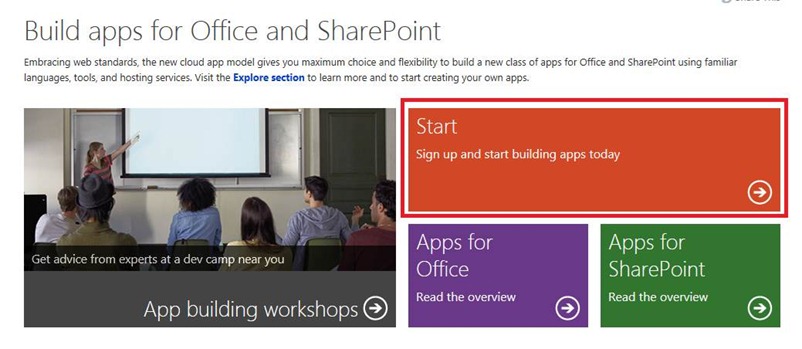
3- Then click on the “Sign up” link (you need to expand the section above it to see this)

4- Then enter your details and click “Create my account”. The important point is that you will have to select a new URL that is unique to you.
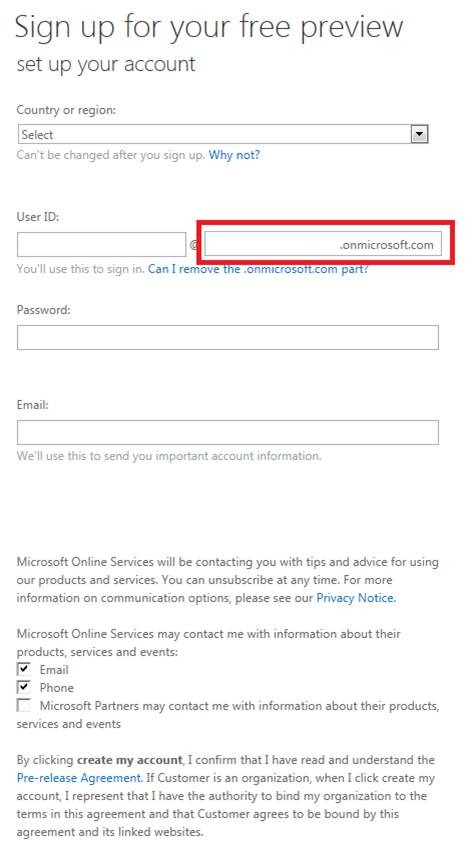
5- Once this is done it will take you to the Tenant administration page and you will see that it is still preparing your account to be patient as it takes around 20-40 minutes to complete everything.
6- Once it is ready you will see the following view

7- Now click on the “Build Apps” link at the top to take you to your developer site. Which would look like the below.

8- If your view is anything different than the above then creation has failed really, so you need either to wait a little more so that the site is correctly provisioned or to re-create a new tenant.
9- Now on your machine browse to the site https://www.microsoft.com/web/handlers/WebPI.ashx?command=GetInstallerRedirect&appid=OfficeToolsForVS2012GA which would open the Web Platform installer to install the required office development tools and templates for Visual Studio 2012. (Or go the site https://msdn.microsoft.com/en-us/office/apps/fp123627 to get the updated link if this changes)
10- After several components installations you should finally install this as below
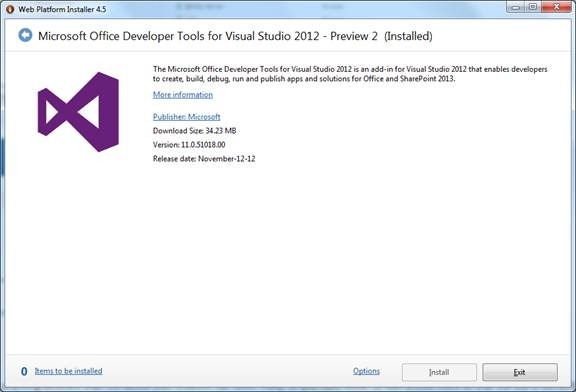
Please note that sometimes it fails to be installed simply close the installation and do it again. I had to do this three times until I got it installed correctly.
11- Now let’s open Visual Studio 2012 and click on new project you will find new templates added for the Apps for SharePoint and office as below

12- Click on new Apps for SharePoint, enter the name HelloAppModel (or anything else) and click ok. Now enter the URL of your developer site that you created in step 7 above and do not forget to select provider hosted model as below
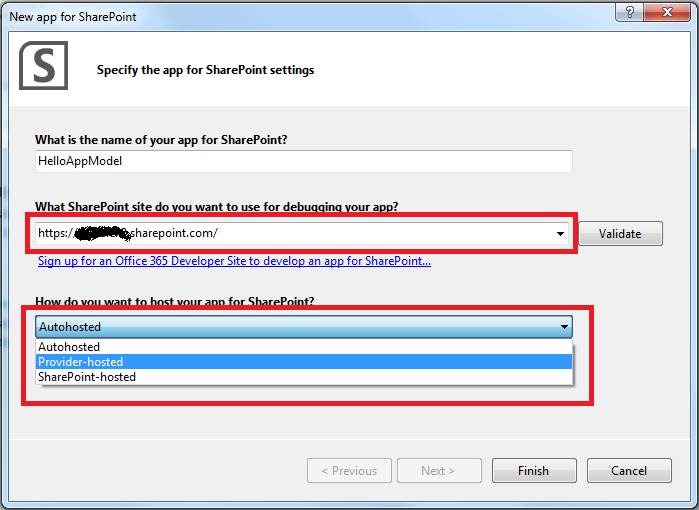
13- Click “Next” and you will now enter the server to server credentials (certificate) in our case since we are working on SharePoint online we can use the client secret since the SharePoint online farm is connected to ACS.

14- Click finish to get the project created and you would see two projects as below
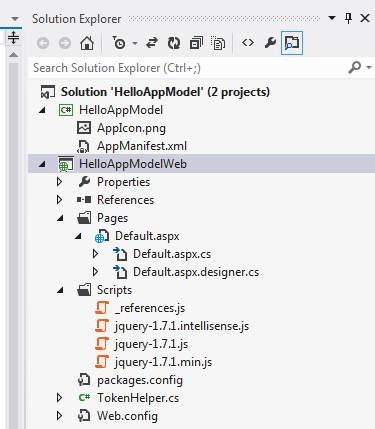
15- Now edit the web site main page to see these changes to your web site (optional)
16- Simply hit F5 to start the deployment and debugging.
17- This will ask you to login to your site as below
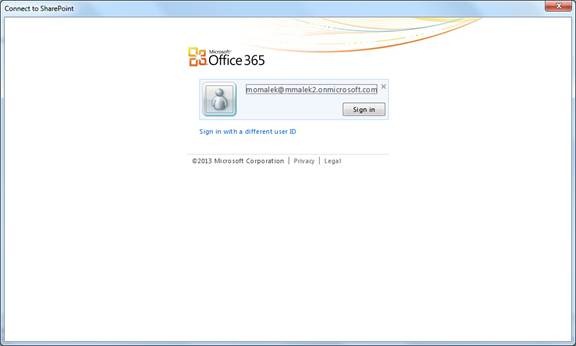
18- Once you do this it will open the browser and point to the default app site and you have to sign in again.
19- Then it will ask you if you trust this App
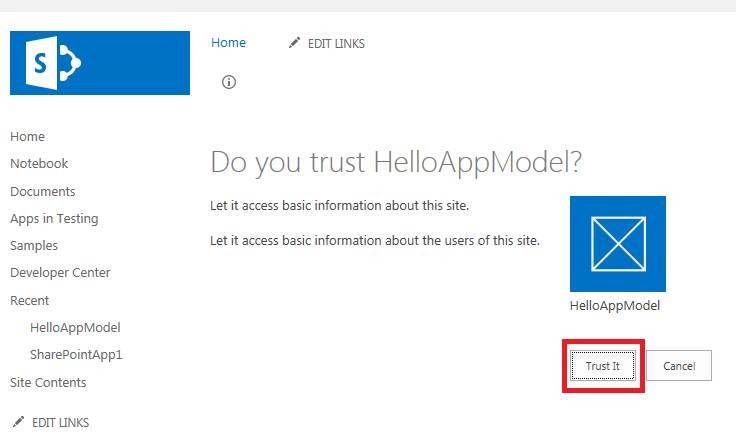
20- Click “Trust It” and here you go

as you can see the URL is referring back to your machine and the source URL is the SharePoint online URL.
Now if you think about this, where is the App is hosted?! The answer is simple it is hosted on your development machine now using the IIS express that comes with Visual Studio 2012 so it is provider hosted, in a sense.
In the next blog post we will become more aggressive and go deeper in our code to read from and write to SharePoint online.

