Getting started with Lab Management – VS2010 RC (Part 4)
In the last post, we created the “system under test” and ensured that the TCM server has information on how to run these tests in a test environment. This post explains how to get the tests run automatically as part of a scheduled build / deploy / test workflow.
Creating the deployment script
The first step is to create a deployment script that can deploy the build and tests from a build drop location to the virtual environment. Let us create a batch script file called “deploy.cmd”. The script below works on IIS7. IIS6 users would have to make changes to use iisvdir.vbs rather than the appcmd used below. Add the deploy.cmd to the calculator application and check it in.
|
Configure the build drop location:
Create drop directory where the output of build will go to, and provide permissions to accounts to write to the location.
|
Run the script and provide the domain name, the service account name and the tfs server name as parameters.
|
The drops location needs different accesses to different accounts
- The build machine needs read / write access. In our case the network service on the local machine is the build machine. So network service and the machine account are given read / write permission.
- The test controller needs read access to the location for it to copy the test dll’s. In our case, test controller is also running as network service.
- The lab service account needs read access to the drop location. In our case it was lmusr1
Create the build definition:
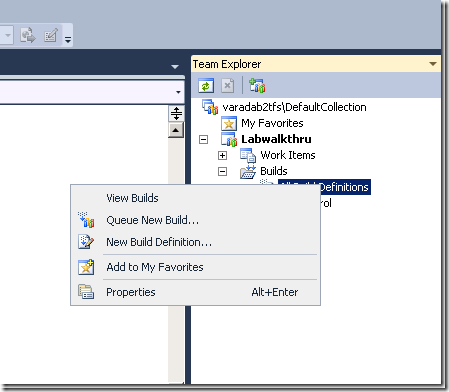
Back in Visual Studio, go to Team Explorer, and create a “new build definition”. This build definition will be used to compile the solution.
In the build defaults, configure the build drop location to use the drop location we created
In the Process –>Advanced tab, disable the tests from running on the build machine as they will run in the lab machine.
Call the build definition “Calculator – Build” and save the build definition. This is used to build the solution.
Create the E2E workflow definition:
Now that we have a build definition which can be used to build the solution, we will wrap that in a end to end definition which will build the solution, deploy it to the VM, test it and report the results.
Create another build definition “Calculator – E2E” and after choosing the same set of entries, change the process tab to select “LabDefaultTemplate.xaml”
And click on the button associated with workflow settings.
Select the environment and the clean check point to revert to. The clean checkpoint helps avoid machine taint issues when running your tests, and thus is highly recommended.
Use the “Calculator – Build” definition that we created before. This definition is used to build the solution.
On the deploy tab, we are telling the system, how to bootstrap the environment with the latest bits. We are using the Deploy.cmd we created earlier to deploy the bits to the VM.
Also note that I am taking a snapshot post the deployment. There are many scenarios where a bug is reported on a particular build. It is easy for a developer to restore to that build, and start debugging.
We select the tests, the plan, configuration and settings and finish.
Queue the workflow:
Select the E2E template and “Queue New Build…”
And you should see that as part of the queued build, the latest solution is built (by the Calculator – Build definition), the virtual environment is restored to the clean snapshot (CleanCP), bits are deployed to the environment using our deployment script, a snapshot is taken post the deployment, our unit tests are run and the results are available for you to analyze in the “Microsoft Test and Lab Manager”.
Couple of things that are different from Beta 2.
- The post deployment snapshot is a link held in TFS rather than a share location.
- There is a link (the last line), which you could drill down and look at the test results.
This concludes the series of getting started with lab. Let us know how your experiments with lab go.


