Change/Update/Replace SSL Certificate on Windows Server 2012 R2 ADFS/WAP Servers
Another PSA here for you…
I use a Digicert multi-domain cert for my ADFS server in my EMS lab. It’s only a 1 year cert so I had to replace it for the first time today and thought I’d document the process. It’s pretty straightforward…
One thing to be sure of – it may have been awhile since you’ve updated your cert and if you’ve enabled workplace join then you need a multi-domain cert to add an alternative name to your certificate. I used this guide for ADFS when building out my 2012 R2 lab. If you haven’t seen it – it might be helpful for you as well. https://technet.microsoft.com/en-us/library/dn280939.aspx
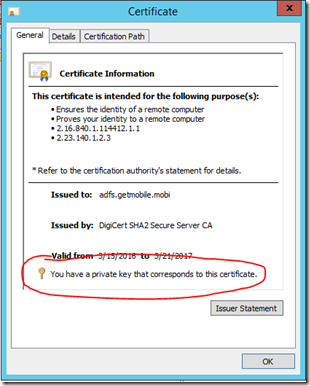
You need a cert that has a private key that corresponds to the certificate. If you don’t make sure that you export the PFX and be sure to include the private key. It’s easy to miss this in the export wizard.
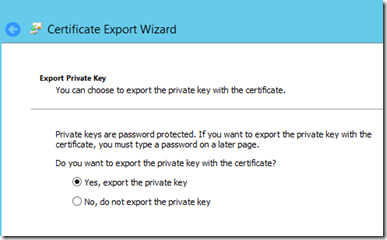
When you walk through the export wizard – make sure you choose the option to include the private key.
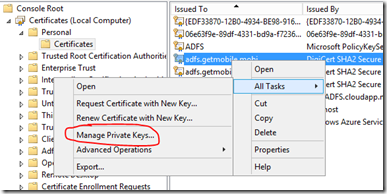
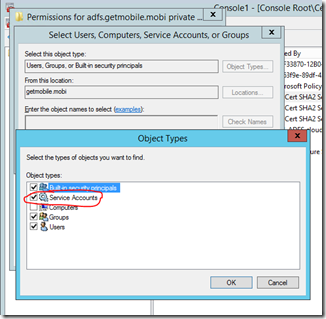
After you have the certificate imported into the ADFS Servers “Personal Store” then you need to make sure that you assign the appropriate permissions to the certificate. Specifically, you need to assign full control to the ADFS service account. If you are using a managed service account be sure to scope your search for that when assigning permissions.
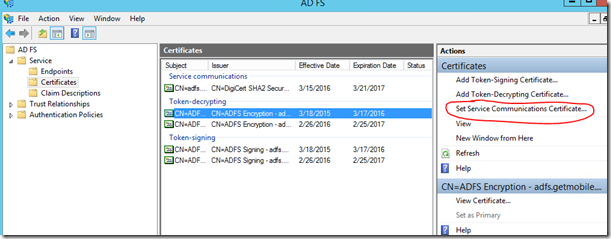
Now you’ll want to bounce over to the ADFS Console to “Set Service Communications Certificate”
You can do this via PowerShell as well:
Set-AdfsCertificate -CertificateType Service-Communications -Thumbprint thumbprint
Set-AdfsSslCertificate -Thumbprint thumbprint
You’ll see all the certs in the personal store enumerated – be sure to pick the right one (there is an option to view the cert before selecting it). If you don’t see your cert it means you didn’t import it correctly or there’s no private key that corresponds to the cert.
Now you need to open PowerShell to run a few commands.
Run Get-AdfsSslCertificate. Make a note of the thumbprint of the new certificate.
WARNING!!!
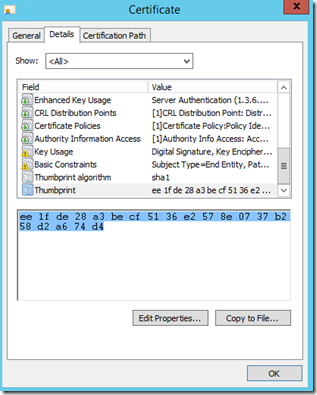
You might run into what I did which is what was messing me up and prompted me to author this article. For some reason for me when I issue the Get-AdfsSslCertificate command it still showed my OLD certificate – not the new one that I just updated with the set service communication certificate step above. You’ll need to confirm this by going into the certificate store and looking at the details of the certificate you set to be the service communication cert to see if the thumbprint there matches what you see with the GET command. In my case, it didn’t match.
At this point you want to take that hex and paste it out to notepad and then remove all of the spaces and then when you issue the SET command make sure to paste that value for the CORRECT certificate in as the thumbprint.
Next run Set-AdfsSslCertification –thumbprint XXXXXXXXXXXXXXXXXXXXXX
Restart the ADFS Service (restart-service adfssrv)
The Powershell for all of this (including installing the role/feature) is:
Install-WebApplicationProxy -FederationServiceTrustCredential System.Management.Automation.PSCredential -CertificateThumbprint 'thumbprintwiththequotes' -FederationServiceName 'adfs.getmobile.mobi'
OPTIONAL: Using a Web Application Proxy Server
Now if you are using a Web Application Proxy Server in front of your ADFS Server you need to do a few things.
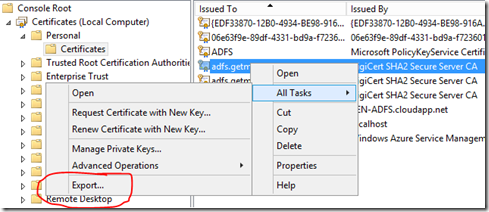
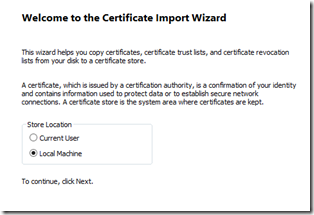
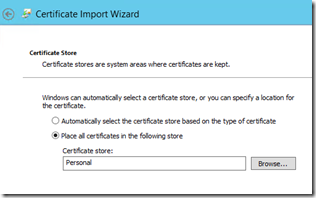
I used the MMC console to see the certificate store on my ADFS server to export the PFX with the private key (make sure you do that!) so that I could import that key over on my WAP server. Once you have that PFX just copy it over to the WAP and click on it – make sure that you import it into the PERSONAL STORE. You can then open the MMC console to see the certificates there and make sure that it has been imported properly to the WAP.
Now at this point you should be able to run a PS command to replace the SSL cert and then restart the adfssrv on the WAP and you’re good to go. For whatever reason that didn’t work for me so I just removed/reinstalled the WAP feature. If you already have published web applications those won’t go away. When you reinstall the WAP feature you’ll see your list of published apps show back up. Basically, just walk through the wizard setup for the WAP again and then select the certificate we’ve been talking about from the list when the setup asks you. That worked like a charm for me.
You can try the PowerShell commands here – hopefully they work for you:
Set-WebApplicationProxySslCertificate -Thumbprint thumbprint (the thumbprint is the same as the one we used above so you should be able to just copy and paste. If you want to get it again you can issue the GET instead of the SET to see the thumbprints for the certs)

You’ll need to restart the service on the WAP: Restart-Service adfssrv
Good luck – hope that gets you going!
Comments
- Anonymous
October 25, 2016
This was very helpful, thanks. One typo with the command you provided - it should be certificate, not certification.Set-AdfsSslCertificate –thumbprint XXXXXXXXXXXXXXXXXXXXXX - Anonymous
January 18, 2017
The right command isSet-AdfsSslCertificate –thumbprint XXXXXXXXXXXXXXXXXXXXXXNot Set-AdfsSslCertification.... - Anonymous
April 09, 2017
Hey Ken,Fantastic Article, thank you very much. We had our SSL Certificate expire (Doesn't a year go quickly) and i needed to resolve this quickly, other articles are long winded and don't contain the relevant information whereas your post was technically correct and straight to the point. Cheers, Errol. - Anonymous
May 09, 2017
Thank you.This helped me to update my ADFS certs - Anonymous
July 17, 2017
The comment has been removed - Anonymous
July 18, 2017
Thank you! This is exactly what I needed - although I followed the instructions to a T, what was listed in PowerShell was my old cert. Doing this fixed that right up, after a few hours of frustration!

