Step-by-Step: Windows Azure Backup
Azure Backup “is a simple and reliable data protection solution which enables customers to back up their on-premises data to Microsoft Azure.”
Remember Windows Server Backup? Well, like that perennial utility, this one backs up from or restores items to your Windows File System.
“But this one backs up to or restores from Azure ?”
Bingo. And as of December, 2014 it also supports backup and restore of files on Windows Client (7, 8, 8.1 and on up) operating systems.
Here’s what we’ll do in this Step-by-Step guide:
- Configure the Backup Vault
- Download the Vault Credentials
- Download and Install the Backup Agent
- Register the Server
- Configure the Backup Schedule
- Backup Now
- Navigate the Recovery Vault
- Restore a Deleted File
Remember: If you just want to try this out without purchasing or using an existing Azure subscription, you can easily set up a free trial.
Configure the Backup Vault
Note that, to start, you might want to be doing these steps from the server or workstation that you want to configure for backing up files. You’ll be downloading credentials and agent, installing the agent, and registering the machine against your Azure subscription, all from that server or workstation, so you may as well start these steps from that machine.
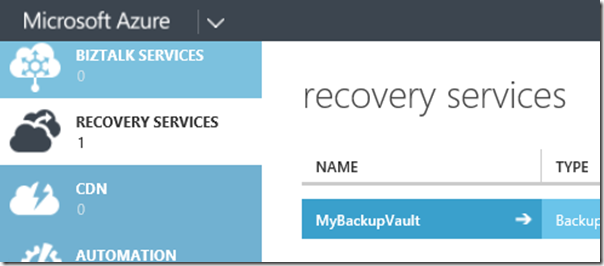
Open an browser, and to to your Azure Subscription (https://manage.windowsazure.com). On the left-hand column you can scroll down to find Recovery Services.
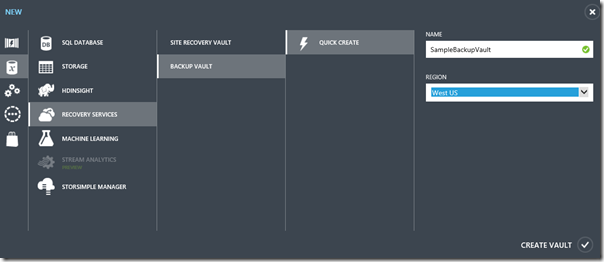
Select Recovery Services, and click New (the “ + ”mark) at the bottom left of your browser. This will contextually place you into the New / Data Services / Recovery Services area.
Select Backup Vault, and then Quick Create.
Your only two things to configure here are to give your vault a useful name, and to choose where in the world you want to have it stored.
Note: You may notice that not all of our data center regions support hosting backup vaults. The list of regions may change over time.
Click Create Vault, and after about 10-15 seconds you’ll have your new backup vault ready to use.
By clicking on the name, you’ll enter into your vault’s quick start page.
Download the Vault Credentials
In the first versions of Azure Backup, establishing the trust between the vault and the server to be backed up required generating and installing a certificate, exporting it, and uploading it to the vault. More recently, however, we’ve made it very easy for you. You’ll simply download the vault credentials from within your account, and that file will be used to establish the trusted connection; either for initially registering the server or workstation, or to recover items to a new machine.
On the quick start page, click Download vault credentials. You will be prompted to open or save a file of type .VaultCredentials.
Save it somewhere you’ll remember, on your machine to be backed up.
Note: Treat this file with care. It’s a file that you don’t want to let get into the wrong hands.
Download and Install the Backup Agent
On the quick start page, click the link to download the backup agent that you require.

Notice that the same agent you can use to natively backup a workstation or server’s files is also the one used by System Center Data Protection Manager (SCDPM), which also can backup to or restore from Azure.
Save the MARAgentInstaller.exe, and then run it later. Or simply run it at this point if you’re already on the machine you want to backup files from.
I choose to run it from right here. You will have some very basic configuration choices when you install the agent.
For my needs, I’m going to just take the defaults, and don’t have any special proxy to get me to/from the Internet.
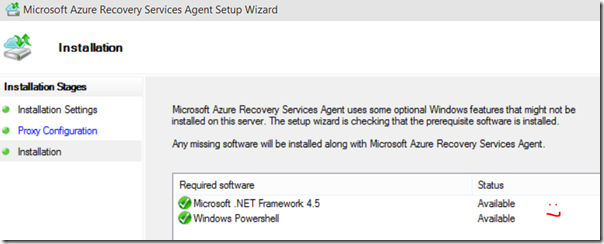
Notice that the agent installation will also install any required components (.NET Framework 4.5) or software (Windows PowerShell) that might be missing.
When the installation is done, you can either close the installer or “proceed” to the “registration”. I’m going to proceed.
Register the Server
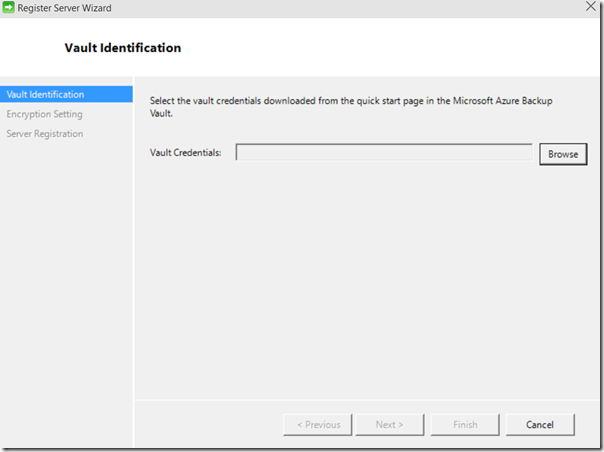
When you do that (or when you open the agent for the first time), you’ll be asked to provide the vault credentials file.
Browse to and select the file you saved earlier, then click Next.
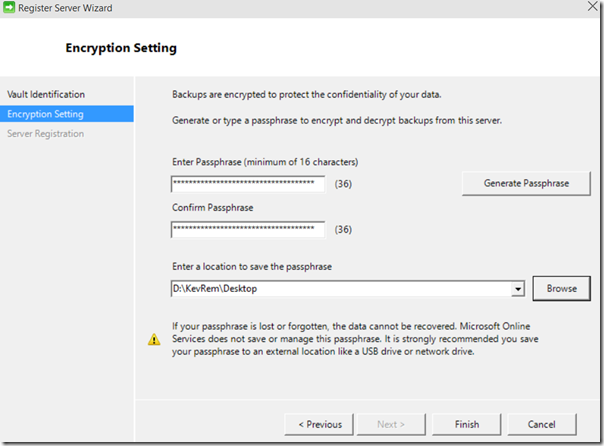
On the Encryption Setting page, you’ll either generate, or enter your own Passphrase.
I choose to have the tool generate a long passphrase for me, and I’ll just save it to my desktop folder for now.
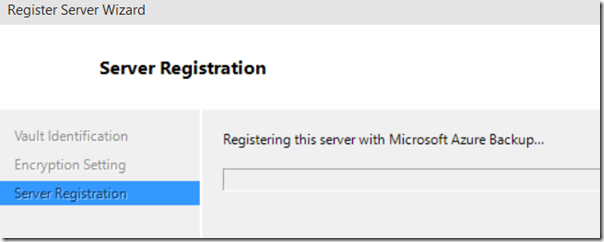
When I click Finish, the tool registers this “server” (I’m actually running this on my Surface Pro 3 running Windows 10 preview) with my backup vault.
And when it successfully completes, I see this:
Leaving the “Launch Microsoft Recovery Services Agent” checkmark checked and clicking Close will launch me into the recovery agent.
Note the options in the Actions pane on the right. We’ve already registered the server, but as the little alert in the main pane reminds us, we haven’t yet scheduled anything to backup. So let’s do that now.
Schedule your Backups
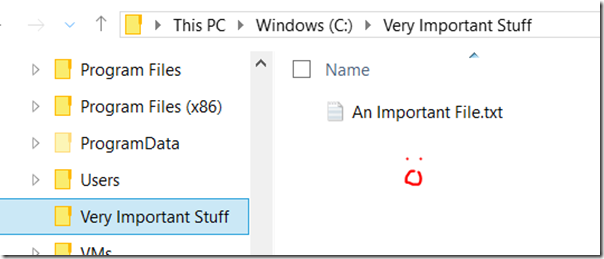
I have a folder full of very important stuff. For this demonstration, it’s right on my C:\ drive in the “Very Important Stuff” folder, with an important file called An Important File.txt
In the Microsoft Azure Backup tool, in the Actions pane, I will click on Schedule Backup.
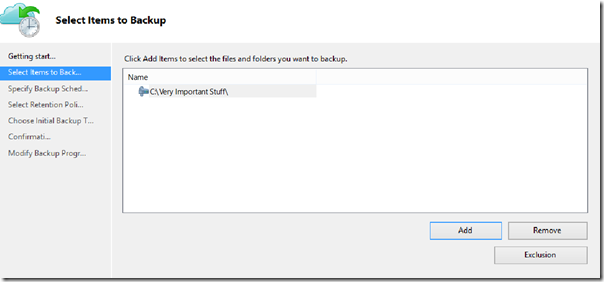
Clicking Next on the Getting Started page brings me to the Select Items to Backup page.
This is what I use to add, browse to, and select folders or items to backup. Notice that I could also use this to exclude certain files by file types.
I’ve selected the C:\Very Important Stuff folder, which is all I need to backup for now. Click Next.
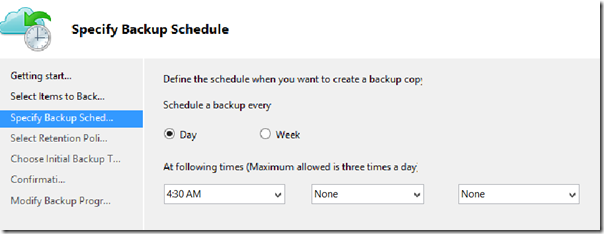
On the Specify Backup Schedule page, notice that I can choose to do my backups daily at a certain time, or weekly, being able to select the days and times to perform the backup.
I’ll just do my backup daily at 4:30am. Click Next.
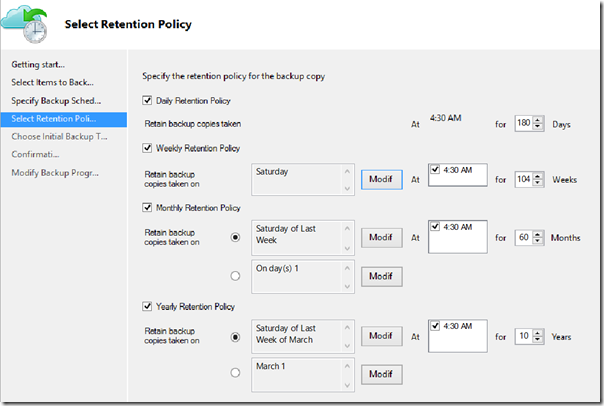
On the Select Retention Policy page, we have some pretty flexible options for retaining our backed-up data for longer periods of time. In my case, not every daily backup needs to be saved for several years, but maybe just the backup that I take the Saturday of the last week of March, which I want to save for 10 years.
Click Next.
On the Choose Initial Backup Type page, I can choose to do my first backup of my files automatically over the Internet, or in an “offline” way, automating the pull of the first set of data from an existing Azure storage location. For our simple sample, we’ll just do our first backup over the Internet. Click Next.
And on the Confirmation page, I verify that all is as it should be. Clicking Finish creates my backup schedule.
Backup Now
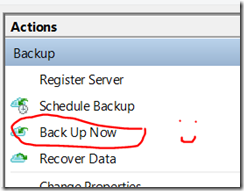
Note: You haven’t yet launched any backup! If I left it all now, the next backup would happen based on my schedule. But I’m going to click the “Back Up Now” option in the Actions pane.
On the resulting Confirmation page, I click Back Up. And then I can click Close at any time, because the job has been launched and will run for you in the background – even if you close the Microsoft Azure Backup console.
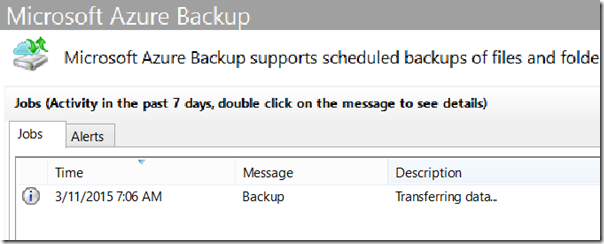
But I’ll leave the console open and watch the status of my job change…
…and in fairly short order (because this was a pretty small backup), I see this…
And I’m quite relieved that my very important stuff is now safely tucked away in my cloud recovery services backup vault.
Navigate the Backup Vault
Back in your Azure subscription and in the Recovery Services section, let’s look into my SampleBackupVault and see what we can see there…
On the DASHBOARD tab, I can see that I have one “server” registered, and currently 0 GB currently protected. (It was a pretty small file, so I’m not surprised that it didn’t register here.)
On the REGISTERED ITEMS tab, I can see my one machine of type “Windows server” currently listed and registered.
Notice that this is also where I could delete any old or no-longer-needed server registrations.
On the PROTECTED ITEMS tab I can see some basic information about what I’ve protected; a file folder currently with only one recovery point available.
It also shows what the most recent recovery point and time are.
Restore a Deleted File
Oh no! Someone deleted my file! (Hint: It was me.)
No worries! Go back into the Microsoft Azure Backup console and click Recover Data in the Actions pane.
On the Getting Started page, notice that I can specify if I’m currently on the machine where the backup was originally taken (and therefore is already registered with the Backup Vault), or if I’m on a new machine that doesn’t yet have the vault credentials – in which case I’d be given the opportunity to point to a downloaded .VaultCredentials file.
Since I’m on the machine where the backup was taken, I’ll just click Next.
On the Select Recovery Mode page, I can choose to either Browse for my files, or search for them.
I would pick search if I knew there were a very large list to go through. But in my case, it’s just one file, so I’ll just browse. Click Next.
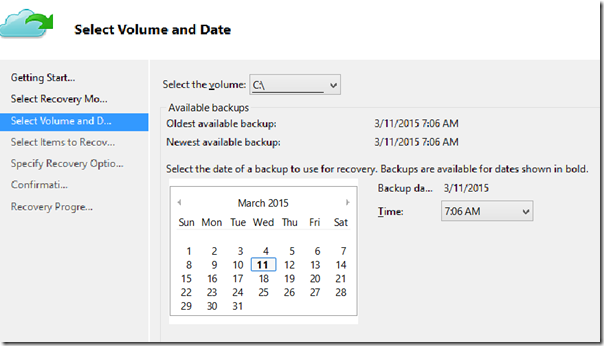
On the Select Volume and Date page, you use the drop-down to pick the volume from which your backup was taken, and then you’re presented with a calendar with some dates in bold representing points in time when you’ve completed past backups.
In our sample, I’ve only done the one backup, so that’s the only point I can recover to. I’ll select it, and click Next.
On the Select Items to Recover page, I can browse to my Very Important Stuff folder and see the files that were backed up from it.
I’m happy to see that my important file is there, so I’ll select it and click Next.
On the Specify Recovery Options page, I have some choices about whether or not I want to restore to the original location, or how to handle duplicates. I can even choose to restore (or not) the Access Control List (ACL – the security permissions) that were associated with the original file.
I’ll leave these defaults and click Next.
I verify that all looks good on the Confirmation page, and click Recover. The recovery starts, and I can close this window because the recovery job is now running for me.
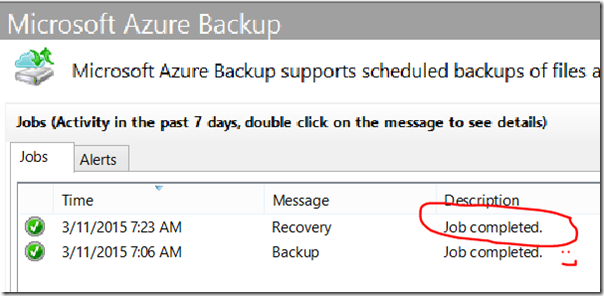
Back in the Microsoft Azure Backup console I can see that my recovery job has completed successfully…
…and.. Hooray! My file is back!
So.. that’s about it!
---
What do you think? Go ahead and share your comments / questions / concerns / rants in the blog comments.
