Create Bot for Microsoft Graph with DevOps 2: Get your appointment from Microsoft Graph and OAuth 2.0 with AuthBot
As we already setup VSTS and unit testing framework, let’s implement actual bot which can get my Outlook appointment. We can use OAuth 2.0 for Microsoft Graph, and AuthBot is the best module for our bot.
AuthBot
You can see the detail of AuthBot here.
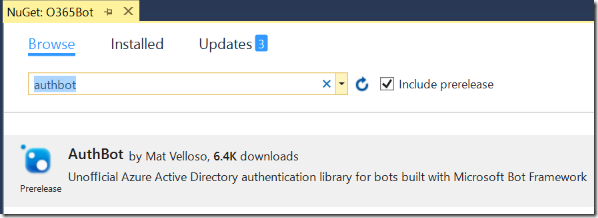
1. Add AuthBot NuGet Package to O365Bot project. You need to check [include prerelease].
2. add appSettings in web.config. I will fill the values later.
 <!-- AAD Auth v1 settings -->
<add key="ActiveDirectory.Mode" value="v1" />
<add key="ActiveDirectory.ResourceId" value="https://graph.microsoft.com/" />
<add key="ActiveDirectory.EndpointUrl" value="https://login.microsoftonline.com" />
<add key="ActiveDirectory.Tenant" value="" />
<add key="ActiveDirectory.ClientId" value="" />
<add key="ActiveDirectory.ClientSecret" value="" />
<add key="ActiveDirectory.RedirectUrl" value="https://localhost:3979/api/OAuthCallback" />
3. Add following code in Application_Start method of Global.asax.cs
 AuthBot.Models.AuthSettings.Mode = ConfigurationManager.AppSettings["ActiveDirectory.Mode"];
AuthBot.Models.AuthSettings.EndpointUrl = ConfigurationManager.AppSettings["ActiveDirectory.EndpointUrl"];
AuthBot.Models.AuthSettings.Tenant = ConfigurationManager.AppSettings["ActiveDirectory.Tenant"];
AuthBot.Models.AuthSettings.RedirectUrl = ConfigurationManager.AppSettings["ActiveDirectory.RedirectUrl"];
AuthBot.Models.AuthSettings.ClientId = ConfigurationManager.AppSettings["ActiveDirectory.ClientId"];
AuthBot.Models.AuthSettings.ClientSecret = ConfigurationManager.AppSettings["ActiveDirectory.ClientSecret"];
You also need to add using System.Configuration; to resolve name.
Register an application to Azure AD
To use OAuth 2.0 in Microsoft Graph, you need to register the application in your Azure AD.
1. Login to https://portal.azure.com with user who can register application.
2. Select Azure Active Directory.
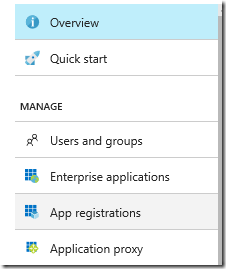
3. Click [App registration]
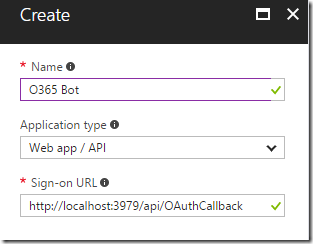
4. Click [New application registration] and enter name and sign on URL. Use https://localhost:3979/api/OAuthCallback for sign on URL
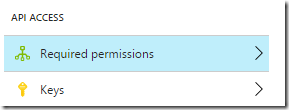
5. Select the created application and click [Required permissions]
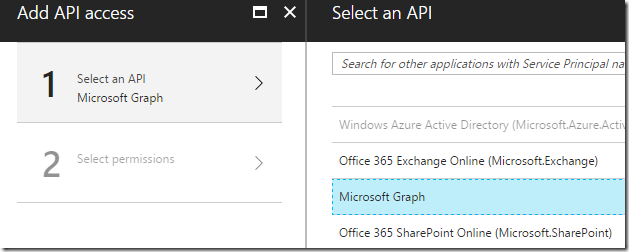
6. Add Microsoft Graph
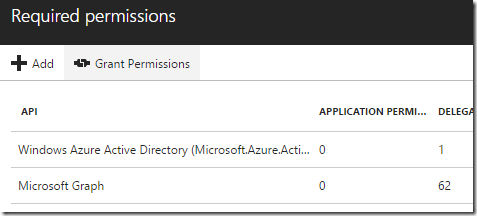
7. Add permissions. As this is a test application, I just check everything which doesn’t require Admin Privilege.
8. Once permission selected, click [Grant Permissions].
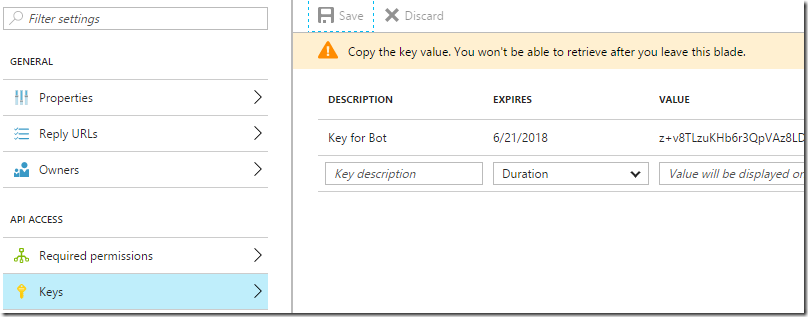
9. Select [Keys] and create new key. Copy the value somewhere safe.
10. Update the web.config values. ClientId is an application id.
Microsoft Graph
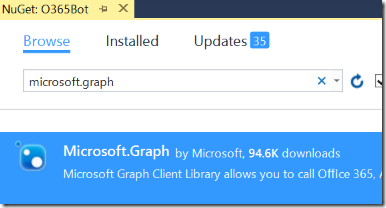
1. Add Microsoft.Graph NuGet package to O365Bot project.
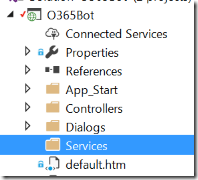
2. Add a folder and name it as Services.
3. Add GraphService.cs inside the folder and replace with the below code.
 using AuthBot;
using Microsoft.Bot.Builder.Dialogs;
using Microsoft.Graph;
using System;
using System.Collections.Generic;
using System.Configuration;
using System.Linq;
using System.Net.Http;
using System.Net.Http.Headers;
using System.Threading.Tasks;

namespace O365Bot.Services
{
    public class GraphService
    {
        IDialogContext context;
        public GraphService(IDialogContext context)
        {
            this.context = context;
        }

        /// <summary>
        /// Get events for next 7 days.
        /// </summary>
        /// <returns></returns>
        public async Task<List<Event>> GetEvents()
        {
            var events = new List<Event>();
            var client = await GetClient();

            try
            {
                var calendarView = await client.Me.CalendarView.Request(new List<Option>()
                {
                    new QueryOption("startdatetime", DateTime.Now.ToString("yyyy/MM/ddTHH:mm:ssZ")),
                    new QueryOption("enddatetime", DateTime.Now.AddDays(7).ToString("yyyy/MM/ddTHH:mm:ssZ"))
                }).GetAsync();

                events = calendarView.CurrentPage.ToList();
            }
            catch (Exception ex)
            {
            }

            return events;
        }

        private async Task<GraphServiceClient> GetClient()
        {
            GraphServiceClient client = new GraphServiceClient(new DelegateAuthenticationProvider(AuthProvider));
            return client;
        }

        private async Task AuthProvider(HttpRequestMessage request)
        {
            request.Headers.Authorization = new AuthenticationHeaderValue(
                "bearer", await context.GetAccessToken(ConfigurationManager.AppSettings["ActiveDirectory.ResourceId"]));
        }
    }
}
4. Then update code in RootDialog.cs with following to use the service.
 using System;
using System.Threading.Tasks;
using Microsoft.Bot.Builder.Dialogs;
using Microsoft.Bot.Connector;
using AuthBot;
using System.Configuration;
using AuthBot.Dialogs;
using System.Threading;
using O365Bot.Services;

namespace O365Bot.Dialogs
{
    [Serializable]
    public class RootDialog : IDialog<object>
    {
        public Task StartAsync(IDialogContext context)
        {
            context.Wait(MessageReceivedAsync);
            return Task.CompletedTask;
        }

        private async Task MessageReceivedAsync(IDialogContext context, IAwaitable<object> result)
        {
            var message = await result as Activity;

            // Check authentication
            if (string.IsNullOrEmpty(await context.GetAccessToken(ConfigurationManager.AppSettings["ActiveDirectory.ResourceId"])))
            {
                // Run authentication dialog
                await context.Forward(new AzureAuthDialog(ConfigurationManager.AppSettings["ActiveDirectory.ResourceId"]), this.ResumeAfterAuth, message, CancellationToken.None);
            }
            else
            {
                // get events
                GraphService service = new GraphService(context);
                var events = await service.GetEvents();
                foreach (var @event in events)
                {
                    await context.PostAsync($"{@event.Start.DateTime}-{@event.End.DateTime}: {@event.Subject}");
                }
            }
        }

        private async Task ResumeAfterAuth(IDialogContext context, IAwaitable<string> result)
        {
            context.Wait(MessageReceivedAsync);
        }
    }
}
Run the app
1. Run the service by pressing F5.
2. Launch Bot Emulator and connect to https://localhost:3979/api/messages. If you don’t install it yet, download it from here.
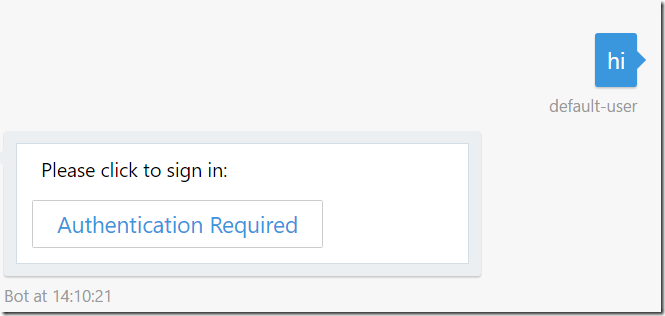
3. Send any message and you will get sign in request.
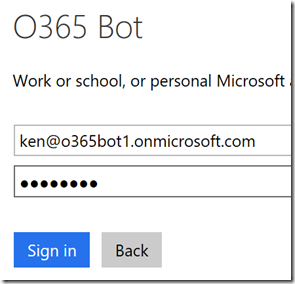
4. Click the button and authenticate.
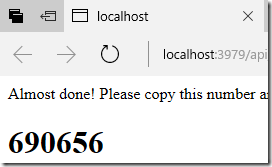
5. Once login process completed, you see ‘magic number’ in the page. Send the number back to bot.
6. Once you send the number, send any message again. Yeah, I know you don’t want to send the message again, eh? I will fix it in the future blog article.
7. Confirm you got events for next 7 days. (only if you have any schedule ![]() )
)
Summery
This time, I just added basic functionary of getting schedule, but how about unit testing? I will explain it next time.
GitHub https://github.com/kenakamu/BotWithDevOps-Blog-sample/tree/master/article2
Ken
Comments
- Anonymous
June 21, 2017
I am unable to bring up the authentication request....- Anonymous
June 21, 2017
Hi,What symptom are you facing? Please make sure you update web.config with appropriate value first
- Anonymous
