Creating a Node.js Application Secured by Azure AD
This post shows how to create a Node.js application using Node.js, Bash for Windows, Visual Studio Code, and Azure Active Directory. The final solution is available at https://github.com/kaevans/node-aad.
Background
I’ve been a C# .NET developer for the past 17 years Sure, I’ve coded with other languages (C++, Java, JavaScript, Pascal, F#, Visual Basic, Ruby), but given a deadline I would always use C# as that is what I am most productive in, and I am very comfortable with Visual Studio. I recently decided to leave my comfort zone of Windows, .NET, and SQL to venture into Linux and Node.js. I wanted to learn how to use various Azure services using Node.js, so the first that I picked was using Azure AD to secure a web application.
I went to an article, Node.js web app sign-in and sign-out with Azure AD, followed the steps, and it didn’t work. I went to GitHub and cloned a repository, https://github.com/AzureAD/passport-azure-ad, and it didn’t work. After wasting a really long time trying to figure it out, I discovered that those two resources (as of today’s date) use Node.js version 4.x, which is the current Long Term Support (LTS) version of Node. Following the instructions below, I ended up with Node version 7.4.0. The versions are not backwards-compatible between major releases, which explains why I couldn’t get things to work.
You could get things to work by using a Node version manager. A popular one is “n” which lets you interactively select which version of Node you are using. The rest of this post assumes Node version 7.4.0.
This post is going to look scary long. It’s actually not that bad, I am just verbose. The completed solution is available at https://github.com/kaevans/node-aad.
My Environment
I am not using a Linux desktop, just using it as a server. I used vi in Linux enough to realize I prefer the productivity of menus and a mouse, so I have a Windows 10 desktop running Visual Studio Code. However, I fell in love with Bash, so I enabled the Bash for Windows feature. This lets me use the Bash shell for things like Node.js (including npm) and Express web server. Once I code and test locally, I deploy the code to a Linux VM running in Azure. If you are using a Mac, you can use the Bash shell natively and you can still install Visual Studio Code.
Create an Azure AD Application
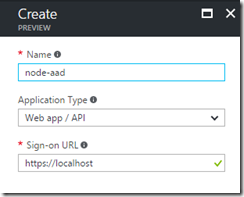
Go to the Azure portal, under Azure Active Directory / App Registrations and add a new registration. Create it as a Web app / API with a sign-on URL of https://localhost.
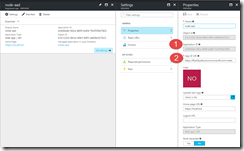
Once created, go to the properties of your new app registration. The App ID URI will have a GUID, you may wish to change that GUID to the name of your app (completely an optional step, but one that I prefer).
In this screen shot, item #1 is the application ID, also known as the client ID. The App ID URI is also known as the Audience URI. We’ll use those values in our configuration at the end of the post.
If your application will access other APIs, you will need a key. To do that, go to the Keys setting of your app registration and add a new key.
Copy this value (you won’t be able to retrieve it later). This key is also known as the client secret.
Install Node.js and Express Generator
I am going to assume that you already have Bash on Windows enabled (more details here), and you have Visual Studio Code installed. Open a command line and just type “bash” to start the Bash shell. This enables you to install Node.js using a package manager in Bash. Since Bash on Windows uses Ubuntu, you need to choose the Ubuntu directions for installing Node.js.
 curl -sL https://deb.nodesource.com/setup_7.x | sudo -E bash -
sudo apt-get install -y nodejs
sudo apt-get install -y build-essential
Now that we have Node.js, we can use the Node Package Manager (NPM) to install dependencies similar to how we’ve used NuGet for packages in Visual Studio. Let’s install the Express Generator that lets us quickly scaffold Node.js applications that use Express. We use the “-g” switch to make this a global dependency.
npm install express-generator -g
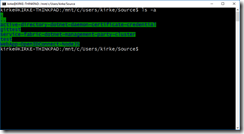
So, where to keep our project? Bash for Windows creates a mounted file system to access your Windows files, so wherever we keep them in Windows is accessible via Bash as well. As an example, I created a directory “Source” under my user profile.
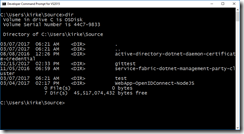
Just for completeness sake, I am showing the same directory using the old CMD shell in Windows to prove you can easily access those files in Windows.
Now close the CMD shell, we will only use the Bash shell during this post!
Create the Application
Now that we have a folder to keep our new application, we need to install some libraries. Change directory to the Source directory and then use the Express Generator to scaffold the application. In the Bash shell:
express node-aad
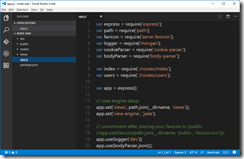
Open Visual Studio Code and then open the node-aad folder that was just created.
If you go to the debug menu in VS Code and hit Start, the application will fail with an error “Exception occured Error: Cannot find module 'express'”. Yes, “occurred” is misspelled, but the more important thing to note is that the packages.json file contains a list of dependencies that haven’t been downloaded yet, kind of like NuGet package refresh. This allows you to check your project into source control without all the dependency binaries. To download the binaries, we go back to the Bash shell and change directory to our project’s folder.
npm install
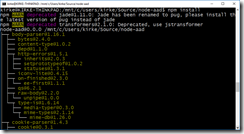
The output shows all the binaries that were downloaded.
To test the application, in the Bash shell try to following:
npm start
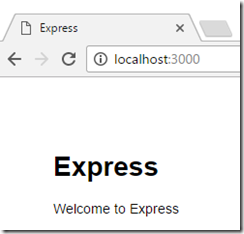
Now switch to a browser and go to https://localhost:3000. You will see your application.
Watch the Bash shell window to see the requests.
Hit Ctrl+C to stop the server. We now have a working Node.js web application. Let’s secure it with Azure AD.
Update Your Application to Use Azure AD with Passport
No, I don’t mean Passport as in the precursor to Microsoft Accounts (formerly Live accounts, formerly Hotmail accounts, formerly Passport accounts), I mean Passport the authentication middleware for Node.js. Passport makes it easy to use different strategies for authenticating to services such as Facebook, Twitter, and more. We will use the passport-azure-ad package that provides an OpenId Connect strategy for authenticating to Azure AD. Go to the Bash shell and run the following. This will install the packages method-override, express-session, passport, and passport-azure-ad, and the “—save” switch will update the package.js file to include the references.
npm install --save method-override express-session passport passport-azure-ad
Go check package.js and you will see that it has been updated.
Enable HTTPS
We are using OAuth, which means we are passing a bearer token in an HTTP header, which means using HTTPS is mandatory. In fact, this is one of the things that didn’t work when I tried the directions for Node.js 4.x using Node.js 7.4.0… the sample I linked to in the opening paragraph allowed you to use HTTP but that doesn’t work with Node 7.4.0. Creating an HTTPS server using Express is really simple. Go to the Bash shell and create the signing key, certificate request, and certificate, then delete the request file.
 openssl genrsa -out key.pem
openssl req -new -key key.pem -out csr.pem
openssl x509 -req -days 9999 -in csr.pem -signkey key.pem -out cert.pem
rm csr.pem
Now update app.js. At the top of the file, add the require statements for https and fs.
Requires
- var https = require('https');
- var fs = require('fs');
At the bottom of the file, just before the last line of code, add the following:
Create HTTPS Server
- var options = {
- key: fs.readFileSync('./myappkey.pem'),
- cert: fs.readFileSync('./myappcert.pem')
- };
- // Create an HTTPS service identical to the HTTP service.
- https.createServer(options, app).listen(443);
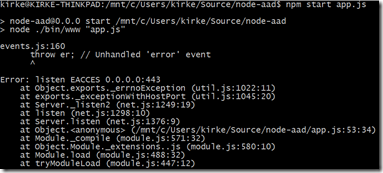
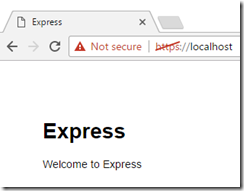
To test, go to the Bash shell and use “npm start” to start the application, then open a browser to “https://localhost” to see your application now listens to port 443 instead of 3000. You may get an unhandled error:
If that is the case, then try running it using the sudo command:
sudo npm start app.js
Note: this is using a self-signed certificate and is not secure for production use.
Using Passport for Authentication
In Visual Studio Code, add a new file called config.js.
config.js
- exports.creds = {
- returnURL: process.env.RETURN_URL,
- identityMetadata: 'https://login.microsoftonline.com/common/.well-known/openid-configuration', // For using Microsoft you should never need to change this.
- clientID: process.env.CLIENT_ID,
- clientSecret: process.env.CLIENT_SECRET, // if you are doing code or id_token code
- skipUserProfile: true, // for AzureAD should be set to true.
- responseType: 'id_token code', // for login only flows use id_token. For accessing resources use `id_token code`
- responseMode: 'query', // For login only flows we should have token passed back to us in a POST
- scope: ['email', 'profile'] // additional scopes you may wish to pass
- };
Notice that we do not put hard-coded values for variable items in this file, and we certainly never ever never ever put secrets (like client ID and client secret) into code.
Add the following to the list of “require” statements in app.js.
Require config
- var config = require('./config');
Beneath the require statements, add the following:
Configure Passport
- // array to hold logged in users
- var users = [];
- // To support persistent login sessions, Passport needs to be able to
- // serialize users into and deserialize users out of the session. Typically,
- // this will be as simple as storing the user ID when serializing, and finding
- // the user by ID when deserializing.
- passport.serializeUser(function (user, done) {
- done(null, user.oid);
- });
- passport.deserializeUser(function (id, done) {
- findByOID(id, function (err, user) {
- done(err, user);
- });
- });
- var findByOID = function (oid, fn) {
- for (var i = 0, len = users.length; i < len; i++) {
- var user = users[i];
- if (user.oid === oid) {
- return fn(null, user);
- }
- }
- console.log("Did not find user by OID: " + oid);
- return fn(null, null);
- };
- // Use the OIDCStrategy within Passport. (Section 2)
- //
- // Strategies in passport require a `validate` function, which accept
- // credentials (in this case, an OpenID identifier), and invoke a callback
- // with a user object.
- passport.use(new OIDCStrategy({
- callbackURL: config.creds.returnURL,
- redirectUrl: config.creds.redirectUrl,
- realm: config.creds.realm,
- clientID: config.creds.clientID,
- clientSecret: config.creds.clientSecret,
- oidcIssuer: config.creds.issuer,
- identityMetadata: config.creds.identityMetadata,
- skipUserProfile: config.creds.skipUserProfile,
- responseType: config.creds.responseType,
- responseMode: config.creds.responseMode,
- scope: config.creds.scope
- },
- function (iss, sub, profile, accessToken, refreshToken, done) {
- if (!profile.oid) {
- console.log(util.inspect(profile));
- return done(new Error("No OID found"), null);
- }
- // asynchronous verification, for effect...
- process.nextTick(function () {
- findByOID(profile.oid, function (err, user) {
- if (err) {
- return done(err);
- }
- if (!user) {
- // "Auto-registration"
- users.push(profile);
- return done(null, profile);
- }
- return done(null, user);
- });
- });
- }
- ));
Next, we create the app object and tell it what middleware to inject.
App middleware
- var app = express();
- // view engine setup
- app.set('views', path.join(__dirname, 'views'));
- app.set('view engine', 'jade');
- // uncomment after placing your favicon in /public
- //app.use(favicon(path.join(__dirname, 'public', 'favicon.ico')));
- app.use(logger('dev'));
- app.use(methodOverride());
- app.use(bodyParser.json());
- app.use(bodyParser.urlencoded({ extended: true }));
- app.use(cookieParser());
- app.use(session({
- secret: 'keyboard cat',
- resave: true,
- saveUninitialized: false
- }));
- //Initialize Passport
- app.use(passport.initialize());
- app.use(passport.session());
- app.use(express.static(path.join(__dirname, 'public')));
Finally we add our routes.
Routes
- // GET /auth/openid
- // Use passport.authenticate() as route middleware to authenticate the
- // request. The first step in OpenID authentication involves redirecting
- // the user to their OpenID provider. After authenticating, the OpenID
- // provider redirects the user back to this application at
- // /auth/openid/return.
- app.get('/auth/openid',
- passport.authenticate('azuread-openidconnect', { failureRedirect: '/login' }),
- function (req, res) {
- console.log('Authentication was called in the Sample');
- res.redirect('/');
- });
- // GET /auth/openid/return
- // Use passport.authenticate() as route middleware to authenticate the
- // request. If authentication fails, the user is redirected back to the
- // sign-in page. Otherwise, the primary route function is called,
- // which, in this example, redirects the user to the home page.
- app.get('/auth/openid/return',
- passport.authenticate('azuread-openidconnect', { failureRedirect: '/login' }),
- function (req, res) {
- console.log('We received a return from AzureAD.');
- res.redirect('/');
- });
- // POST /auth/openid/return
- // Use passport.authenticate() as route middleware to authenticate the
- // request. If authentication fails, the user is redirected back to the
- // sign-in page. Otherwise, the primary route function is called,
- // which, in this example, redirects the user to the home page.
- app.post('/auth/openid/return',
- passport.authenticate('azuread-openidconnect', { failureRedirect: '/login' }),
- function (req, res) {
- console.log('We received a return from AzureAD.');
- res.redirect('/');
- });
- //Routes (section 4)
- app.get('/', index);
- app.get('/account', ensureAuthenticated, function (req, res) {
- res.render('account', { user: req.user });
- });
- app.get('/login',
- passport.authenticate('azuread-openidconnect', { failureRedirect: '/login' }),
- function (req, res) {
- console.log('Login was called in the Sample');
- res.redirect('/');
- });
- app.get('/logout', function (req, res) {
- req.logout();
- res.redirect('/');
- });
- // catch 404 and forward to error handler
- app.use(function (req, res, next) {
- var err = new Error('Not Found');
- err.status = 404;
- next(err);
- });
- // error handler
- app.use(function (err, req, res, next) {
- // set locals, only providing error in development
- res.locals.message = err.message;
- res.locals.error = req.app.get('env') === 'development' ? err : {};
- // render the error page
- res.status(err.status || 500);
- res.render('error');
- });
- // Simple route middleware to ensure user is authenticated. (section 4)
- // Use this route middleware on any resource that needs to be protected. If
- // the request is authenticated (typically via a persistent sign-in session),
- // the request proceeds. Otherwise, the user is redirected to the
- // sign-in page.
- function ensureAuthenticated(req, res, next) {
- if (req.isAuthenticated()) { return next(); }
- res.redirect('/login')
- }
Making It Readable
We now turn to making it readable so someone can actually use our application. Let’s update the controller for the Index view to pass both the user and the title to the view.
Index.js
- var express = require('express');
- var router = express.Router();
- /* GET home page. */
- router.get('/', function (req, res, next) {
- console.log('index was called');
- res.render('index', { user: req.user, title: 'Express' });
- });
- module.exports = router;
Now let’s update the view.
index.jade
- extends layout
- block content
- h1= title
- p Welcome to #{title}
Notice the Jade file starts with “extends layout”. We can use this like a master page in ASP.NET (or a layout in ASP.NET MVC). Update the layout.jade file.
layout.jade
- doctype html
- html
- head
- title= title
- link(rel='stylesheet', href='/stylesheets/style.css')
- body
- div(id="navbar")
- if user
- span
- a(href="/") Home
- span
- a(href="/account") Account
- span
- a(href="/logout") Log out
- else
- span
- a(href="/") Home
- span
- a(href="/login") Log in
- block content
In our app.js file, there’s a route for /account. We need a view for that as well. Add a new “account.jade” file in the views folder.
account.jade
- extends layout
- block content
- if user
- p displayName: #{user.displayName}
- p givenName: #{user.givenName}
- p familyName: #{user.familyName}
- p UPN: #{user._json.upn }
- p Profile ID: #{user.id}
- p=JSON.stringify(user)
- a(href="/logout") Log out
- else
- h1 Please log in
- a(href="/login") Log in
The last thing we need to do it to add a little styling so the navigation is easier to read. Update style.css in the public/stylesheets folder to include padding.
style.css
- body {
- padding: 50px;
- font: 14px "Lucida Grande", Helvetica, Arial, sans-serif;
- }
- a {
- color: #00B7FF;
- }
- #navbar span{
- padding-right: 20px;
- }
Check It In
We want to commit the code to git, but we don’t need to commit all those dependencies. In the root of the project, create a file “.gitignore” and add the following:
.gitignore
# .gitignore
node_modules
.vscode
*.pem
*.log
This will prevent checking in any files in the node_modules folder, the .vscode folder (will be created in the next step), the certificates for the HTTPS server, or any log files.
In VS Code, you can now go to the Git tool and initialize the repository and check your changes in.
Test It Out
Our config.js file uses a lot of environment variables. We need a way to pass those into our program when debugging locally. One way is to use the Bash command:
sudo CLIENT_ID=YOUR CLIENT_ID CLIENT_SECRET=YOUR_APP_SECRET_KEY REDIRECT_URL=https://localhost/auth/openid/return node app.js
Replace the placeholders for client ID and app secret with the values from your Azure AD app.
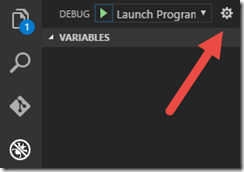
Another way to do this is to set the environment information within VS Code. Go to the debugging tab, then click Settings.
That will create a .vscode/launch.json file that makes it easy for you to configure the environment variables necessary for debugging your application without creating a script or actually setting those variables for your environment. Replace with the values for your Azure AD application.
launch.json
- {
- // Use IntelliSense to learn about possible Node.js debug attributes.
- // Hover to view descriptions of existing attributes.
- // For more information, visit: https://go.microsoft.com/fwlink/?linkid=830387
- "version": "0.2.0",
- "configurations":
- [
- {
- "type": "node",
- "request": "launch",
- "name": "Launch Program",
- "program": "${workspaceRoot}/app.js",
- "env":
- {
- "CLIENT_ID": "2f992fd9-04dc-4809-931f-3b5eca6405f3",
- "CLIENT_SECRET": "6abc/rABCabcaaABCabcabcdefcjABsABCu1ABGabSg=",
- "REDIRECT_URL": "https://localhost/auth/openid/return",
- "AUDIENCE": "https://BlueSkyAbove.onmicrosoft.com/node-aad",
- "IDENTITY_METADATA": "https://login.microsoftonline.com/blueskyabove.onmicrosoft.com/.well-known/openid-configuration"
- }
- },
- {
- "type": "node",
- "request": "attach",
- "name": "Attach to Process",
- "address": "localhost",
- "port": 5858
- }
- ]
- }
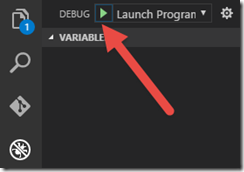
In VS Code, you can now click the Debug button to start debugging, giving you access to breakpoints, step-through, watch locals, etc.
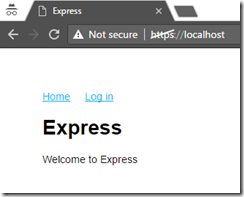
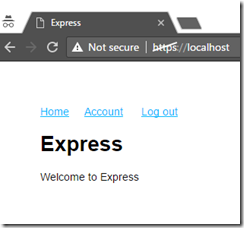
Now open a browser in InPrivate (Internet Explorer) or Incognito (Chrome) to ignore existing cookies. Navigate to https://localhost and you will see your new application!
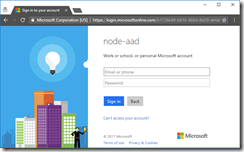
Click Log In and see that you are prompted to log into Azure AD.
Once you log in, the UI changes to indicate you are logged in.
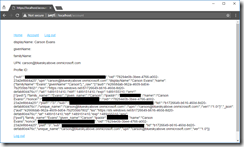
Click Account to see details about the claims in your token.
Git the Source
If you weren’t able to follow along or just want to download the source, the completed solution is available at https://github.com/kaevans/node-aad. At a command line:
git clone https://github.com/kaevans/node-aad.git
To run the application, you will need to complete a few steps:
- The node modules are not checked into source, but are referenced in the package.json file. Just change directory to the project root and use the command “npm install” to download all of the dependencies so that you can debug locally. Checking these into source would bloat your repository needlessly.
- The certificates are not checked into source (these are secrets). Follow the directions above for using openssl to generate the certificates. Do not check these into source!
- The .vscode/launch.json is not checked into source (it has secrets in it). Follow the directions above for creating/modifying the .vscode/launch.json file. Do not check this into source!
For More Information
Creating an HTTPS server using Express
https://github.com/kaevans/node-aad – Completed source code
Node.js web app sign-in and sign-out with Azure AD – instructions to build a Node.js 4.x application, some changes required for a 7.x application.
https://github.com/AzureAD/passport-azure-ad – Completed sample for a Node.js 4.x application, some changes required for a 7.x application.

