Windows HPC Pack 2012 Tutorial (1/5): Installing Server 2012 on an IaaS VM
In a previous blog, I explained Big Compute and the newly released HPC Pack 2012 from Microsoft. I also announced a blog tutorial series on installation, deployment and running HPC applications using the latest version of the software. This is the first tutorial of the series, we will cover the install preparation of an HPC head node using a Server 2012 IaaS virtual machine.
First, you will need a Windows Azure account, you can sign up for a free trial here. Please note that you can get 750 compute hours, 35 GB disk space, and many other benefits. For trying out an HPC cluster, your hours may run out much quicker. For example, if you deploy a 5 medium sized (2 cores) nodes, you’ll only be able to run the cluster for 75 hours given the free 750 compute hours resources. I strongly recommend paying for an account if you would like to experiment more with the cluster.
The steps described in this part of the tutorial are:
- Create a Windows 2012 IaaS VM.
- Download the HPC Pack and unzip.
- Create a domain controller and join the head node to it.
- Logon as a domain user and get ready to install HPC Pack 2012.
I. Create a Windows 2012 IaaS VM
Once you log into the Windows Azure portal.
Click on the Virtual Machines Tab, then click on New on the bottom Panel.
Click on Compute, Virtual Machine, then Quick Create.
Enter DNS name, select Windows Server 2012 Image, machine size larger than 2 cores, and admin password for your head node VM.
Select a location, I prefer west US since it is a relatively new data center. Select a subscription if you have multiple.
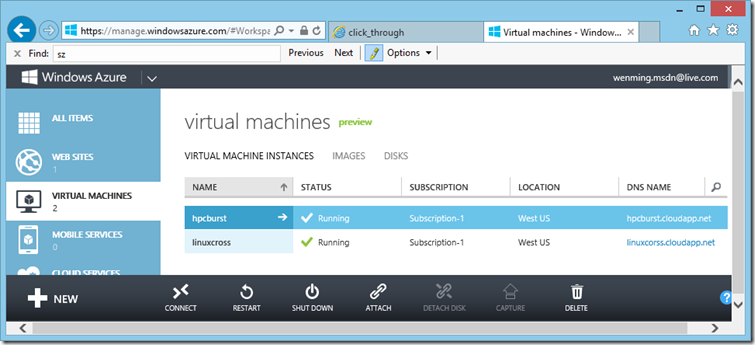
It takes a few minutes for the Server 2012 IaaS VM to be provisioned, you should see your new VM in the virtual machines listing when it is done.
Click on the VM we just created and click on START at the bottom tool bar.
Once the machine is in the “Running” state.
Click on Connect to log into the VM.
II. Download the HPC Pack and unzip
Once logged in.
Launch the server manager/dashboard by click on the first icon at the bottom of the task bar.
In Server manager, click on IE Enhanced Security Configuration and turn it off for Admin and users.
Open IE and download https://www.microsoft.com/en-us/download/details.aspx?id=36054 save it to d:\temp
This may take up to 10 or more minutes depending on your VM location and size; you may continue to step III while it is downloading.
Right click on the downloaded file and click on Extract All.
III. Create a domain controller and join the head node to it
Go back to the Server Management Tool.
Click on Manage, then Add Roles and Features.
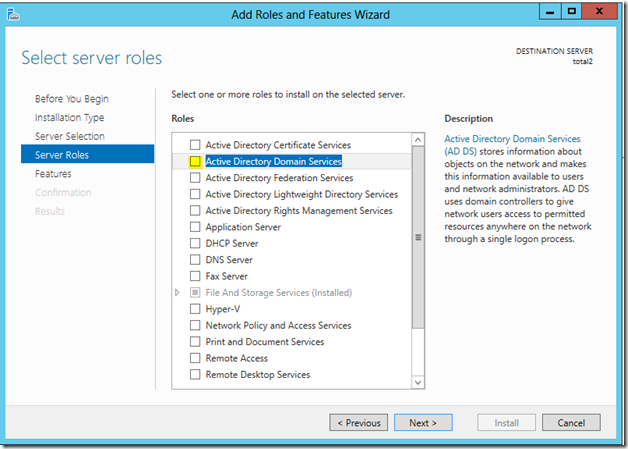
Go through the wizard, and select Active Directory Domain Services for installation.
Select Role-based or feature-based installation.
Select Active Directory Domain Service and click on Next.
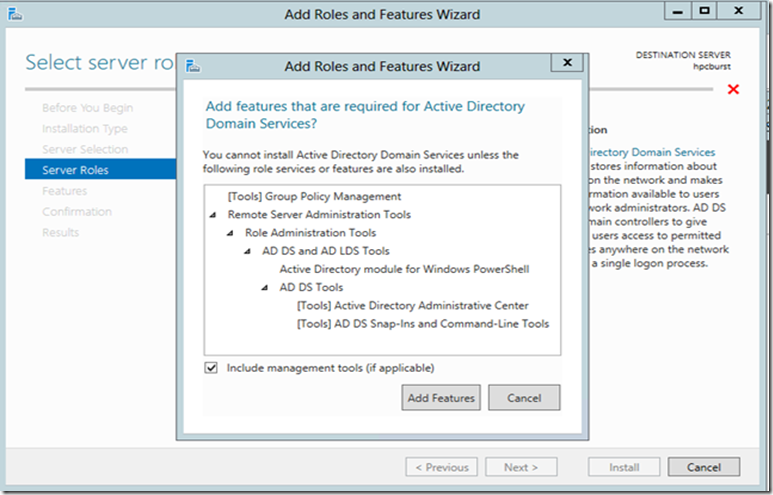
Click on Add Features.
The installation might take a few minutes to complete, click close. Please note that the installation may go on for a while after you click on Close.
Once installed, you will need to configure a simple local domain.
Go back to the Server Manager Console tool and click on the flag with a yellow notice sign, then click on Promote this server to a domain controller.
Select “Add a new forest”, and enter hpcdomain.local. You may pick your own domain name and append .local to it to create a local domain.
Enter Password and click on Next.
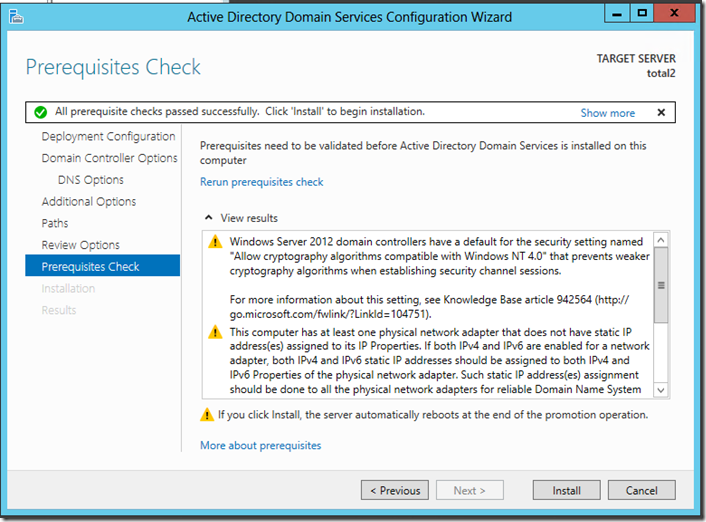
Click Next with default for DNS (not shown), and NetBios domain name.
Proceed to Installation.
After the domain controller has been installed, launch AD Tool to add a domain user.
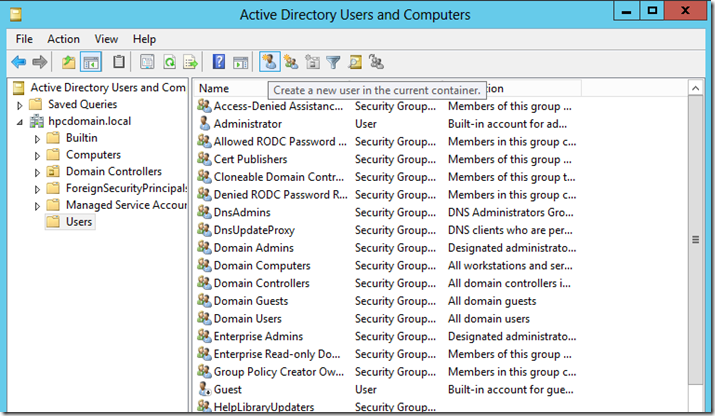
In the Server Management tool select Tools, then Active Directory Users and Computers.
Note that this is required for HPC server to function.
Expand hpcdomain.local, then select the Users Container. Click on Create a new user in the current container Icon.
Add a user.
Enter name and user login name.
Then on your local machine launch user Accts under Control Panel, note this is from your local machine not the AD Tool.
Click on Give other users access to this computer.
Click on Add from the User Accounts dialog, then enter the domain user you just created to give the domain user access to the head node.
Give the user Admin privilege.
IV. Logon as a domain user and get ready to install HPC Pack 2012
Now Log off/disconnect the machine.
Click on Connect again on the Azure portal tool bar for your VM.
Re-login using the domain user name and password. In my case, hpcdomain\hpcuser
Note you can only install HPC Pack using a domain account.
Once logged in, you’ve completed all the prerequisite for installing HPC Pack 2012. We will cover HPC Pack installation in the next tutorial.
Comments
Anonymous
April 02, 2013
This is amazing, thank you for the insight. Has the next steps in the tutorial been created/published yet? Cheers, Sean.Anonymous
January 30, 2014
Were the following 4 tutorial ever produced? I can't see them anywhere in the list. Best regards Neil


