Visual State Manager and Adaptive Triggers for Universal Windows App
Excited to write this blog post as this is one of the much awaited topic that I wanted blog about. Yes Universal Windows App ![]() One App targeting for one Billion Devices, that’s just incredible reach for developers and enterprises!
One App targeting for one Billion Devices, that’s just incredible reach for developers and enterprises!
With Universal App platform now we can target all devices essentially running same app running from IOT devices, Phones, Tablets, Laptops, Big Desktops and Huge Displays, No matter what device is used to view them. It’s the same app package! With the introduction of the Windows 10 core and the Universal Windows Platform (UWP), one app package can run across all platforms.
Alright let’s try to understand the idea behind designing these kind of application from developer perspective that too from XAML and C# side of things. As a HTML Developer or Web developer would have done this in the past in CSS meaning designing the Web application to scale to different resolutions or form factors also have different look and feel for their site based on Media Queries.
Okay first let’s see what we get with Windows 10 App templates.
You need to download Windows 10 SDK and tools to get this option while you install VS 2015.
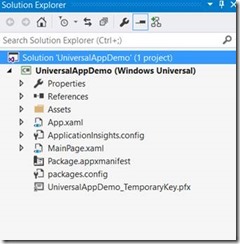
1. Select Blank App template (Windows Universal) you should see something like below. This nothing new if you have developed WPF, Windows Store App or Windows Phone app before. So I won’t bore you with Hello World app J
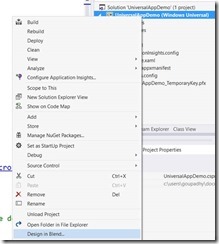
2. Open the App from Blend to design a page targeting different form factors like Phone, Tablet and Desktop. To do that Right click on the app and select Design with blend option. This should open the app in Blend.
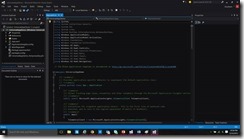
3. You should see something like below, Expression blend was scary initially when I started WPF/Silverlight development and I always thought it’s a tool for Designers only. But the way expression blend as a tool has evolved over years I must say it’s Awesome.
4. To Experience its awesomeness lets design an app with few basic elements on the screen and let’s render the UI on different devices. First click on the MainPage.xaml and click on the drop down as shown in the 1st Arrow. Basically you get to see your page in different device in design time. Next if you want to check your page as how it looks click on the Portrait or Landscape button as shown in 2nd and 3rd arrow.
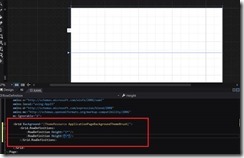
5. We have base Grid added for you with in the Page, now let’s divide the Grid into 2 portions in 1:5 ratio as shown below using star sizing.
6. Created Image folder and added 3 images Laptop.jpg, Tablet.jpg and Mobile.jpg. Add couple of controls like TextBlock and Image controls inside the grid that we added in the previous step and set few properties as highlighted below position these controls on the UI as below.
7. Now time to test how it looks on phone. Click on the Emulator option as shown below to see how the UI looks on 4inch Phone emulator.
8. You should see the text block and the image as shown in the screen shot below.
9. If you notice as of now the image control source is set to the Mobile.jpg so the Nokia phones image is shown on a mobile emulator. Okay so now if we run the application again on a Laptop or any other tablet emulator it’s going to show the same image. But that isn’t the behavior we want. We want the app automatically adjust the UI based on the devices it runs like “Media Queries in CSS”.
10. Now it’s time to implement cool stuff, Go to the states tab in expression blend and click on the Add state group tab
11. Now click on the Add state button and add 3 new states and rename it as shown below.
12. Click on the XAML view of the View page and add Adaptive triggers to the Visual States that we created for Phone, Tablet and Desktop. Set MinWindowWidth property for each one of the Adaptive Triggers for Visual state for VisualStatePhone, VisualStateTablet and VisualStateDesktop as shown below.
13. Now what happens is when the Universal App that we have written is viewed in width 0-600 screen width Visual State for Phone will be triggered and for 600-800 width Visual State for tablet will be triggered and anything beyond 800 Visual state for desktop will be triggered. Now it’s time to set some of the properties that affect the look and feel for different views. We do that with the help of VisualState.Setters as shown below. We are setting the Image controls source property to the desired value that we want in our case when the screen is in 600-800 range we are changing the image source from Mobile.jpg to Tablet.jpg. Similarly need to do for Desktop Visual State and Mobile Visual State as shown below.
14. And that is it we are ready to test our application on different devices width. Select local Machine and Click on the play button to rock n roll.
App View in Desktop with width greater than 800.
15. Reduce the width with the help of mouse from the right side edges of the app you should see something like below. App adjusting the UI itself to change the look and feel in our case we are changing the image from Desktop.jpg to Mobile.jpg when the screen width is changed.
App View in Phone with width in range of 0-600.
16. Similarly if you now slightly increase the width in Range of 600-800 you should see again our universal app adjusting its screen UI elements for Tablets.
App View in Tablet with width greater than 600 and less than 800
So, similar to what we have for Media queries in CSS, in XAML we have Visual State Manager feature in Blend which is very effective for designing UI’s that changes the look and feel automatically to adapts/adjusts itself for the devices that it runs on.
Waiting to see some great apps on Universal Windows Platform (UWP) from you.
Thanks for reading!
Comments
- Anonymous
May 17, 2015
Windows phone is gonna be the best operating system, It's only a matter of time. http://asiait.ir/


