Consuming a Claims-Enabled WCF Web Service as a SharePoint 2010 External Content Type
This article is the fourth and last in a series of MSDN articles on creating a claims-aware web service and consuming it from SharePoint Business Connectivity Services (BCS). In this article, you are going to use SharePoint Designer 2010 to consume the claims-enabled Web service that you created in the first three articles. Before following the procedures in this article, read and follow the procedures in the first three articles.
This blog is inactive.
New blog: EricWhite.com/blog
Shows how to create a very simple web service using WCF. Shows how to host this web service using IIS. |
|
Enhances the example so that the Web service can authoritatively report on the identity of its caller. |
|
Establishing Trust between a WCF Web Service and the SharePoint 2010 Security Token Service |
Configures the example developed in the previous article so that it uses a self-signed certificate to support a secure connection. |
Consuming a Claims-Enabled WCF Web Service as an SharePoint 2010 External Content Type (This post) |
Walks through the procedure for consuming a claims-enabled web service as a SharePoint 2010 External Content Type. |
These articles were written by Saji Varkey, and Bin Zhang, and me. They will be published on MSDN sometime in the near future. After they are published, I will update these posts to point to the MSDN articles. Juan Balmori Labra was the program manager behind these articles.
Procedure: Create an External Content Type (ECT) from the Web service
If you are already familiar with setting up external content types, then you will be familiar with nearly all of the steps in this procedure. The only steps that are specific to using claims are steps 26, 27, and 28.
1. Open Microsoft SharePoint Designer 2010. Open the SharePoint site that you configured to consume the External Content Type.
2. Click External Content Types in the Site Objects list.
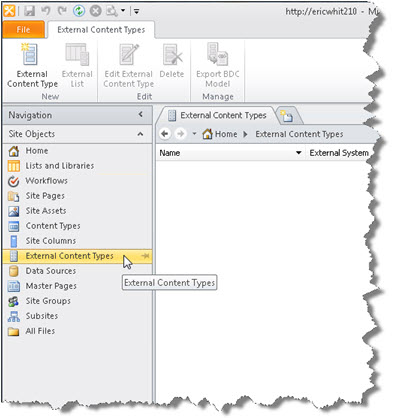
3. In the ribbon, click the New External Content Type button.

4. Click the New external content type link in the New external content type tab.
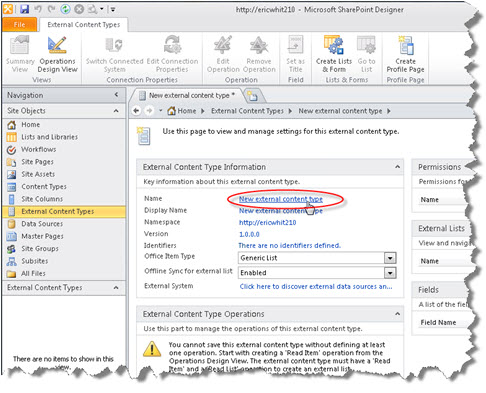
5. Enter the name of the external content type. For this example, give it the name of Customers. Press the Tab key.

When you press the Tab key, SharePoint Designer 2010 sets the Display Name to be the same as the Name. If you desire, you can edit the Display Name to make it different from the Name.
6. Click the link entitled Click here to discover external data sources.
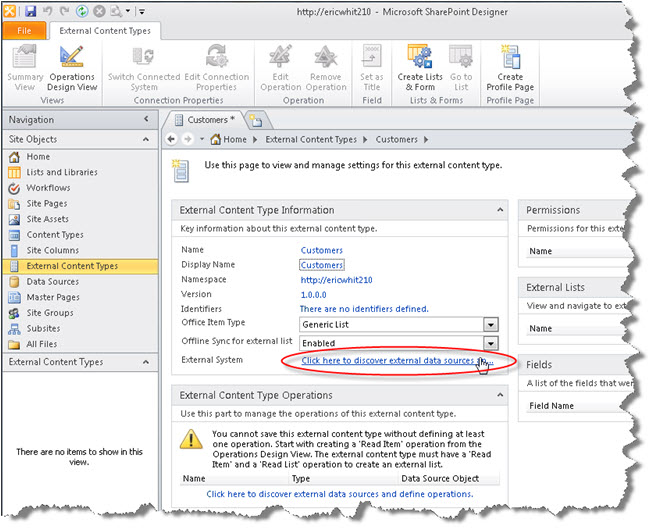
7. Click the Add Connection button.

8. This will display the External Data Source Type Selection dialog box.
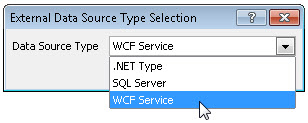
Select WCF Service from the list. Click OK.
9. In the WCF Connection dialog box, in the Service Metadata URL field, enter the service metadata URL for the web service that you created in the previous article in this series. The metadata URL will look something like the following, with the machine name replaced with the value of the Subject field that you determined in step 5 of the procedure to bind the certificate to https, from the previous paper.
https://ericwhit209.redmond.corp.microsoft.com/Customers/Customers.svc?wsdl

Note that the metadata URL does not use https.
10. Enter the Service Endpoint URL for the Web service. The service endpoint URL will look something like the following, with the machine name replaced with the fully qualified machine name in the domain.
https://ericwhit209.redmond.corp.microsoft.com/Customers/Customers.svc
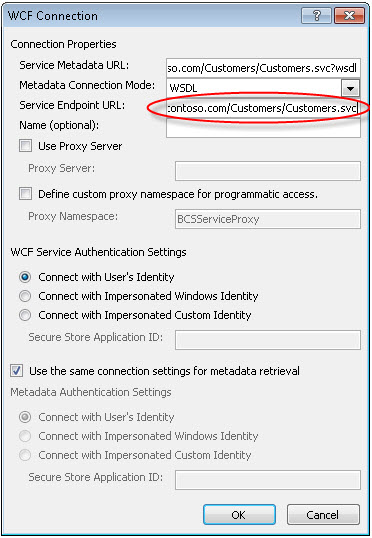
11. Enter Customers into the Name (optional) field.

12. Click OK. SharePoint Designer will display one or more progress bars while it discovers the Web service.
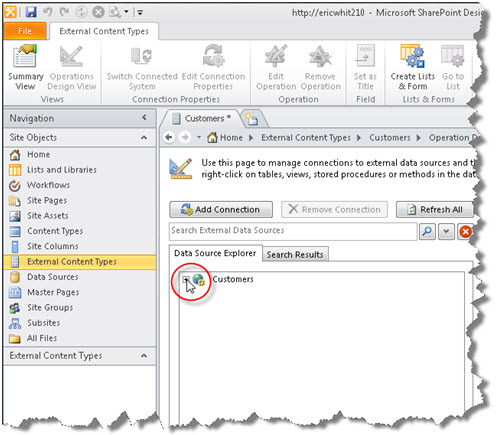
13. Click on the plus in the Data Source Explorer to expand the Customers data source.
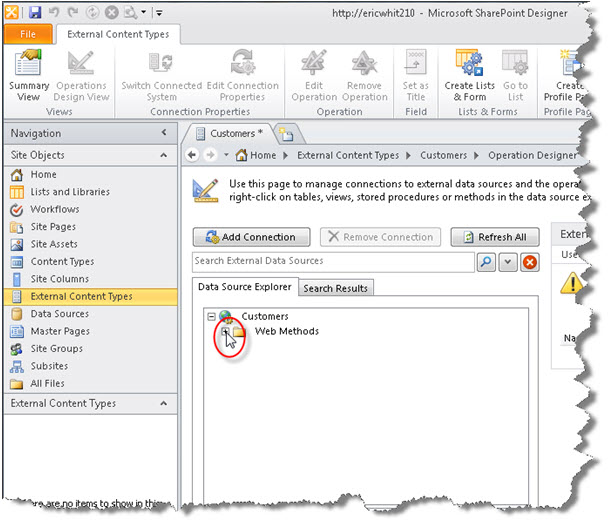
14. Click on the plus in the Data Source Explorer to expand the Web Methods.
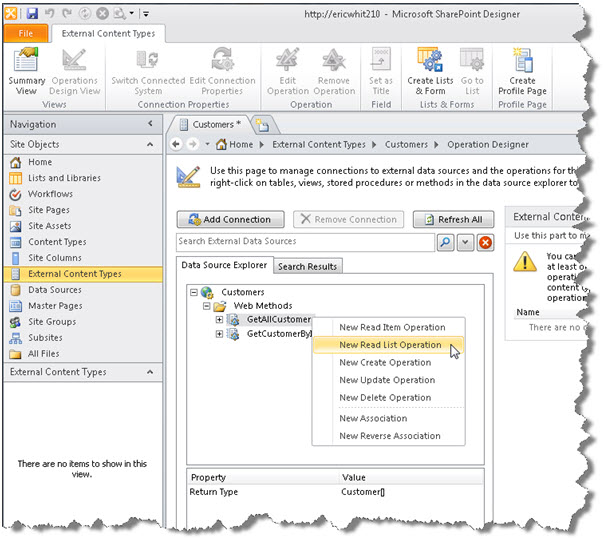
15. Right-click on GetAllCustomers, and then click New Read List Operation on the context menu.
16. In the Operation Properties dialog of the wizard, click Next.
17. In the Input Parameters Configuration dialog of the wizard, click Next.
18. In the Return Parameter Configuration dialog of the wizard, first click CustomerID in the Data Source Elements tree, then click the Map to Identifier check box in Properties.
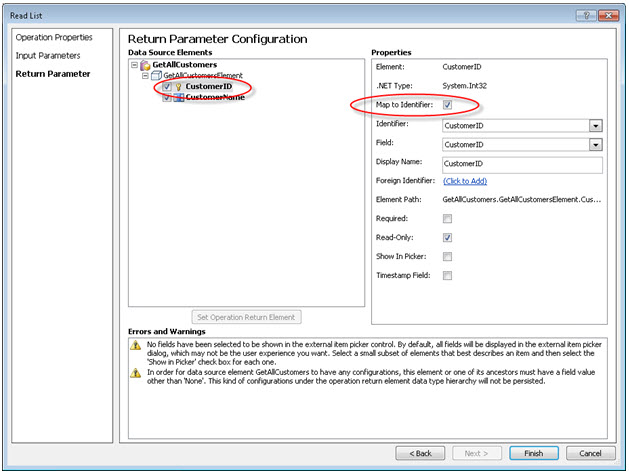
Click Finish.
19. In the Data Source Explorer, right-click on GetCustomerByID, and then click New Read Item Operation on the context menu.

20. In the Operation Properties dialog of the wizard, click Next.
21. In the Input Parameters Configuration dialog of the wizard, click CustomerID for Data Source Elements, and click the Map to Identifier check box.
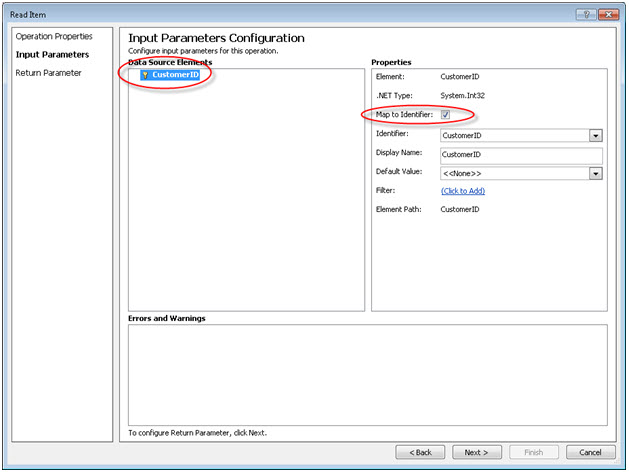
Click Next.
22. In the Return Parameter Configuration dialog of the wizard, click on CustomerID in Data Source Elements, and click the Map to Identifier check box.

Click the Finish button.
23. In the tool bar, click the Save button. SharePoint Designer will save the External Content Type.

24. In the ribbon, click the Create Lists and Forms button.

25. In the Create List and Form for Customers dialog box, enter Customers in the List Name field. Click OK.

26. Next, you need to enable claims for the External Content Type that you just created. Click on Customers (the content type name) in the Navigation pane.

27. Click on Edit Connection Properties in the ribbon.

28. In the Connection Properties dialog box, click on the Use claims based authentication check box. Click OK.

29. Next, you need to assign appropriate permissions for the external content type that you just created. On the computer that is running SharePoint 2010 server, start SharePoint Central Administration.
30. Under Application Management, click Manage service applications.
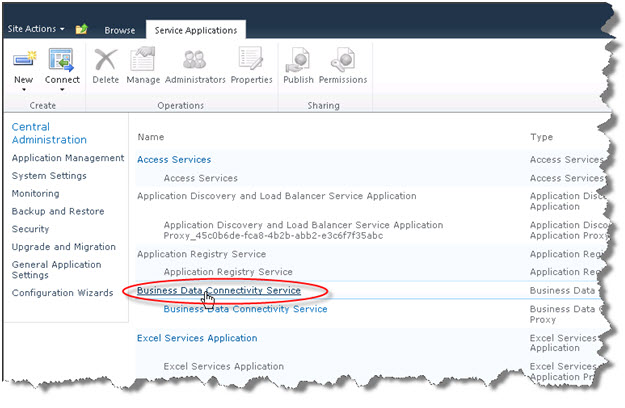
31. On the Service Applications page, click Business Data Connectivity Service.
32. Click the check box next to the content type that you just created, and then click Set Object Permissions.

33. In the Set Object Permissions dialog box, enter the alias of the user that will have permissions to set permissions into the field that allows you to add an account or group. In my case, I entered my alias, ericwhit. Click the Check Names button, and then click the Add Button.
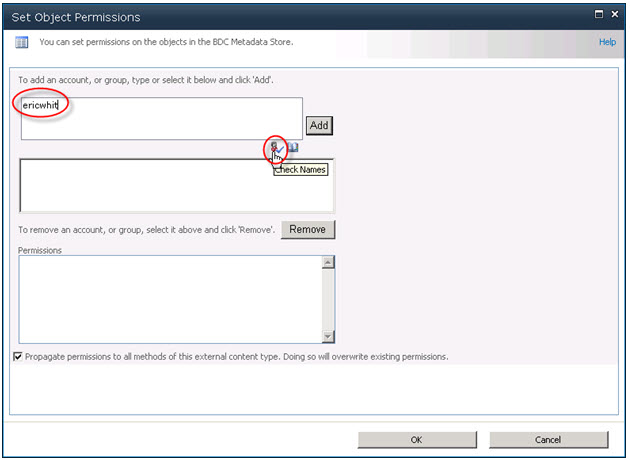
34. After clicking Add, give this user all permissions for this content type.

35. In the Set Object Permissions dialog box, enter all authenticated users into the field that allows you to add an account or group. Click the Check Names button, and then click the Add Button.

36. Click the Execute check box to give authenticated users execute permissions for the external content type. Click OK.
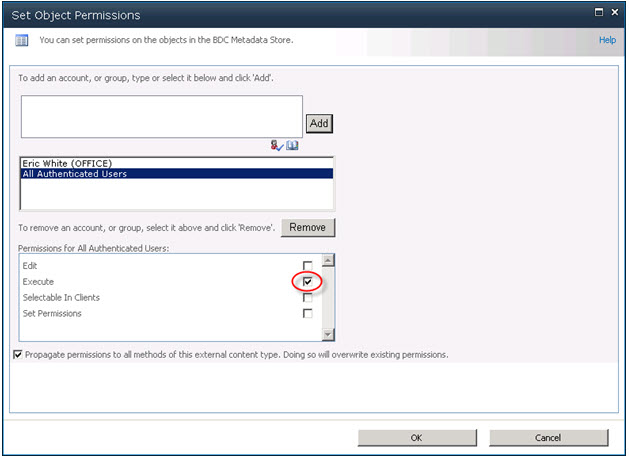
The external content type is now setup properly to use claims-based authentication.
37. Use a browser to browse to the SharePoint site. Open the Customers list, and you will be able to see the data that the external content type retrieved from the Web service.

38. As a last step, you can validate that the Web service has access to the identity claim, and that the identity claim is properly returned. On the computer that is hosting the Web service, open the log file at C:\MyWebService\log.txt. You will see that the log file has an entry for the latest access of the external content type. You can see the identity of the user that accessed the list. This identity was retrieved from a claim.
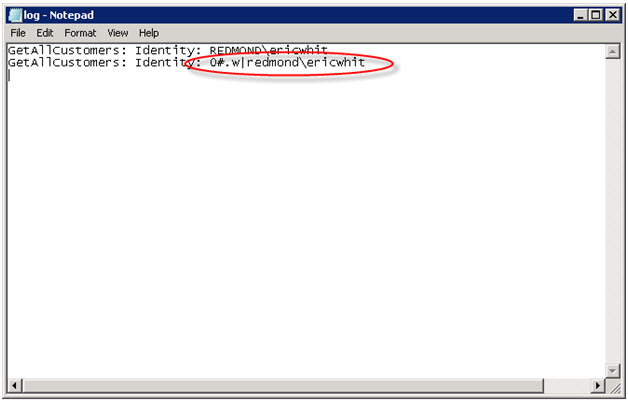
When you retrieve the identity as a claim, the characters “0#.w|” are prepended to the identity because this is an encoded SharePoint identity claim value. The prefix indicates that this was issued by a Windows claim provider.
Conclusion
In this series of articles, you built a web service that uses claims. You were able to configure BCS to consume that web service. You were able to flow the original user identity all the way to the web service without any additional user interaction, and without storing user credentials in a secure store. The web service is able to see the claims, and based on the claims, is able to give access to protected resources.
These articles showed only the basics of connecting to a web service using claims. In a more advanced scenario, the web service could access security group information as a claim, and give access to certain resources based on that security group.
Claims-based authentication for a Web service eliminates the ‘double hop’ issues that you normally see when configuring SharePoint Server 2010 to access other resources in a secure fashion.
Comments
Anonymous
May 05, 2012
All works ok but When i change the user doesnt work.Anonymous
May 07, 2013
yes it does, you just have to crawl your content again