使用SCOM 2012 R2监控Windows Azure 系列(二)使用Azure管理包
在前面一篇博客里(https://blogs.msdn.com/b/chshen/archive/2014/10/29/scom-2012-r2-windows-azure.aspx)介绍了如何安装和配置Azure管理包,现在我们要介绍如何使用Azure管理包。
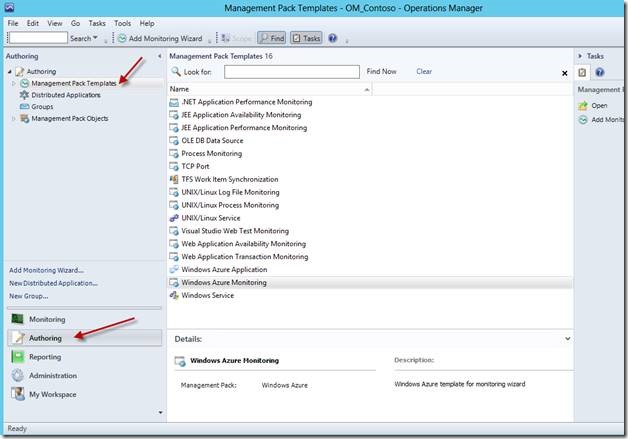
在SCOM的Operation Console从左边的向导中选择 “创作” 并点击 “管理包模板”:
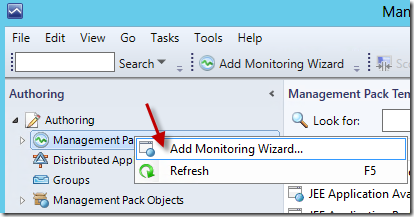
右击 “管理包模板” 并选择“添加监视向导(M)… ”:
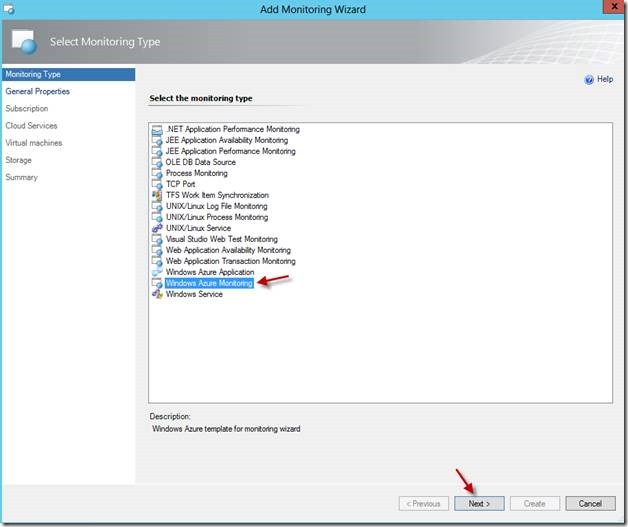
当添加监视向导对话框打开是选择 “Windows Azure Monitoring” 并选择 “下一步(N) > ”:
这时候你有两个选择:使用已有的管理包或建立新的管理包. 你可以参考一下的管理包使用指南:
Management packs can be sealed or unsealed. A sealed management pack cannot be modified directly. Any changes to the workflows in the sealed management pack, such as an override for a monitor, must be saved to an unsealed management pack. The unsealed management pack references the sealed management pack that it modifies.
It's good practice not to use the management packs that are installed with Operations Manager to save any settings that you change or elements that you create. When you have to select a destination management pack, always select a management pack that you create.
我会建立一个新的管理包作为目标管理包
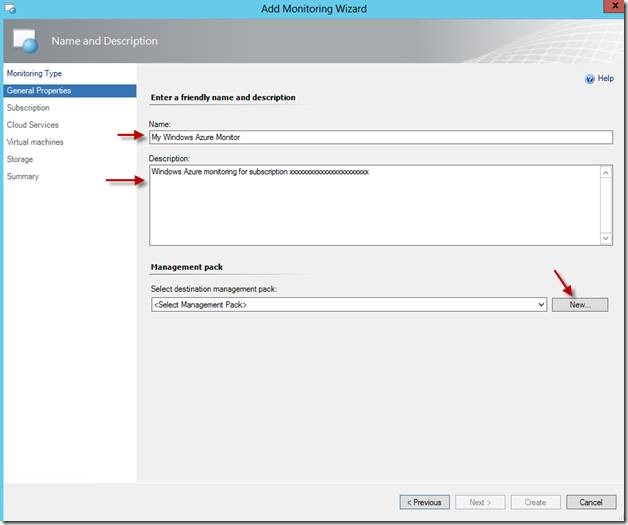
在添加监视向导对话框中输入名称和描述并选择 “新建(W)…”:
输入名称,版本,描述并选择 “下一步 (N)>”:
如果你愿意的话可以添加知识文章, 我会略过这步并选择 “创建(R)”:
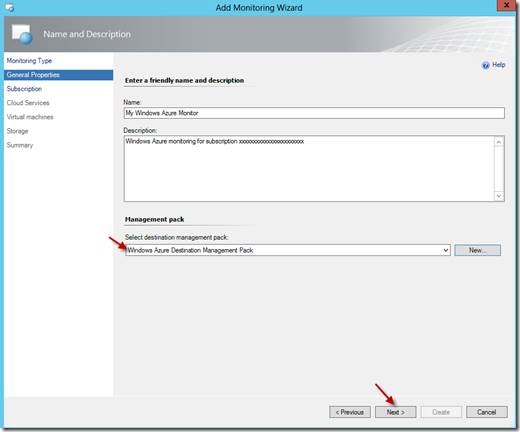
当目标管理包建好后,你就可以回到添加监视向导对话框并继续创建 Windows Azure monitor. 确认新建的目标管理包在下拉框中被选上并选择 “下一步(N) >”:
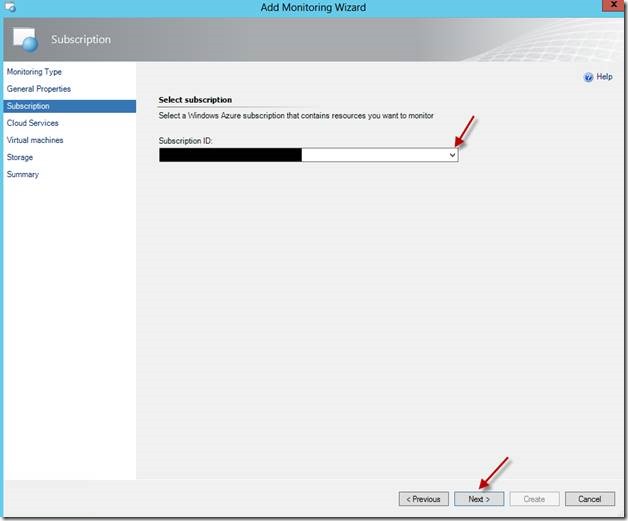
在Subscription 对话框中选择你想监控的Windows Azure subscription 并选择“下一步(N) >”:
在下面的几个对话框中你将可以选择你想监控的Azure 云服务, 虚拟机和存储。 选择 “添加… ”增加云服务:
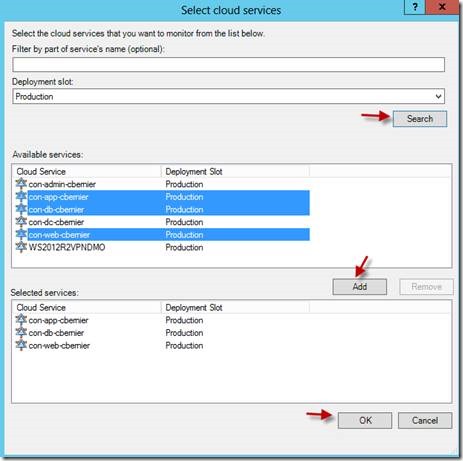
以下的对话框将会打开。这时你可以选择根据名字和部署类型 (Staging 或 Production)来过滤云服务。选择你想监控的云服务点击“添加”并点击 “确认”.
这时候会回到添加监视向导并会看到你选择的云服务, 选择 “下一步 (N)> ”:
这时候你可以选择你要监控的虚拟机. 点击“搜索” 选择你要监控的虚拟机, 点击“添加”, 并点击 “确认”:
点击 “下一步(N) > ”:
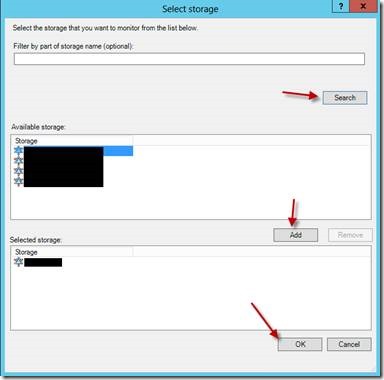
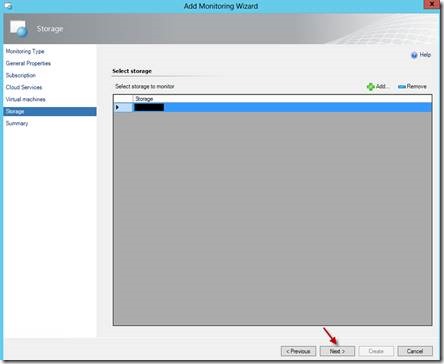
选择要监控的存储点击“添加”,并点击 “确认”:
点击”下一步(N)>"
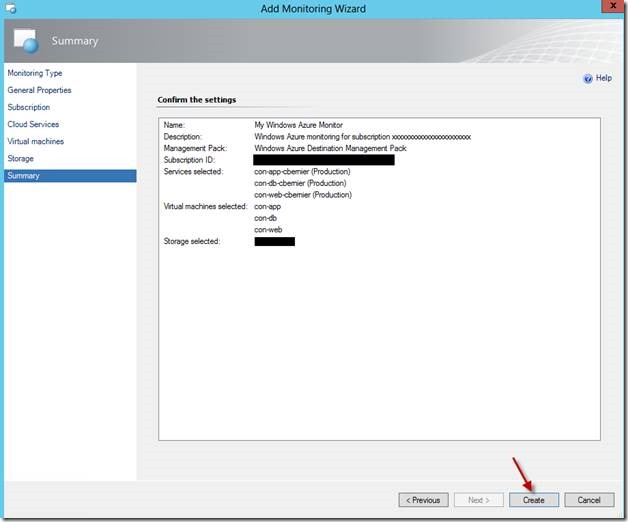
点击 “创建”:
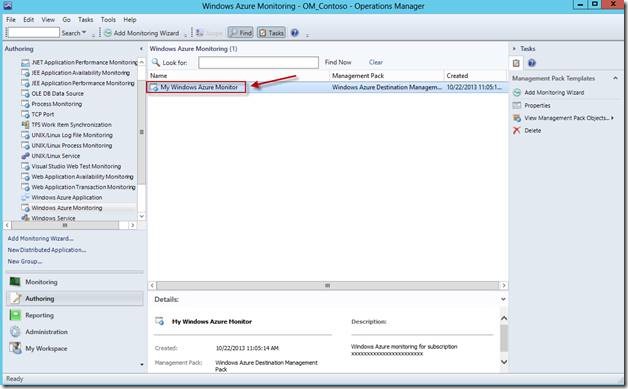
当添加监视向导对话框关闭时你会回到Operations Manager console 并可以看到你新建的Azure 监控:
使用这些监控
好,我们现在已经建好了Azure监控,现在让我们来看一些监控数据
在你建立完Azure监控后应该在监控的栏目里有个文件夹的名字是你新建的目标管理包,我建立的名字是叫 “Windows Azure Destination Management Pack”.
右击这个文件夹,选择“新建(N)" 会发现有很多不同类型的视图可以创建
下面用两种视图做为例子:
状态视图
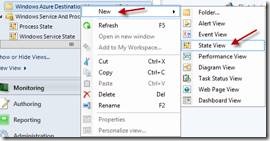
右击目标管理包文件夹,点击”新增(N) "并点击 “状态视图” :
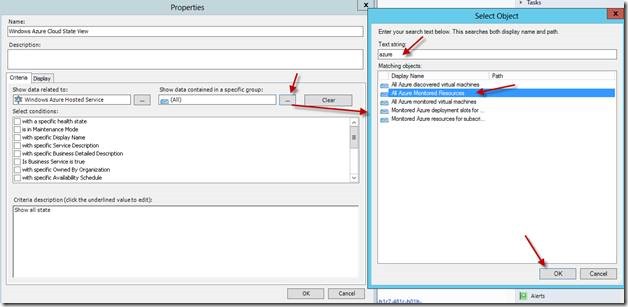
当状态视图的属性对话框打开时,输入名称,描述,并点击 “... "。另外一个窗口会打开,选择”查看所有目标(A)"并查找 "Azure"。选择名字为“Windows Azure Hosted Service”, 点击”确认“
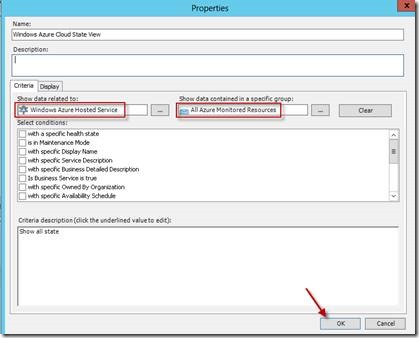
现在我们要选择组里的数据. 点击"显示包含特定组中的数据” 的" ... "。 当选择对象对话框弹出时,输入“azure"查找并选择 “All Azure Monitored Resources”:
点击 “确认”:
当状态视图建好后,你可以点击它查看 Azure实例的状态:
Diagram View
右击管理包文件夹, 点击 “新建(N)” 并点击 “图示视图(D)”:
添加名称,点击“浏览”, 用 “azure”过滤, 然后点击 “查找”, 并选择 “All Azure Monitored Resources”, 点击 “添加”, 然后点击 “确认”回到创建图示视图对话框:
用缺省的设置建立一个新的模板并点击 “创建”:
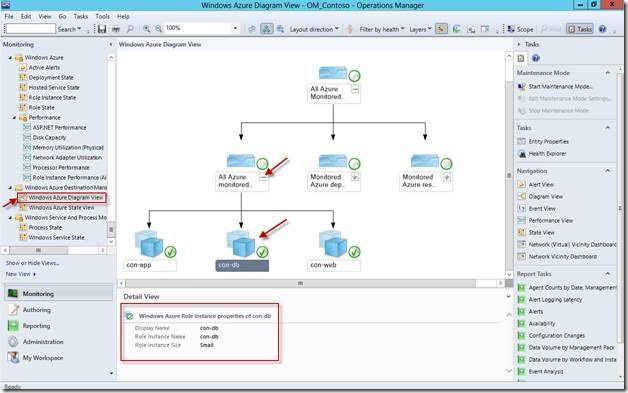
以下是我建立的图示视图::
恭喜你,你已经建立好Azure的监控了,以后你都可以用SCOM来监控Azure了。
