Test Lab: Standalone STS with AD FS in Azure VM (for test only)
In this blog post I will show you how I created a test lab for a publicly accessible Secure Token Service (STS) server using Active Directory Federation Services (AD FS) on an Azure VM. I created the test lab in order to help with the ramp-up process of creating an enterprise Web app in Azure Websites that needs to authenticate users against various forms of federated authentication scenarios, such as an on-premise AD FS service or an Azure Active Directory (AD) tenant that is synced with AD FS on-premise.
IMPORTANT: As this is a test lab for the Web development scenario, it's not meant to demonstrate the best practices of setting up a public-facing STS server with AD FS. For example, it's already violating the first no-no at
Can you deploy Windows Server AD FS on Azure Virtual Machines? since both the STS and DC are exposed directly to the internet. Nevertheless, it's exactly what I need as a developer in order to ramp up on the end-to-end authentication of an application (such as Azure Websites) with an STS.
Here are the basic things I needed to create this test lab:
- A trial account for Microsoft Azure.
- Ownership and administrator account of a domain name (e.g. contoso.com) from a DNS service like www.godaddy.com. I create the AD FS service using a DNS name under it (e.g. adfs.contoso.com) and redirect traffic to the Azure VM's IP address. Also, since I'm also testing directory integration with Azure AD, I need to generate a valid SSL certificate, and any certificate authority (CA) would verify that I own the domain before issuing me a certificate.
- An SSL certificate for the AD FS service. I've used a trial certificate from SSL.com as well as generated test CA and server certificates, and they both work.
I created one Azure VM running Windows Server 2012 R2 with the following specs:
- Open Azure VM's endpoint for port 443
- Configure AD DS for the domain I own (I will call it contoso.com)
- Configure AD FS (I will call it adfs.contoso.com)
- Open the inbound port 443
Now, here are the detailed steps to reproduce this test lab:
First, create the Azure VM. Log into your account in https://portal.azure.com. Click New, and select Windows Azure 2012 R2 Datacenter.

When Azure has finished creating the VM, click Connect at the top of the dashboard and download the RDP file.

Open the RDP file to connect to the Azure VM using the hostname\username and password you created. If you get an error connecting to the Azure VM, you may need to wait awhile before the DNS changes for the VM gets propagated.
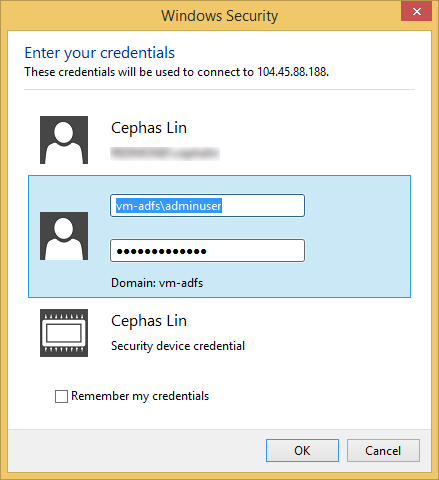
Notice in the screenshot above that I connected directly to the IP address of the Azure VM. You may find yourself wanting to do this if the DNS updates for the Azure VM takes longer than normal. The VM's IP address is available immediately so you don't have to wait to keep going.
IMPORTANT: Open Windows Updates and bring the VM to the latest important and optional updates. The Windows Server 2012 image from October 2014 cannot add the required Windows features without the most recent updates.
Open the PowerShell window and run the following commands:
$domain = "contoso.com"
$password = "<your password here>"Install-WindowsFeature -Name AD-Domain-Services, ADFS-Federation, NET-Framework-Core -IncludeManagementTools
Install-ADDSForest -Force -DomainName $domain -SafeModeAdministratorPassword (ConvertTo-SecureString $password -AsPlainText -Force)The script above will install AD Domain Services and AD Federation Services, then promote the VM to a DC server.
After the system restarts, log into the VM again using your domain admin credentials:
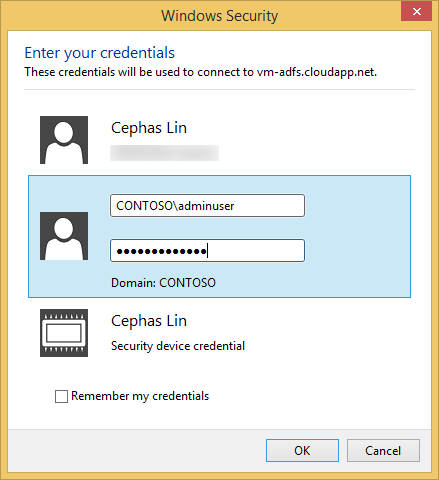
Create the certificates you will use to configure the AD FS service. You can run the commands below using OpenSSL for Windows. You will create a test CA certificate and a certificate that's signed by that CA certificate.
Prepare the configuration file (sancert.cnf) by following the instructions at Get a SubjectAltName certificate using OpenSSL (be sure to specify the subjectAltName parameters as shown above).
When generating the certificate signing request (CSR), use the appropriate SAN configuration per Certificate requirements. I created a certificate for adfs.contoso.com, so my SAN configuration should be:
subjectAltName=DNS:adfs.contoso.com,DNS: enterpriseregistration.contoso.com
Run the following commands in a command prompt in administrative mode, and follow the prompts to supply the private keys and password for each respective step. Since these are test certificates, feel free to use the same password for all of them.
openssl genrsa -out C:\rootCA.key 2048
openssl req -x509 -new -nodes -key C:\rootCA.key -days 1024 -out C:\rootCA.pem
openssl pkcs12 -export -in C:\rootCA.pem -inkey C:\rootCA.key -out C:\rootCA.pfx
openssl req -new -nodes -keyout C:\adfs.key -out C:\adfs.csr -newkey rsa:2048 -config C:\sancert.cnf
openssl x509 -req -in C:\adfs.csr -CA C:\rootCA.pem -CAkey C:\rootCA.key -CAcreateserial -out C:\adfs.crt -days 500
openssl pkcs12 -export -in C:\adfs.crt -inkey C:\adfs.key -out C:\adfs.pfxThese commands accomplish the following:
- Create a root CA certificate.
- Create a .pfx file for the root CA certificate. You need to install this certificate as a trusted root certificate on your development machine so you won't get the nasty message later on saying that the AD FS certificate is not trusted when you access AD FS. Keep in mind this is only for testing purposes.
- Create the AD FS certificate that is signed by the root CA certificate above.
- Create a .pfx file for the AD FS certificate. You will use this certificate to configure the AD FS service on the Azure VM.
Copy rootCA.pfx to your development machine, then double-click the file to import the certificate as a trusted root certificate authority.
Copy the .pfx file for AD FS that you created above into the Azure VM's RDP session (using Control-C and Control-V).
In a PowerShell window in administrative mode, run the following snippet. You will be prompted to supply service account credentials. For the test lab, I just use the domain admin's credentials.
# Change these variables to fit your environment
$cn = "adfs.contoso.com"
$pfx_path = "c:\adfs.pfx"
$pfx_password = "<your PFX export password here>"# import pfx certificate and private key into cert:\LocalMachine\MY
certutil -f -importpfx -p $pfx_password $pfx_path# Configure AD FS service
$serviceAccountCredential = Get-Credential -Message "Enter the credential for the Federation Service Account."
Install-AdfsFarm `
-CertificateThumbprint:(Get-ChildItem cert:\LocalMachine\MY | Where-Object {$_.Subject -match "CN=$cn*"}).Thumbprint `
-FederationServiceDisplayName:"ADFS Test Lab in Azure VM" `
-FederationServiceName: $cn `
-OverwriteConfiguration:$true `
-ServiceAccountCredential:$serviceAccountCredential# Configure firewall rule for port 433
netsh advfirewall firewall add rule name='AD FS (HTTPS)' localport=443 dir=in action=allow protocol=TCP# Add required A record (e.g. "adfs") and CName record ("enterpriseregistration")
Import-Module DnsServer
$ip = (Get-WmiObject -Class Win32_NetworkAdapterConfiguration -Filter "DHCPEnabled=true" –ComputerName.).IPAddress[1]
$domain = $cn.Substring($cn.IndexOf(".")+1)
Add-DnsServerResourceRecordA -Name $cn.Split(".")[0] -ZoneName $domain -IPv4Address $ip
Add-DnsServerResourceRecordCName -Name "enterpriseregistration" -HostNameAlias $cn -ZoneName $domainCreate an endpoint on the Azure VM that corresponds to port 443. Back in the https://portal.azure.com, scroll down to the bottom of the dashboard for your Azure VM and click the Endpoints box.

Click Add to add an endpoint, with 443 as both the Public Port and the Private Port.
Now everything is configured, but you still need to direct traffic to the Azure VM's IP address. Note the IP address in the screenshot above is 23.102.153.156. Log into your domain's management account and add an A record that points adfs.contoso.com to this address. In my GoDaddy account for my domain (contoso.com), it looks like this:

Finally, you can test whether your AD FS service is publicly available. On your development machine (where you installed the test CA certificate), open Internet Explorer and navigate to https://adfs.contoso.com/FederationMetadata/2007-06/FederationMetadata.xml. Here's what you should see:

And you're done! To manage the AD FS service, such as add a relying party app, log into the Azure VM again, go to Server Manager, click Tools, and select AD FS Management as shown below.

Bonus Lab: Integrate AD FS with Azure AD for single sign-on
For those interested, the next thing I did was to extend the test lab to include directory synchronization to Azure AD. There's a comprehensive content set on the best-practice guidance for Directory Sync with Single Sign-On Scenario, but here I just wanted to create the minimal working solution for the end-to-end user experience from line-of-business (LOB) applications.
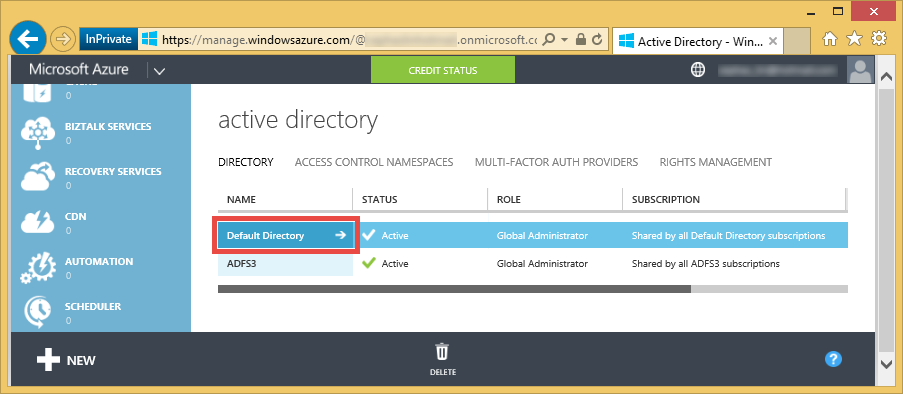
Log into https://manage.windowsazure.com/ with your Azure subscription and go to the Active Directory tab. Click the Default Directory that's created for you by default.
Click the Users link at the top, and then click ADD USER at the bottom.
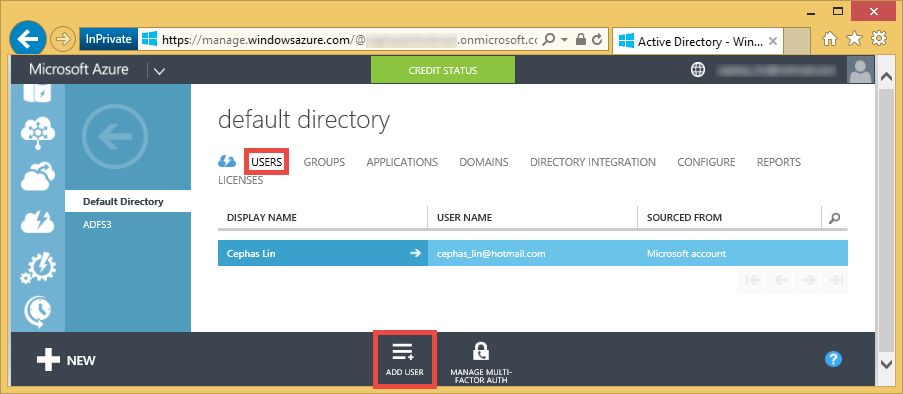
Create a new user in this directory with the role Global Administrator.

Save the automatically generated password. You will need to change it before you can use it to configure directory sync. Note full user name that you created.
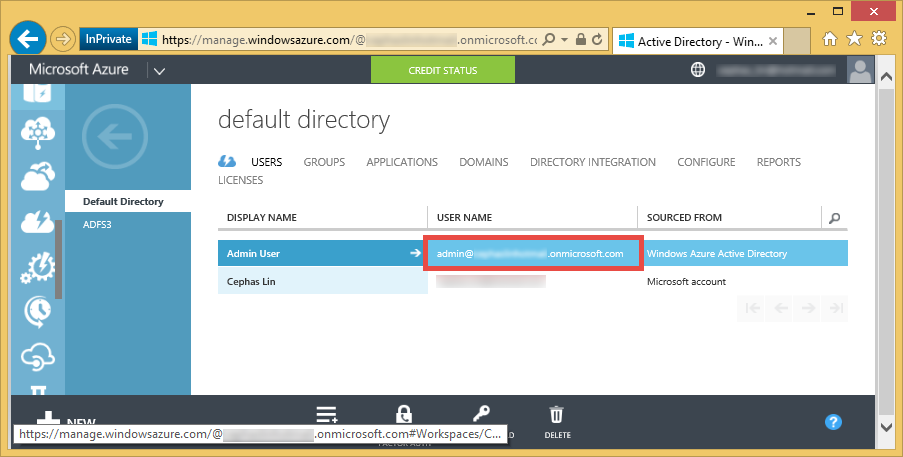
Log out of https://manage.windowsazure.com/ and log back in with the user name you created and the temporary password, then change the password. You are now ready to configure directory sync.
Surprise, surprise. Just a few days before I published, Azure AD Connect went on public preview, which will do almost all the steps below in one tool (albeit with a disclaimer for lab environments only). Azure changes so fast, it's hard to keep up with the latest and greatest.
Back in the RDP session for your ADFS VM, install Microsoft Online Services Sign-In Assistant for IT Professionals RTW and then install Azure Active Directory Module for Windows PowerShell (64-bit version).
From the Start screen, launch Windows Azure Active Directory Module for Windows PowerShell, then run the following commands to create a new Azure AD domain with a trust relationship with your ADFS service:
$cred=Get-Credential
Connect-MsolService –Credential $cred
New-MsolFederatedDomain –DomainName <e.g. contoso.com>
You will be prompted to enter the global administrator's credentials that you just created (<username>@<youraccount>.onmicrosoft.com). Once the commands are completed, you will be asked to verify the domain.
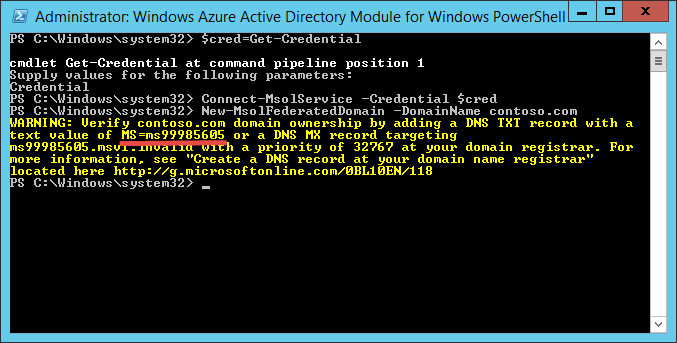
You then need to add a TXT record at your domain registrar. So in my GoDaddy.com account, I created the following entry:

Back in the RDP session for your ADFS VM, in the same Windows Azure Active Directory Module for Windows PowerShell session, press the UP key rerun the last command to create the new federated domain in Azure AD. The command should now succeed.
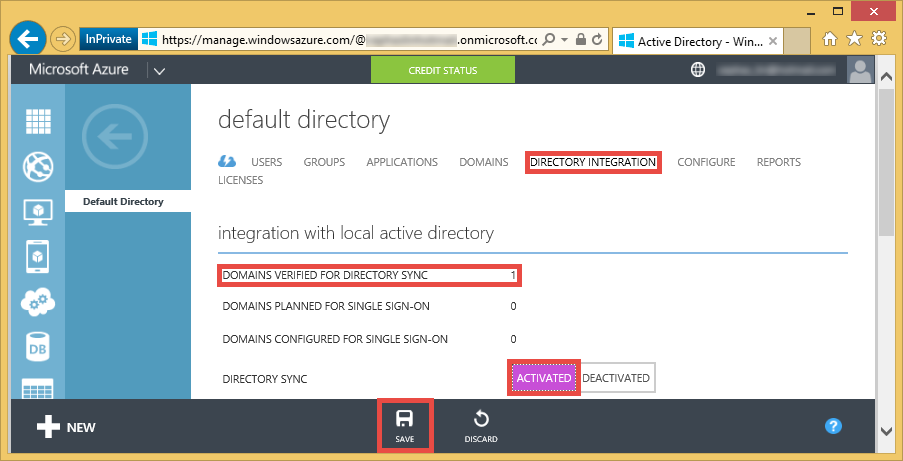
Go back to the default directory view in https://manage.windowsazure.com/, refresh your browser and click Directory Integration at the top. You should now see that there's a domain verified for directory sync. Set Directory Sync to Activated and click Save.
Back in the RDP session for your ADFS VM, install AAD Sync.
After AAD Sync is installed and launched, step through the GUI to enter the following:
- The Azure AD global administrator's credentials (e.g. <username>@<youraccount>.onmicrosoft.com)
- The AD DS credentials for your domain administrator (e.g. CONTOSO\adminuser)
- In Optional Features, select Password synchronization
Go back to the default directory view in https://manage.windowsazure.com/ and refresh your browser. You should now see a domain configured for single sign-on:

Now, add a dummy user to the AD domain to test if it is synced to Azure AD.
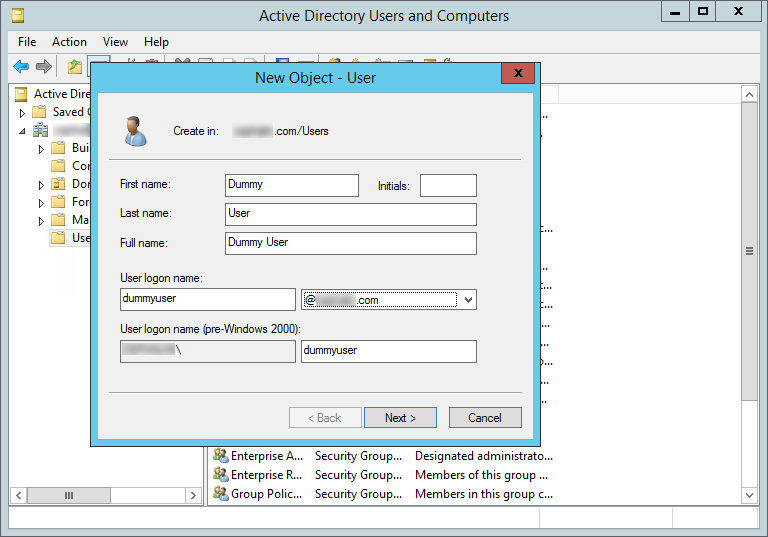
Launch Task Scheduler and run the Azure AD Sync Scheduler task.

Go back to the default directory view in https://manage.windowsazure.com/ and refresh your browser. Click the Users link at the top. You should now see the AD user synced to your Azure AD default directory.