Part 4 of 5: Introduction to Consuming Azure Mobile Services from iOS
This post is about building the iOS Application using Xcode
- You'll need to be running Mac OS along with Xcode to create this iOS application.
- The programming language will be Objective-C .
- We will also download a library to help with the JSON parsing
Previous Posts
Xcode is the IDE used to create iOS Apps
- The download link is here:
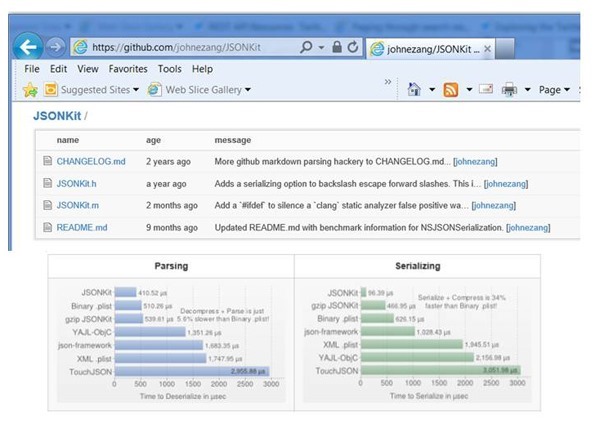
Downloading JSON Kit
- The JSON toolkit dramatically simplifies your Objective-C code.
- This free kit saves you the trouble of parsing JSON formatted data.
- We will download this kit and leverage a couple of files.
- The link.
- There are two key files:
- JKSONKit.h
- JKSONKit.m
- The two files above will be added to our iOS project.
Starting Xcode, Creating a project
- The first step is to create a project.
- Start Xcode and choose the following menu selections, File / New / New Project.
- The next screen will allow you to select the type of project you would like for your iPhone.
- We will select a Navigation-based Application.
Creating a Navigation-based Application
- We are choosing a Navigation-based Application because it makes it easy to use the TableView control.
- The TableView control is what will display our ToDo data, as shown previously.
- You can think of the table view control being similar to a grid control in other environments.
- The TableView control is used by iOS developers because it has a lot of powerful, built-in capabilities (graphics, sorting, master/detail, etc).
- It allows you to display columnar data easily and efficiently.
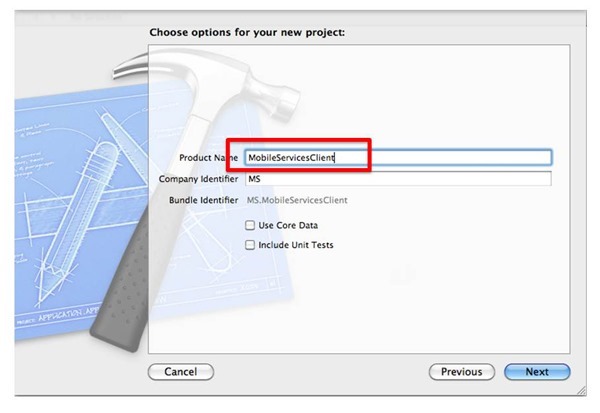
Project Name
- You can name your project anything you want.
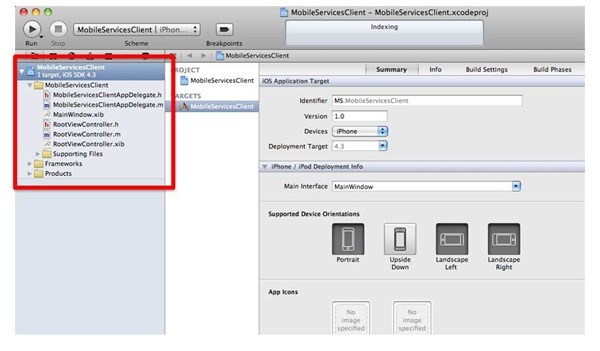
The project files have been generated
- We will need to do a couple of things at this point:
- Add the JSONKit files
- Modify RootViewController.h and RootViewController.m
- We would get this done in the final post (Part 5)
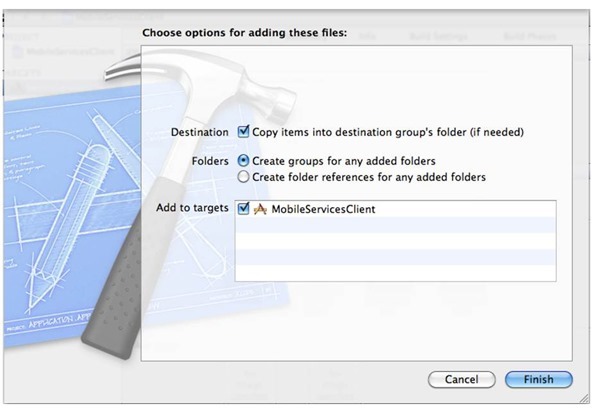
Simply click Finish
- We can accept the defaults indicated above.
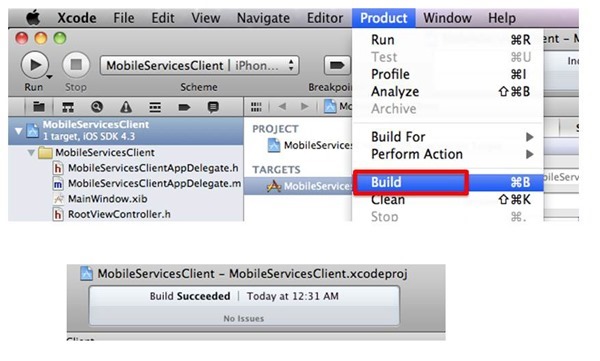
Verifying correctness
- Go to the PRODUCT menu and choose BUILD.
- In the isn't enough and the
You will need a trial account for Windows Azure for these posts to make sense
- Please sign up for it here:
Next post is the final post, part 5
In the final poster will complete our iOS phone application. A bunch of Objective-C code will be presented. We would download the JSON kit to help with the parsing of the JSON data.


