Incremental data load from Azure Table Storage to Azure SQL using Azure Data Factory
Azure Data Factory is a cloud based data integration service. The service not only helps to move data between cloud services but also helps to move data from/to on-premises. For example, moving data from Azure blob storage to Azure SQL etc. You can find supported data stores here.
Many business scenario starts with an initial data load, then continual incremental data loads, either hourly/daily/monthly etc. The focus of this post is to explain ADF creation and how incremental data could be loaded.
Prerequisite
- Azure Subscription
- Azure Table Storage which hosts the source data
- Azure SQL DB which hold table to store data
- PowerShell/.Net SDK if you want to create ADF solution from said platform. In this blog we’ll be using Azure portal without this requirement.
Setting up the initial scenario
Everyday new data lands in an Azure Table, and needs to be updated on Azure SQL Database on some periodic basis, daily/hourly/monthly depending on the schedule desired. We don’t want to upload the entire table daily rather just want to add new data at destination. In this example I will focus on Employee data defined in next section.
Azure Table storage
Here is the sample data that will be our Copy Activity source. In this example we will be using Azure Storage Explorer.
Here is the schema defined for records.
PartitionKey, RowKey and Timestamp are automatically included for every entity. PartitionKey and RowKey value will be user/developer responsibility to fill in whereas Timestamp value manage by server which can’t be changed/modified. So if schema doesn’t have any property to define when record added then Timestamp property can be used. For more information about Table service model please click here.
As shown in above screenshot, Azure storage explorer 6.0.0 doesn’t show Timestamp property.
Azure SQL Server
Below is the table definition defined in Azure SQL Database that will be our Copy Activity Sink (destination).
Azure Data Factory Solution
In this section, we will be creating an Azure Data Factory.
Creating ADF Service
- Go to https://portal.azure.com
- Click New
- Click Data + Analytics
- Click Data Factory
- Enter Azure Data Factory Name
- Select Subscription
- Select/Create new Resource group name
- Select Pin to Dashboard
- Click Create
- Once ADF created, there will be an tile added at home screen.
- Click Author and deploy
Creating Data Sources
Azure Storage
-
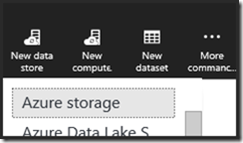
- Click New data store
-
- Select Azure storage
- Provide storage account name and account key
-
- Click Deploy
Azure SQL
-
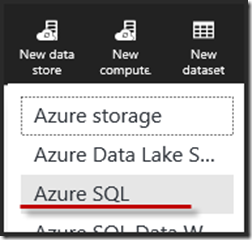
- Click New data store
- Click Azure SQL
-
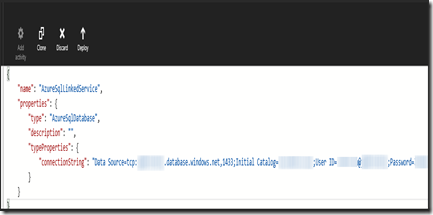
- Provide Server name
- Provide Initial Catalog (database name)
- Provide user id and password
-
- Click Deploy
Creating Dataset
Azure Table
-
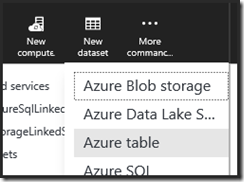
- Click New dataset
-
- Select Azure table
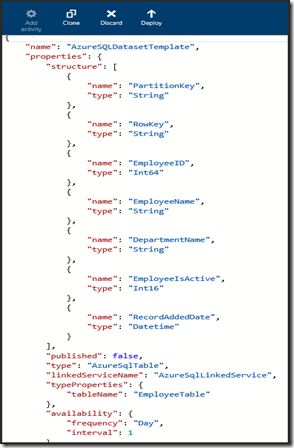
- Refer article Datasets to understand properties like Structure, Published, type, typeProperties etc.
-
- Click Deploy
Azure SQL
-
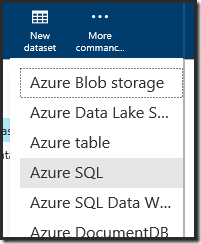
- Click New dataset
-
- Select Azure SQL
-
- Click Deploy
Creating Pipeline
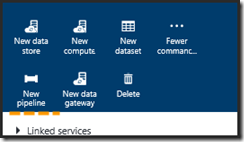
- Click New pipeline
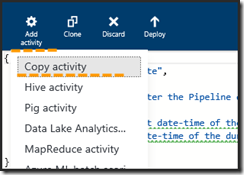
- Click Add activity and select Copy activity
- Add the code for data transformation. It will be look like below once done.
- Click Deploy. The diagram will look like below.
Once this pipeline is deployed, it will start processing the data based on the start and end time. In this blog we define in scheduler frequency is Day and interval is 1. That means it will run daily once. We also define start and end time for this pipeline and as per the definition it will run only for one day. For more information on Pipeline execution please refer Scheduling and Execution with Data Factory.
Go back to the Data Factory which we created in the web portal. Click Pipelines and select the pipeline which we created just now.
On summary page click Datasets, Consumed. Notice the Pipeline Activities details shows it executed once.
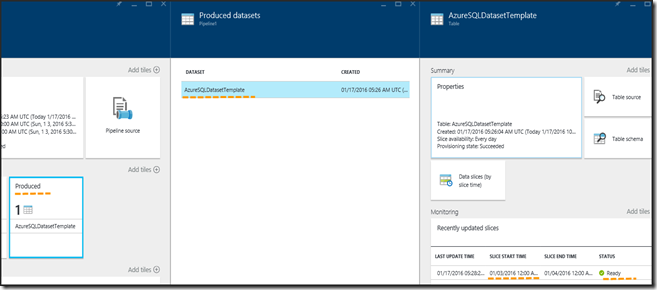
Go back and click Datasets, Produced. Notice the Slice is in the “Ready” state, meaning data has been transferred. Sometime it will show Pending Execution means it’s waiting to execute. Is progress means it is still running. You may notice Error state in case there is any error while designing/execution of pipeline.
Checking Execution
You can use SQL Server Management studio to confirm if the data arrived or not. Do a select query on destination table to confirm.
Incremental load
Now that we have all the data loaded in destination, the next step is that we want to move incremental data on a daily basis rather than deleting and inserting the whole set of data. In this example, we will be adding some additional records with different dates and will insert data for specific date. Below is sample data added in Azure Table storage.
As an example, for the next date, we’ll move data only for 9-January-2016. To do this first change we will do in pipeline is to fetch specific data from source. To do we’ll add the line below in JSON property azureTableSourceQuery for the data factory pipeline.
"azureTableSourceQuery": "$$Text.Format('RecordAddedDate eq datetime\\'{0:yyyy-MM-ddTHH:mm:ss}\\'', SliceStart)"
The above query will filter record based on the slice Start Time on RecordAddedDate property. $$ is used to invoke data factory macro functions. Since RecordAddedDate is a date-time property we need to add datetime prefix to cast it. In this example we will filter records where RecordAddedDate equals to SliceStart date. We can also define SliceStart, SliceEnd, WindowStart or WindowEnd as parameter.
*Note:- if RecordAddedDate property is not define in table entity, we can use Timestamp property. Please refer Azure Table Storage section at the beginning of this blog.
Add changes and deploy
Once the JSON is deployed, and the Produced dataset state is in Ready status, you can query the SQL Server table to see the second copy activity’s output. Notice it has only transferred data for 09-Jan-2016.
Generally, in such defined scheduler, ADF pipeline executes at 12:00:00 AM daily. In case if required to run pipeline in different time instead of default (12:00:00 AM) let say 6:00:00 AM then add "offset": "06:00:00" property.
Thanks my colleague Jason for reviewing this post.
Hope it’s helpful.
Comments
- Anonymous
March 16, 2017
Is it necessary that we need to have a datetime column in our data for achieving incremental delta load. If it is not so, how can we do that?


