Connecting Devices – IoT Part 1
Getting Started…
I recently did a community event on IoT and thought to share my learning's.
My journey with IoT starts when I started working on Microsoft Azure Stream Analytic Service. It’s interesting how real time reporting brings lot of insights for business decision maker to get real sense of their business and make effective decisions. There are lot of real time services available like storm, MapR, Microsoft Azure Stream Analytic Service etc which help building real time solutions. I worked on Apache storm and when I started working on Azure Stream Analytic Services, one thought came to my mind which is “This is really simple”. I am not doing any comparison here which many people might be interested in. I will probably write another blog on such comparison but for now some information can be found here.
During my research phase, I read lot about IoT (Internet of Things). So I started getting deeper and deeper and wonder how technology benefit world in real time. How this concept can help us to make a better world. There are lot of work going on in this direction.
I started looking onto sensors, board, devices etc. so that I can get involved in it. I looked onto various boards available in the market like CubieBoard, Banana Pi, MinnowBoard Max, Intel Galileo, Raspberrypi etc. I bought raspberry pi because it’s cheap ![]() and I thought to use it as my entertainment device at home. I setup my raspberry pi device with sensor and send all information to PowerBI through Microsoft Service bus and Azure Stream Analytics. Here are the steps.
and I thought to use it as my entertainment device at home. I setup my raspberry pi device with sensor and send all information to PowerBI through Microsoft Service bus and Azure Stream Analytics. Here are the steps.
When I received my raspberry pi 2 kit, here what I got in the packet.
1) Raspberry Pi 2 Model B with 1GB RAM, QuadCore CPU
2) 16 GB Micro SD Card with NOOBS (New out of box software)
3) Plastic Case
4) 5V 2Amp Power Adapter with Micro USB cable
5) High Quality HDMI Cable
6) 4Pole 3.5mm to 3 RCA Video/Audio Cable
7) Cat5E Network Patch Cable
The 16 GB Micro SD Card I received have ‘new out of box software’ includes various operating system like Raspbian, Pidora, OpenELEC, OSMC, RISC OS, Arch Linux. We can choose to install any one the OS provided in Micro SD Card. Though I have Raspbian on the card but I thought to format it, download the bits and install it. Here are the steps…
Setting up device…
1) Put SD Card in a card reader.
2) Put SD card reader into the laptop.
3) Format the card.
4) Download Raspbian image on a separate disk.
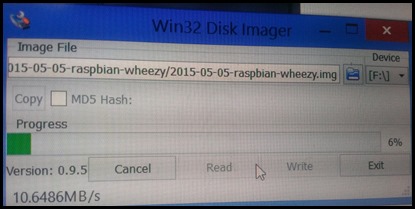
5) I am using “win32 Disk Imager” to the write image (downloaded in previous step) on the card.
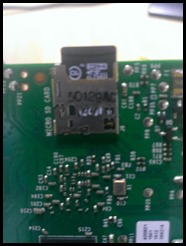
6) Put SD card to raspberry pi
7) Connect network, Power, Display, Keyboard and Mouse to raspberry pi and switch it on.
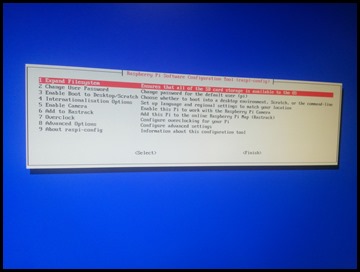
8) It will start booting up the device and pause incase you want to change anything in configuration. The default keyboard layout is British so you may want to change it. That can be done even after. Click finish.
9) Once it finish the configuration, it open the console to run queries. Type “startx” and press enter.
10) The above command will open Linux UI (below).
Next I want to test some code to connect to event hub and send events. Let’s explore how that can be done.
Installing Azure SDK for python…
11) Open LX Terminal.
12) Setting up python setuptools. Type following command sudo easy_install pip
13) Install azure sdk by running following command sudo pip install azure
14) Once installation is done. It’ll be good to reboot. Type sudo reboot and press enter.
15) After Reboot, it will prompt for login and password. Type pi as login and raspberry as password. Press enter.
16) T``ype startx and press enter.
Setting up Service on Microsoft Azure…
Before we exploring python code to send events to Event hub, we need to setup service bus on Microsoft Azure.
17) Open browser on raspberry pi or on any other device.
18) Goto https://manage.windowsazure.com
19) Login with your account which is associated with Microsoft Azure Subscription.
20) Once you login, Click on Service Bus and click CREATE A NEW SERVICEBUS. You can use existing service bus as well.
21) Enter Service Bus Name, Region, Type and Messaging Tier as mentioned below.
22) Once service bus set up, double click on newly created service, click on Configure and copy the Primary Key which is required in next step.
We are not going to create event hub. That will be done through python code. For more information on service bus can be found here.
Sending events from Python code…
23) Open Python IDE
24) Click File, New Window
25) Copy & Paste the following code
#import random because using one of the functions in code
import random
from azure.servicebus import ServiceBusService# SharedAccessKeyName from Azure Portal
key_name ='RootManageSharedAccessKey'# SharedAccessKey from Azure Portal
key_value=''# Pointing to Microsoft Azure Service Bus
sbs = ServiceBusService('SERVICE_BUS_NAME', shared_access_key_name=key_name, shared_access_key_value=key_value)# Event Hub Creation
sbs.create_event_hub('hubcreationfromlinux')# Some randomg values
devicecounts = 5
eventcounts = 1000for eventcount in range (1, eventcounts) :
deviceId = "dev-" + str(random.randrange (1, devicecounts))
temperature = str(float("{0:.2f}".format(random.uniform (0,50))))
sbs.send_event('hubcreationfromlinux', '{ "DeviceId":"' + deviceId + '", "Temperature":"' + temperature +'"}')
print "DeviceId : " + deviceId + " Temperature : " + temperatureThe above code I put up in github here.
26) Click File –> Save
27) Click Run –> Run Module
28) Once code start executing, it will first create a Event hub and then start sending the events.
29) Switch to Microsoft Azure portal and click on newly created event hub. Under the dashboard, it will show events are coming up.
That’s all for now. I hope you like it (though it’s little longer ![]() ). I will write another blog on same line where I will showcase how to use sensors with raspberry pi and sending events to event hub and then how to present that information on PowerBI. Signing off….Have a great day!
). I will write another blog on same line where I will showcase how to use sensors with raspberry pi and sending events to event hub and then how to present that information on PowerBI. Signing off….Have a great day!
- Eat Healthy…Stay Fit and Keep learning.
Comments
Anonymous
July 13, 2015
The comment has been removedAnonymous
July 14, 2015
Nice one. Instead of randomly generating the temperature, one can try logging the temperature of raspberry pi using the following command (in built) /opt/vc/bin/vcgencmd measure_temp :-)Anonymous
July 14, 2015
InterestingAnonymous
July 23, 2015
Wow. Nice article. Hoping you will write future articles using Windows 10 on Raspberry Pi 2.Anonymous
April 10, 2016
Excellent article. I have the service bus created and the event hub WAS created in my python script. However I don't see any temperatures in the even hub graph? I think a SAS (Shared Access Policy) is required when creating the event hub, did you not have to do that?You have done a great job documenting step by step so it is not a criticism. I'm just trying to understand why I'm not getting events and you are.Big project. I have temperature data coming in from a sensor on a RaspberryPi2.- Anonymous
July 06, 2016
Hi Jesse,Thanks for the feedback. Yes you were correct. You need Service Bus Access key to create event hub (or any other hub). It's part of my code.# SharedAccessKeyName from Azure Portal key_name =’RootManageSharedAccessKey’# SharedAccessKey from Azure Portal key_value=” Thanks and Regards.Sudhir Rawat
- Anonymous
Anonymous
November 27, 2016
Excellent


![clip_image002[5] clip_image002[5]](https://msdntnarchive.z22.web.core.windows.net/media/MSDNBlogsFS/prod.evol.blogs.msdn.com/CommunityServer.Blogs.Components.WeblogFiles/00/00/01/53/94/metablogapi/1680.clip_image0025_thumb_07583362.jpg)


