Handling app transition with Advanced Installer Express
When you decide to package a desktop application using the Desktop Bridge and to release it on the Microsoft Store, a problem can arise. What happens if the user already has my application installed as a traditional desktop app? Worst case scenario, the two applications step on each other and start returning all kind of errors and issues. But even in the best scenario, in which the two applications can happily live side by side, the user experience would be really bad: what’s the point of having the same app installed twice on the same machine? What happens if I click on the taskbar icon? Am I opening the desktop version or the Store version?
To address this problem the Windows team has added support in the Desktop Bridge for the app transition concept. When the user installs the Store version of your app and Windows detects that you have also the classic desktop one installed, the system will take care of performing some tasks to make the overall user experience better, like redirecting all the Start menu and taskbar shortcuts to the new version. Some tasks, instead, must be handled manually by the developer, like migrating the data or uninstalling the desktop version.
In this post we’re going to see how to handle app transition and how Advanced Installer Express, the free version of the tool which we have discussed in the previous post, can help to make simpler to handle the manual tasks.
What Windows can do for me? Taskbar shortcuts & tiles transition
A very common scenario, especially if your app is frequently used, is to have some shortcuts that make quicker and easier to launch your application. For example, the user can create a tile on the Start screen or add a shortcut on the taskbar. When you install the Store version of your app, you want to make sure that all the existing shortcuts are kept but, at the same time, they should start redirecting the user to the Store version instead of the desktop one.
To achieve this goal the team has added a specific Desktop Bridge extensions, which can be declared in the manifest. It’s called windows.desktopAppMigration and its purpose is to reconfigure all the existing shortcuts so that they start to point to the Store version of your application. Its definition is quite simple:
 <rescap3:Extension Category="windows.desktopAppMigration">
   <rescap3:DesktopAppMigration>
      <rescap3:DesktopApp ShortcutPath="%USERPROFILE%\Desktop\[my_app].lnk" />
      <rescap3:DesktopApp ShortcutPath="%APPDATA%\Microsoft\Windows\Start Menu\Programs\[my_app].lnk" />
      <rescap3:DesktopApp ShortcutPath="%PROGRAMDATA%\Microsoft\Windows\Start Menu\Programs\[my_app_folder]\[my_app].lnk"/>
   </rescap3:DesktopAppMigration>
</rescap3:Extension>
This extension is part of the rescap3 namespace, which must be declared in the root of the manifest.
 <Package IgnorableNamespaces="uap uap3 rescap rescap3"
        xmlns="https://schemas.microsoft.com/appx/manifest/foundation/windows10"
        xmlns:uap="https://schemas.microsoft.com/appx/manifest/uap/windows10"
        xmlns:uap3="https://schemas.microsoft.com/appx/manifest/uap/windows10/3"
        xmlns:rescap="https://schemas.microsoft.com/appx/manifest/foundation/windows10/restrictedcapabilities"
        xmlns:rescap3="https://schemas.microsoft.com/appx/manifest/foundation/windows10/restrictedcapabilities/3">

</Package>
Inside a DesktopAppMigration entry you can specify multiple DesktopApp items, one for each shortcut which is created during the setup by your application. In the previous sample, we have created three entries to handle the shortcuts on the desktop and on the Start menu. Each entry has a ShortcutPath attribute which points to the full path of the LNK file.
To help you testing this scenario, I’m providing you a sample WPF application both as MSI installer and as AppX package. You can get them from https://github.com/Microsoft/Windows-AppConsult-Samples-DesktopBridge\Blog-AppTransition\Installers . In the repository you will find also the source code of the application. You can notice in the MainWindow_Initialized event of the MainWindow class that I’m leveraging the Desktop Bridge Helpers library to detect if the application is running as native Win32 or packaged with the Desktop Bridge. In the second case, I’m changing the title of the window, to make easier to discover which version of the app I’m running.
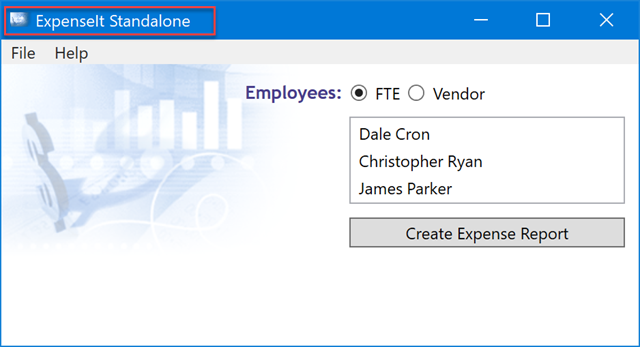
As first, install the app using the traditional MSI and then launch the application. Notice the title of the window:
Now pin the application on your Start menu and in the taskbar, then deploy the AppX package. You will need first to add the AppConsult.pfx certificate to the Trusted people store on your machine, as explained in this article. When you will be asked for a password, use 123456. If you inspect the content of the package, you will notice that the manifest includes the desktopAppMigration extension:
 <Extensions>
  <rescap3:Extension Category="windows.desktopAppMigration">
    <rescap3:DesktopAppMigration>
      <rescap3:DesktopApp ShortcutPath="%APPDATA%\Microsoft\Windows\Start Menu\Programs\ExpenseIt\ExpenseItDemo.exe.lnk"/>
      <rescap3:DesktopApp ShortcutPath="%PROGRAMDATA%\Microsoft\Windows\Start Menu\Programs\ExpenseIt\ExpenseItDemo.exe.lnk"/>
      <rescap3:DesktopApp ShortcutPath="%USERPROFILE%\Desktop\ExpenseItDemo.exe.lnk"/>
    </rescap3:DesktopAppMigration>
  </rescap3:Extension>
</Extensions>
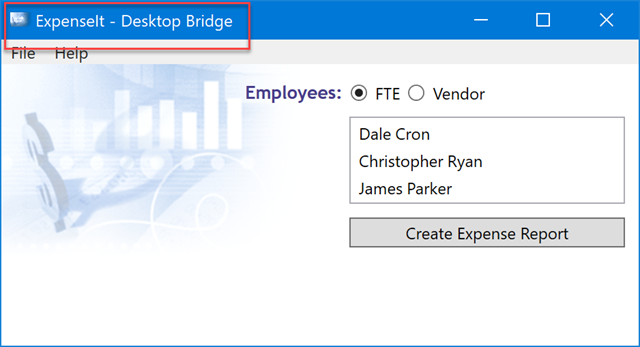
When the package has been deployed, you will immediately notice that the look & feel of the taskbar icon will change and will reflect the new Desktop Bridge app asset. Click on it and you will notice that the title of the window will be different:
Automatically, the taskbar icon is now redirecting you to the Desktop Bridge version of the app and not to the classic Win32 one, despite it’s still installed.
What Windows can do for me? File type association and protocol handler migration
Another common scenario is an application that registers itself to handle some file types or some protocols. This means that, for example, my application can handle files with extension .foo so that, when I double click on one of these files, it’s automatically opened.
The manifest of a Desktop Bridge app has always supported the ability to declare one or more file type associations or protocol handlers. However, in our scenario, we don’t want just to open existing files, but we want to make sure that when the user double clicks on a .foo file the Store version is opened and not the classic desktop one. We can achieve this goal thanks to a special entry in the fileTypeAssociation extension:
 <uap:Extension Category="windows.fileTypeAssociation">
    <uap3:FileTypeAssociation Name=“.foo”>
        <rescap3:MigrationProgIds>
            <rescap3:MigrationProgId>[My_App_ProgId]</rescap3:MigrationProgId>
        </rescap3:MigrationProgIds>
    </uap3:FileTypeAssociation>
</uap:Extension>
The MigrationProgIds can be used to specify the unique ProgId of your existing desktop application, which can be found in the registry as explained in the official documentation. Thanks to this entry, we can be sure that every existing .foo file on our machine won’t be opened anymore with the traditional desktop version of our app, but with the one the user has downloaded from the Store.
What Windows can’t do for me? Uninstallation and data migration
After we have redirected the user to use our new shiny Store application instead of the classic desktop one, we need however to make sure that he isn’t going to lose his data and that he won’t be confused by the presence of two versions of the same app on the same machine.
However, both these operations can’t be performed directly by Windows, because it doesn’t know how we have structured the data of our application or how the uninstallation process works. From a high level point of view, it’s our responsibility to:
- Check, when the app starts, if the traditional desktop version is still installed
- Starts a task to copy the existing data to the new location (for example, the local storage assigned to Store apps)
- Start another task to perform the uninstall procedure of the existing app
You can find a good sample of this approach in the official GitHub repository by the Desktop Bridge team. However, as you can see browsing the project, there are multiple challenges to face:
- You need to change the code of your application, since all the operations must be done at runtime when the application starts
- To migrate your data, you can’t simply use the Windows APIs to copy the needed files because of the file system redirection enforced by the Desktop Bridge. Let’s say, for example, that your application stores the data in the AppData folder (eg. C:\users\<username>\AppData\Local\<myapp>). Every attempt to access to this location using the Windows APIs will trigger the file system redirection, which means that the application will access under the hood to the new local folder in C:\users\<username>\AppData\Local\Packages\<myapp_PFN>\LocalCache. As such, you are forced to use an external tool (which lives outside the installation package) in order to avoid the file system redirection. The sample provided by the Desktop Bridge team, for example, uses the robocopy command line tool to perform the migration.
- You need to identify the uninstall string of your application in the registry in order to detect the process to launch to start the uninstall process.
This is where Advanced Installer Express comes to the rescue, by giving us a huge help in handling this scenario. Let’s see how.
Setting up the app transition in Advanced Installer Express
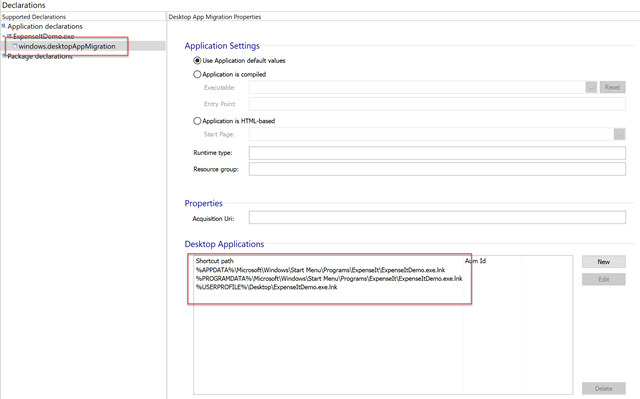
If you already have an Advanced Installer’s project to create a MSI setup and you add AppX as a new build target, Advanced Installer will automatically add the desktopAppMigration extension for you in the manifest file. You can see it in the Declarations section of the tool:
As we have seen in the previous post, Advanced Installer Express makes easier to declare Desktop Bridge specific extensions thanks to the visual editor. However, the real magic happens when you move to the Package Information section of the tool. At the bottom, you will see a section called Migration:
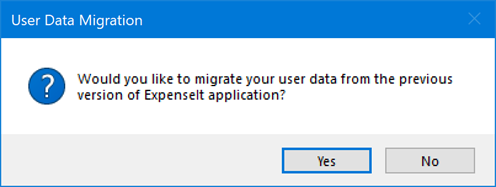
The Uninstall code field will be already filled with the unique CLSID of your application, retrieved from the MSI definition. Optionally, you can also specify the path where the original data of your application is stored. In the end, you can choose the approach you want to leverage: a silent migration of the data or an explicit request to the user.
Now move to the Builds section and use the AppX build definition (as we’ve seen in the previous post) to generate a new app package. If you’ll explore its content (just open the AppX file with a compression tool like 7-Zip), you will immediately notice something different than a traditional app package:
- There’s a folder called AI_STUBS which includes an executable called AI_STUB.EXE
- If you open the manifest with a text editor, you will notice that the entry point in the <Application> node isn’t the main executable of our application (in our case, the ExpenseItDemo.exe process) but the AI_STUB.EXE file we have just seen
This executable is automatically generated by Advanced Installer and it will take care of doing all the app transition for you:
- It will migrate the data from the folder you have specified in the tool to the local storage of your Store application
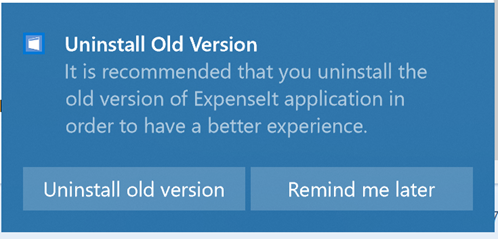
- It will display a notification to the user, inviting him to uninstall the old desktop version
You can easily see this behavior by deploying again the traditional MSI and then the AppX of the ExpenseIt sample app. After starting the Desktop Bridge version, you will see this notification popping out in Windows:
By pressing Uninstall old version, the uninstaller of the traditional desktop version will be triggered. This notification will be displayed every time we’re going to launch the Desktop Bridge version, until the classic desktop version will be removed. If you have specified also a User data folder, the operation will also take care of copying all the content of that folder to the C:\Users\<username>\AppData\Local\Packages\<MyApp_PFN>\LocalState folder, which represents the local storage of your Store app. In this case, you will have also to change a bit the code of your application to make sure that it’s able to work properly also when the data is stored in this new location.
Wrapping up
In this post we have seen how to help users to transition from the classic desktop version of your app to the Store version, which is critical to ensure a good user experience. Users expect to start using your new shiny Desktop Bridge version out of the box, without having to take care of manually copying data, uninstalling the old version of the app, recreating all the tiles and shortcuts, etc. Some tasks, like shortcuts and file associations transitions, are easily handled by Windows thanks to a manifest extension. However, some other tasks, like uninstalling the old app or migrating the data, pose some challenges. We have seen how the new free tool Advanced Installer Express can help to solve them in an easy way, thanks to an intermediate process that takes care of doing the transition and then launching the Desktop Bridge version of our application.
Remember that you can download Advanced Installer Express for free from here, while you can download the source code and the packages used in this blog post from GitHub.
Happy packaging!
