How to increase 2000 query result limit and implement query result filtering in the new SCSM HTML5 Self-Service Portal like a boss!!!
Among other great new features in the OOB HTML Portal mentioned here, https://blogs.technet.microsoft.com/antoni/2016/04/06/the-new-html5-based-self-service-portal-ssp-in-system-center-2012-r2-service-manager-ur8/ one of those is the fact that query results are not loaded initially with the page:
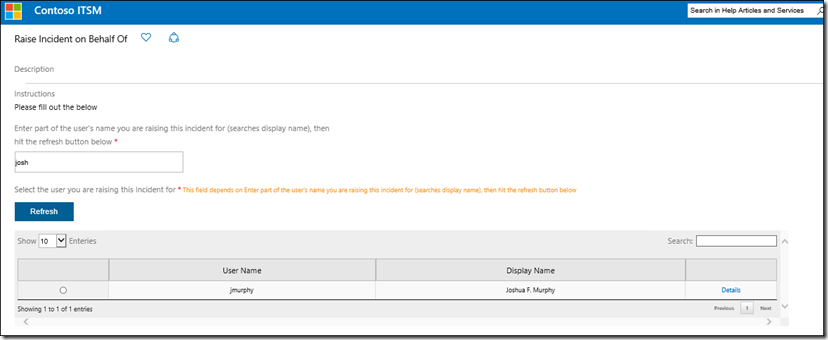
Note, this uses the ‘Raise Incident on Behalf of’ Request Offering example that I documented here a little while ago: https://aka.ms/behalf
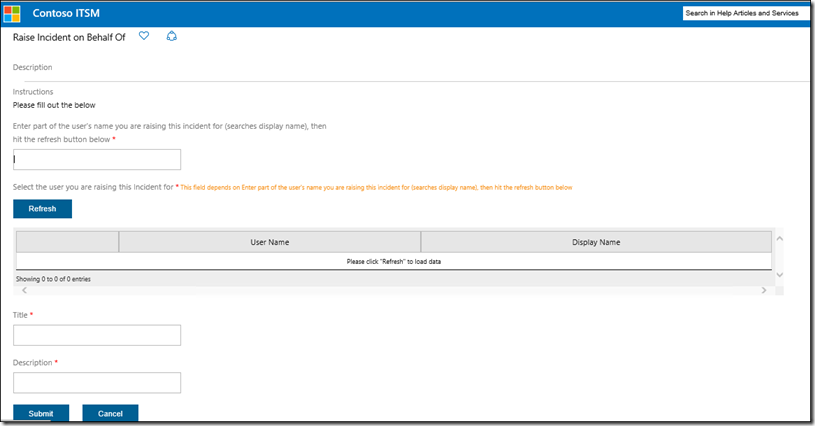
Required Refresh in new HTML SSP:
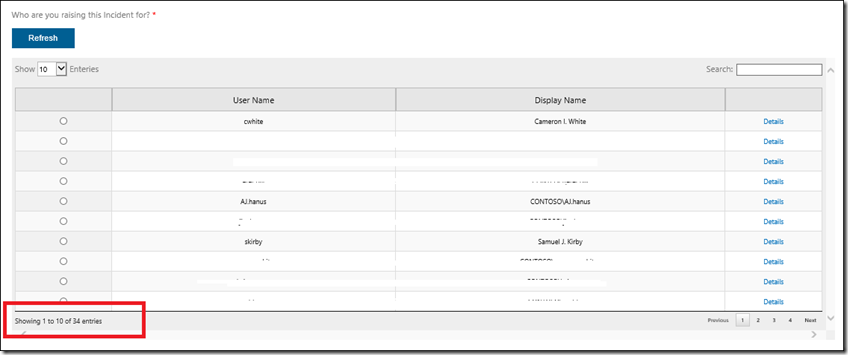
Whenever you use a ‘query results’ field which allows you to pick a given object from the CMDB (a user you are raising an incident for in the example below), the available objects are not loaded until you hit the blue refresh button:
In the old portal, all objects would be loaded along with the initial page loading, causing delays when a large number of objects were being returned.
In this situation, You would sometimes become a little more well acquainted with this dialog than desired:
Now the fundamental behavior has changed in that no objects are loaded in the portal, until you hit the refresh button.
However, OOB, the biggest number you will see above is 2000. In the above example where we’re querying Active Directory Users, if your Service Manager CMDB contains more than 2000 users brought in from Active Directory (the AD Connector may have been scoped down to certain OUs etc. to help circumvent this), you’re going need to get very lucky to see your record available for selection.
There are 3 ways to manipulate this behavior, or you can can use a combination of the three
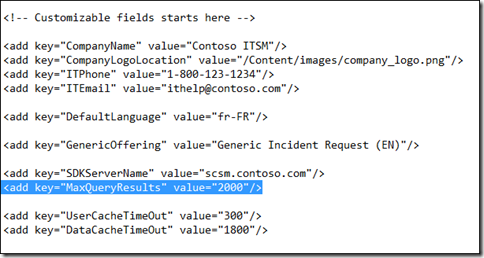
1) Change the maxqueryresults value in the web.config file from 2000 to the desired value.
2) Add criteria in the Query Results Configuration
3) Add an extra prompt for searching
Here are the steps on how to implement each of these:
1) Change the maxqueryresults value from 2000 to the desired value.
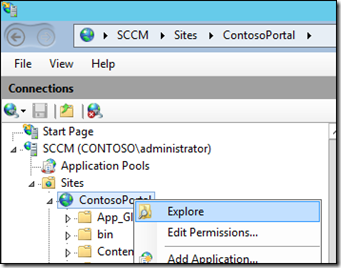
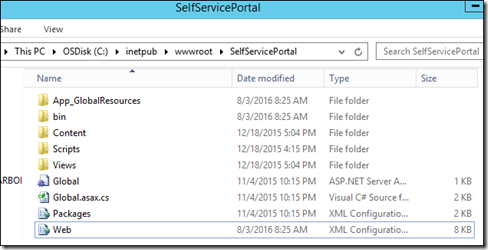
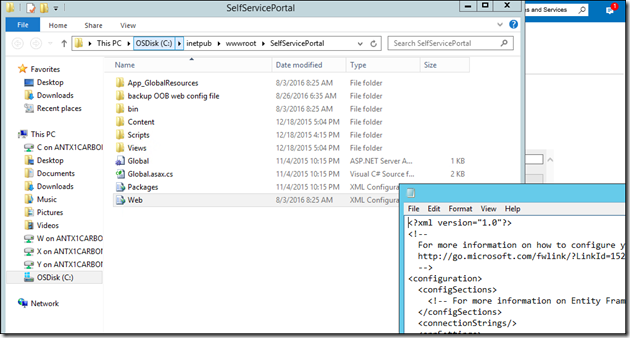
Click Explore in IIS to find the web.config file location:
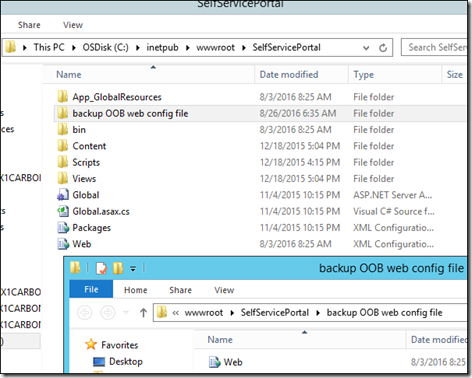
Create a backup of the Web.config file:
Open up Notepad and drag web.config into it:
Customize the MaxQueryResults value and then save the modified web.config file:
Save the edited web.config file and Restart IIS.
Details on other settings that can be configured in the web.config file can be found here:
Deploy the new self-service portal > ‘Customize the self-service portal’ Section
NOTE: if your search is going to be slow after upping it, you may want to read on and use one or both of the following techniques also
2) Add criteria in the Query Results Configuration
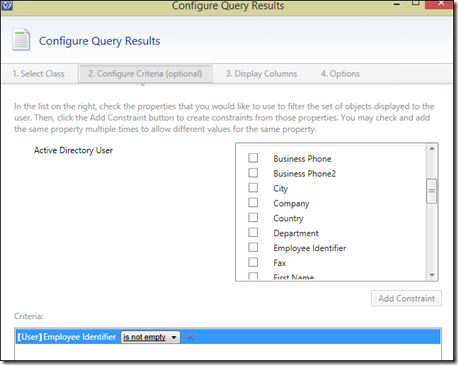
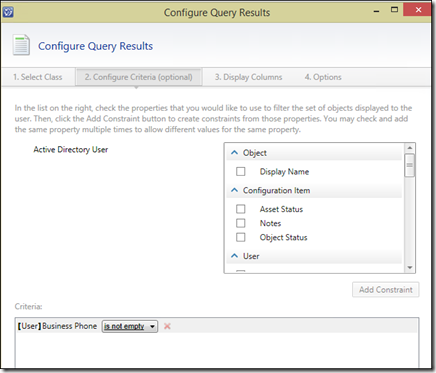
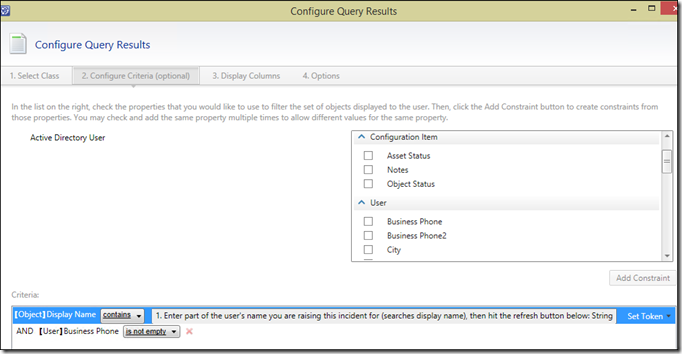
Add a piece of criteria such as business phone / employee ID is not empty in the query results configuration:
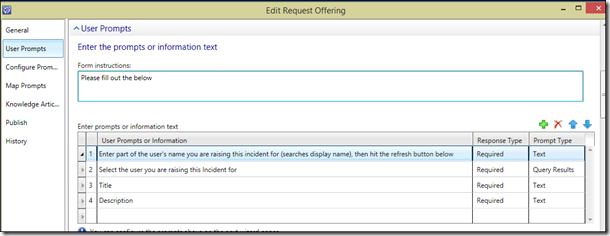
In the Request Offering, add an extra user prompt field:
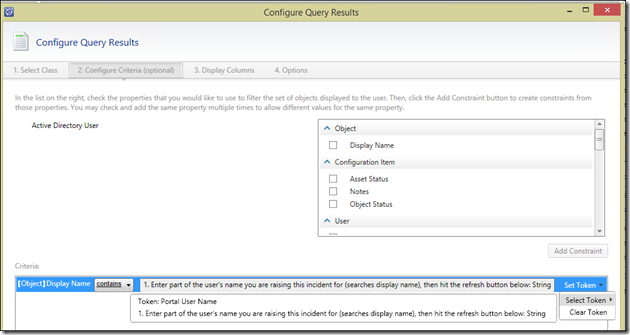
In the configuration of the query results prompt (2 – Select the user in my case) add the property you want to search for the value entered in the first prompt (display name in my case). I use the Contains operator. Then click the arrow to the right of ‘Set Token’ and choose the prompt you added:
Or to go all out, use a combination of all 3 methods as shown here ![]()
The end result looks a little something like this:
Happy HTML SSP-ing ![]() I would greatly appreciate it if you could rate my article and / or leave feedback if this helped you!
I would greatly appreciate it if you could rate my article and / or leave feedback if this helped you! ![]()
Cheers, Antoni


