Manage privileged access management
Managing Privileged Access Management (PAM) involves monitoring and maintaining the workflows, policies, and approvals associated with privileged administrative access.
Manage requests
Managing requests is the core function of Privileged Access Management (PAM), ensuring that sensitive tasks requiring elevated permissions are authorized only when necessary. Submitting, approving, or denying requests ensures that administrative actions are controlled, logged, and compliant with security policies.
Submit a request
Submitting a request allows users to gain temporary elevated permissions to perform tasks requiring higher privileges. This ensures that sensitive operations are completed securely without granting standing access, reducing the risk of misuse or breaches. Requests for privileged access are valid for up to 24 hours after the request is submitted. If not approved or denied, the requests expire and access isn't approved.
Submit a request using the Microsoft 365 Admin Center
Sign into the Microsoft 365 Admin Center.
Navigate to Settings > Org settings > Security & privacy > Privileged access.
Select Create policies and manage requests > Request access and complete the form:
Type: Task, Role, or Role Group
Scope: Exchange
Access to: Select from available options
Duration (hours): Number of hours of requested access. There isn't a limit on the number of hours that can be requested.
Reason: Provide a reason for the request
Select Create to create a new privileged access management request.
Submit a request using PowerShell
Use the New-ElevatedAccessRequest cmdlet in PowerShell to submit a privileged access request. This request temporarily grants elevated permissions for a specified task:
New-ElevatedAccessRequest -Task 'Exchange\<exchange management cmdlet name>' -Reason '<appropriate reason>' -DurationHours <duration in hours>
Example:
New-ElevatedAccessRequest -Task 'Exchange\New-MoveRequest' -Reason 'Attempting to fix the user mailbox error' -DurationHours 4
-Task: Specifies the Exchange cmdlet for which privileged access is requested.-Reason: Provides a justification for the request.-DurationHours: Defines the duration (in hours) for the elevated access.
Approve or deny requests
Approving or denying requests enables approvers to evaluate the necessity and appropriateness of a user's elevated access request. This step enforces organizational security policies and ensures only authorized users can execute privileged tasks.
Approve or deny a request using the Microsoft 365 Admin Center
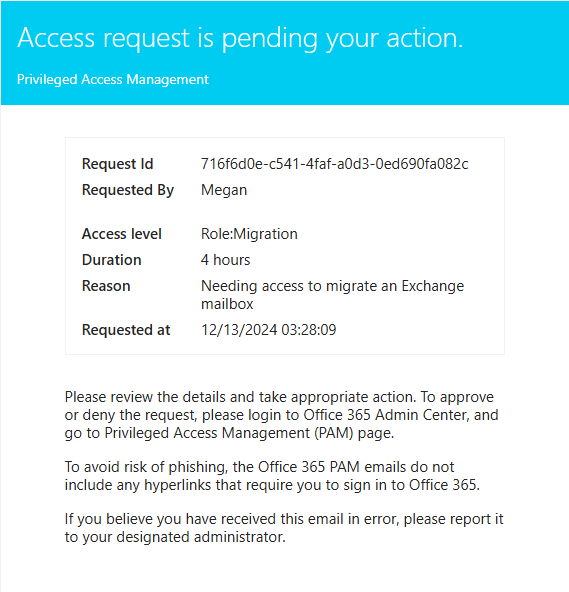
Approvers receive an email notification for the request.
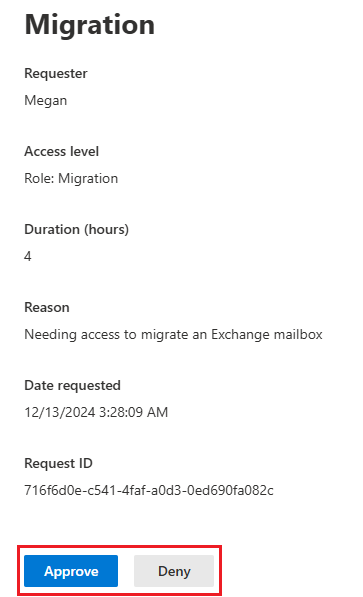
Approvers can log into the admin center and:
Review the request details
Approve or deny the request
Approved requests allow the user to complete the task within the specified duration.
Approve or deny a request using PowerShell
To approve or deny privileged access management requests with PowerShell:
Approve a request:
Use the
Approve-ElevatedAccessRequestcmdlet to grant a submitted access request:Approve-ElevatedAccessRequest -RequestId <request id> -Comment '<approval comment>'Example:
Approve-ElevatedAccessRequest -RequestId a4bc1bdf-00a1-42b4-be65-b6c63d6be279 -Comment '<approval comment>'Deny a request:
Use the
Deny-ElevatedAccessRequestcmdlet to reject a submitted access request:Deny-ElevatedAccessRequest -RequestId <request id> -Comment '<denial comment>'Example:
Deny-ElevatedAccessRequest -RequestId a4bc1bdf-00a1-42b4-be65-b6c63d6be279 -Comment '<denial comment>'-RequestId: Identifies the specific request to approve.-Comment: Adds optional comments regarding the approval or denial decision.
View, modify, and delete policies
Privileged access policies are the backbone of PAM, defining the conditions under which access is granted. Regularly reviewing, modifying, and removing policies ensures that your organization's security configurations remain up-to-date and aligned with operational needs.
View, modify, and delete policies using the Microsoft 365 Admin Center
Navigate to Settings > Org settings > Security & privacy > Privileged access.
Select Create policies and manage requests > Manage policies.
From here, you can:
View policies: Review all configured policies and their details.
Modify policies: Update fields like:
Update Approval type to switch between manual and automatic approval.
Change the Approvers to assign a different group responsible for approvals.
Save changes after making updates.
Delete policies: Select the policy to remove, select Remove Policy, and confirm the deletion.
View, modify, and delete policies using PowerShell
View policies
Use the Get-ElevatedAccessApprovalPolicy cmdlet to get a list of privileged access management policies:
Get-ElevatedAccessApprovalPolicy
Modify policies
Use the Set-ElevatedAccessApprovalPolicy cmdlet to update existing privileged access policies. This cmdlet allows changes to fields such as the approval type and approver group:
Set-ElevatedAccessApprovalPolicy -Identity <Policy ID> -ApprovalType '<Manual or Auto>' -ApproverGroup '<New Approver Group>'
Example:
Set-ElevatedAccessApprovalPolicy -Identity 'Policy123' -ApproverGroup 'securityadmins@fabrikam.com' -ApprovalType 'Manual'
-Identity: Identifies the specific policy to modify.-ApproverGroup: Assigns a new mail-enabled security group to handle approvals.-ApprovalType: Updates the policy to require manual or automatic approval.
Delete policies
Use the Remove-ElevatedAccessApprovalPolicy cmdlet to delete outdated privileged access policies. This ensures your environment remains organized:
Remove-ElevatedAccessApprovalPolicy -Identity <Policy ID>
Disable privileged access management
Disabling PAM removes the controls around elevated access requests and approvals, reverting to standard administrative access levels. This action is typically reserved for situations where PAM is no longer required or if an alternate solution is being implemented.
Disable privileged access management using the Microsoft 365 Admin Center
Uncheck Allow privileged access requests and choose a default approval group under the privileged access settings.
Disable privileged access management using PowerShell
Disable-ElevatedAccessControl
Auditing and monitoring PAM
Auditing and monitoring activities are crucial for identifying policy gaps, ensuring compliance, and detecting anomalies. By reviewing logs and conducting regular evaluations, organizations can maintain effective control over privileged access.
Audit logs
PAM activities, including requests and approvals, are logged for compliance purposes:
Navigate to the Microsoft Purview portal.
Select Solutions > Audit and search for activities related to PAM.
Filter logs by activity type, date range, or user.
Regular reviews
Conducting regular reviews ensures that policies and approver group memberships remain relevant and effective. These reviews are essential for adapting to organizational changes and maintaining robust security.
Policy reviews: Periodically evaluate policies to ensure they align with organizational needs.
Approver group membership: Verify that approvers are up to date and authorized.
Troubleshooting PAM issues
Common Issues
Failed request submissions: Ensure that the requestor has sufficient permissions.
Approval delays: Confirm that approvers are receiving notifications and have access to the admin center.
Policy conflicts: Verify that multiple policies don't overlap and cause unintended behaviors.

