Display the Copilot case summary on custom case forms
When you turn on the Copilot case summary feature, representatives can view the case summary by default on out-of-the-box case forms. However, many organizations use custom forms that are tailored to the way that their representatives work. If your organization uses custom forms, you need to add them manually.
Follow these steps to have the application display the Copilot case summary on your custom case forms:
In Microsoft Power Apps, add the msdyn_CopilotCaseSummaryLibrary.js web resource to your solution. For more information, see Add a web resource to a solution.
Select Add existing > More > Developer > Custom Control.
Search for and add the
mscrmcontrols.csintelligence.copilotcasesummarycontrolcustom control.Select Tables > Case > Forms.
Create a new form or use an existing form. For more information, see Create, edit, or configure forms using the model-driven form designer.
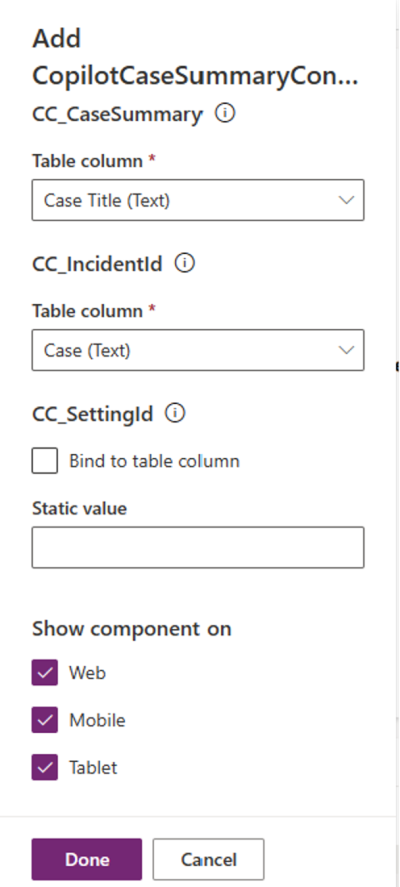
In the form designer, select Components from the left navigation. Select CopilotCaseSummaryControl and then drag it on to the form.
Set the values of the following fields:
CC_CaseSummary - Any unused string column. Copy the unique name of the specified column.
CC_IncidentId - Case (Text)
Save and publish the customizations.
Next, you need to make sure that the Copilot summary doesn't load on the custom case form when the Copilot case summary feature isn't turned on. Additionally, you need to ensure that the summary doesn't load when the agent experience profile that's linked to the representative doesn't have the Copilot option turned on:
In Power Apps, add the event handler function for the On Change event. For more information, see Add or remove event handler function to event using UI.
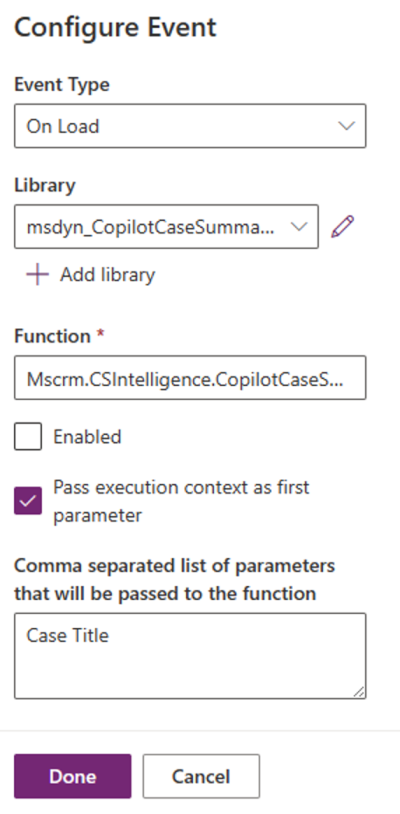
Specify the following details on the Configure Event dialog:
Set the Event Type to On Load.
Set the Library to msdyn_CopilotCaseSummaryLibrary.js.
Specify Mscrm.CSIntelligence.CopilotCaseSummary.setVisibilityOfCaseSummary in the Function field.
Select the Pass execution context as first parameter option and then specify the unique name of the table column value that you provided in CC_CaseSummary.
Save and publish the changes.
Turn on Copilot features for custom apps
You can turn on Copilot features for custom apps in your organization by following these steps:
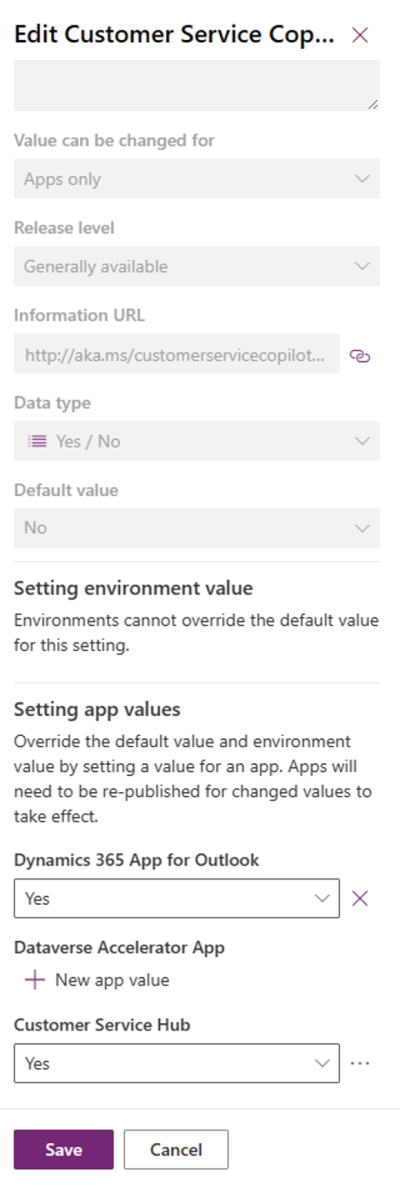
In Power Apps, add the Customer Service Copilot Enabled setting definition. For more information, see Add an existing setting definition.
In the Edit Customer Service Copilot Enabled pane, in the Setting app values section, set the New app value to Yes for a required app. For more information, see Update a setting definition.


