Build Outgoing Webhooks
Important
Microsoft 365 Connectors (previously called Office 365 Connectors) are nearing deprecation, and the creation of new Microsoft 365 Connectors will soon be blocked. For more information on the schedule and how the Workflows app provides a more flexible and secure experience, see retirement of Microsoft 365 connectors within Microsoft Teams.
How can you create a webhook in Teams?
To automatically post to a chat or channel when a webhook request is received, use the predefined workflow templates or create a workflow from scratch using the When a Teams webhook request is received trigger. For more information, see post a workflow when a webhook request is received in Microsoft Teams.
For more information about the When a Teams webhook request is received trigger, see Microsoft Teams - Webhook.
If you've already built Office 365 Connectors:
Create a Power Automate connector: Power Automate enhances the widely used Workflows apps in Teams. It's the scalable and secure approach to transmit data programmatically into and out of Teams. If you adopt this method, you can create workflow templates for posting alerts from your product to Teams channels. This approach simplifies user adoption of the new method. For more information, see Power Automate for enterprise developers, ISVs, and partners.
Update your Teams app: You can enhance your current Teams app. For example, you can enable users to set up proactive messages based on trigger events within your system. For more information, see how bots can post to channels through proactive messages.
Known issues
- Workflows app can't post in private channels as a flow bot. However, it can post on behalf of a user.
- Workflows support Adaptive Cards only. It doesn't support the older message card format that Office 365 Connectors use. Workflows don't support using the message card format. For more information, see how to convert connector message card format to Adaptive Card.
- Workflows don't offer third-party connectors such as DataDog and Jenkins.
- Workflows can only be created in your default environment.
Limitations
Workflows are linked only to specific users (referred to as owners of the workflow) and not to a Teams team or channel. Workflows can become orphan flows in the absence of an owner if no co-owners assigned. To maintain continuity in the business process automated by the flow, admins can add one or more co-owners and grant them full control over the workflow. They can also add authentication for connections, if any, and enable the flow if it has been disabled. For more information, see manage orphan flows.
Webhooks help Microsoft Teams to integrate with external apps. In Teams, the Outgoing Webhooks act as bot and search for messages in channels using @mention. The Outgoing Webhooks allow users to send messages to web services without performing the entire process of creating bots through Microsoft Bot Framework. The Outgoing Webhooks post data from Teams to any service capable of accepting JSON payload.
Key features of Outgoing Webhooks
- Send notifications to any external web service.
- Respond with rich text messages including cards and images.
- Receive messages in public channels and not within the personal or private scope.
- Send HTTP POST to web service and get response.
Note
The Outgoing Webhooks can't access any other APIs, such as retrieve the roster or list of channels in a team.
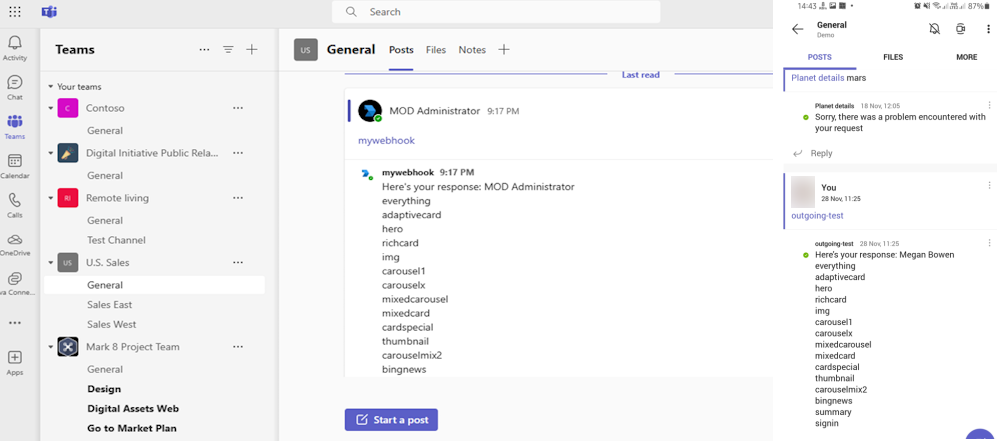
This step-by-step guide helps you to create Outgoing Webhooks in Teams. You'll see the following output:
Prerequisites
Ensure that you install the following tools and set up your development environment:
| Install | For using... | |
|---|---|---|
| Microsoft Teams | Microsoft Teams to collaborate with everyone you work with through apps for chat, meetings, and call all in one place. | |
| Visual Studio 2022 | You can install the enterprise version in Visual Studio 2022, and install the ASP.NET and web development workloads. Use the latest version. | |
| Dev tunnel | Teams app features (conversational bots, message extensions, and incoming webhooks) need inbound connections. A tunnel connects your development system to Teams. Dev tunnel is a powerful tool to securely open your localhost to the internet and control who has access. Dev tunnel is available in Visual Studio 2022 version 17.7.0 or later. or You can also use ngrok as a tunnel to connect your development system to Teams. It isn't required for apps that only include tabs. This package is installed within the project directory (using npm devDependencies). |
Note
After downloading ngrok, sign up and install authtoken.
Set up local environment
Open Microsoft-Teams-Samples.
Select Code.
From the dropdown menu, select Open with GitHub Desktop.
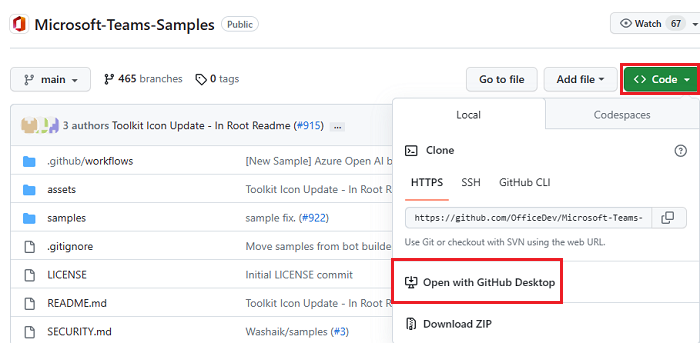
Select Clone.
Create Outgoing Webhooks
Create a tunnel
Open Visual Studio.
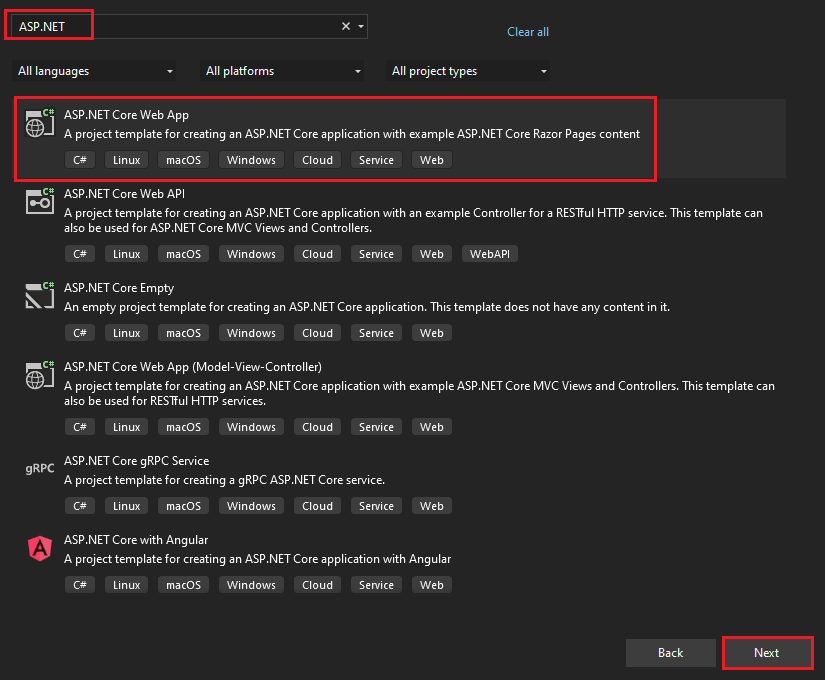
Select Create a new project.

In the search box, enter ASP.NET. From the search results, select ASP.NET Core Web App.
Select Next.
Enter Project name and select Next.
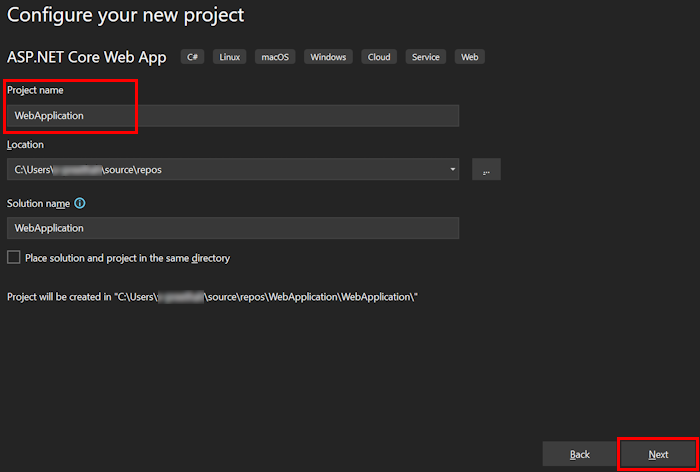
Select Create.

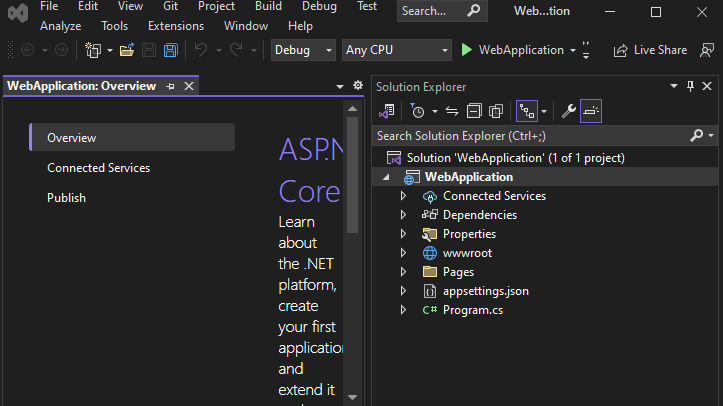
An overview window appears.
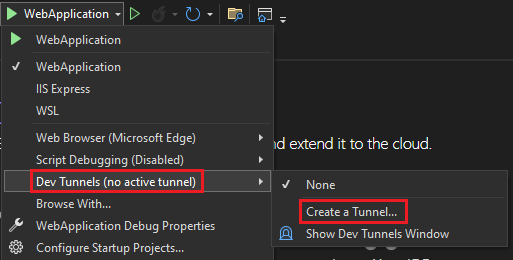
In the debug dropdown list, select Dev Tunnels (no active tunnel) > Create a Tunnel....
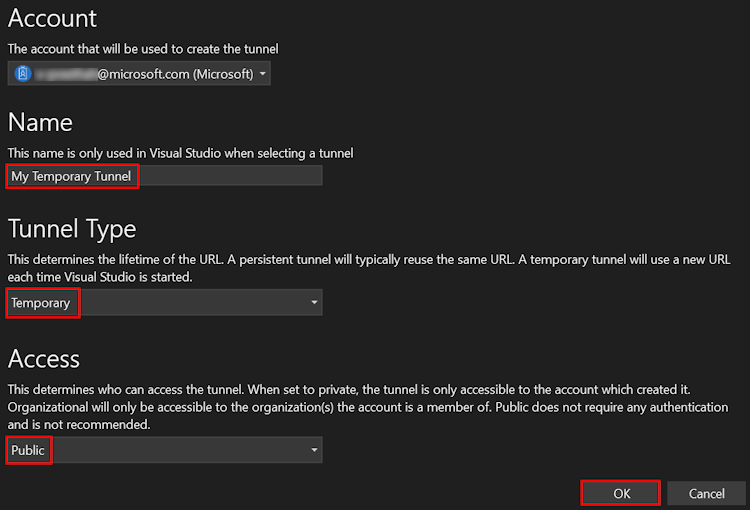
A pop-up window appears.
Update the following details in the pop-up window:
- Account: Enter a Microsoft or GitHub account.
- Name: Enter a name for your tunnel.
- Tunnel Type: From the dropdown list, select Temporary.
- Access: From the dropdown list, select Public.
Select OK.
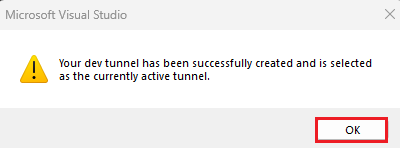
A pop-up window appears showing that dev tunnel is successfully created.
Select OK.
You can find the tunnel you've created in the debug dropdown list as follows:
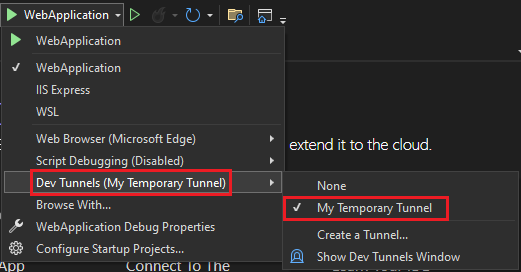
Select F5 to run the application in the debug mode.
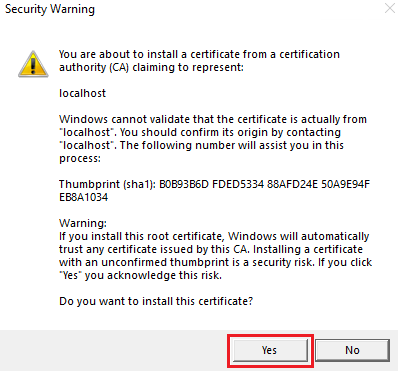
If a Security Warning dialog appears, select Yes.
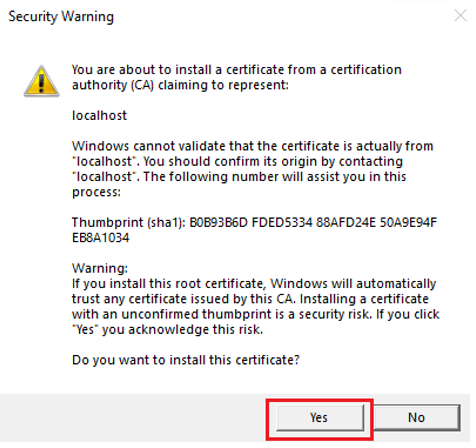
A pop-up window appears.
Select Continue.
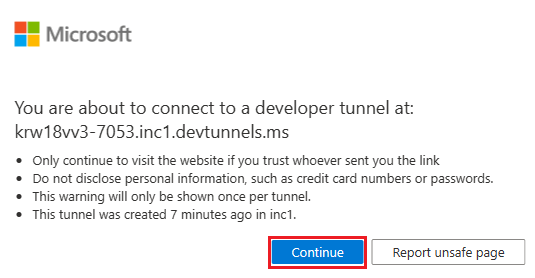
The dev tunnel home page opens in a new browser window and the dev tunnel is now active.

Go to Visual Studio, select View > Output.
From the Output console dropdown menu, select Dev Tunnels.
The Output console shows the dev tunnel URL.

Go to Teams and select Teams from the left pane.
Go to a team that you want, select More options (•••), and then select Manage team.
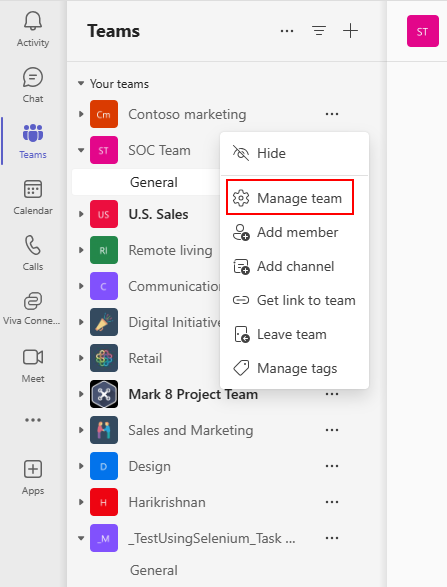
Select the Apps tab from the navigation bar.

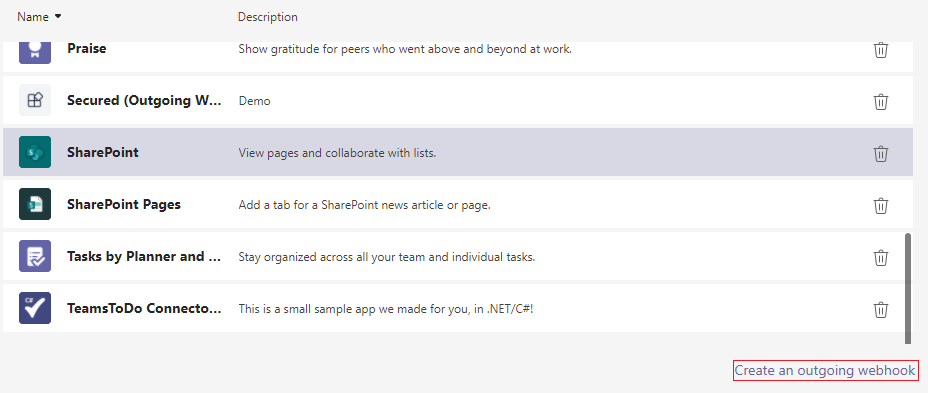
Select Create an outgoing webhook from the lower-right corner of the window.
Enter the following details:
Name: The webhook title in @mention tab.
Callback URL: The URL generated from ngrok that accepts JSON payloads and receives POST requests from Teams. To use the
api/Sampleorapi/authenticatedSample, do the following:For api sample, copy and paste the
dev tunnelorngrokURL and append it with/api/sample.For api authenticatedSample, copy and paste the
dev tunnelorngrokURL and append it with/authenticatedSample?id=contoso.
Description: A detailed string that appears in the profile card and the team-level app dashboard.
Profile picture (optional): App icon for your webhook.
Select Create. The Outgoing Webhook is added to the current team's channel.

A
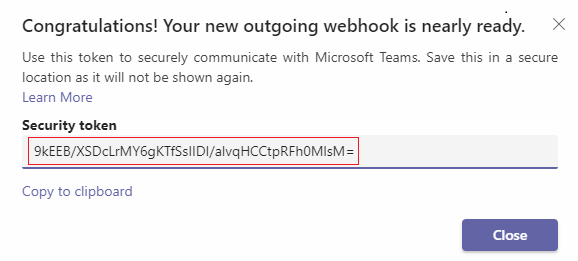
Hash-based Message Authentication Code (HMAC)dialog appears. You can use the security token in AuthProvider.cs file to authenticate calls between Teams and any designated outside services.Note
The Outgoing Webhook is available to the team's users, only if the URL is valid, and the server and client authentication tokens are equal. For example, an HMAC handshake.
Build and run the service
Open Visual Studio.
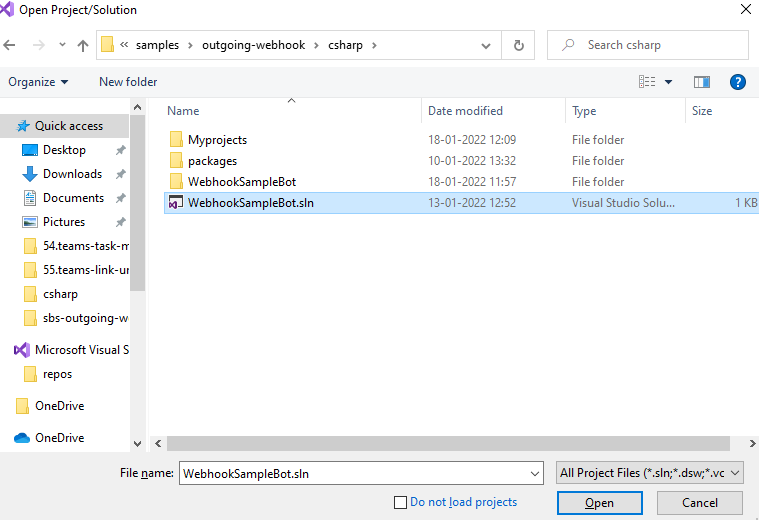
Go to File > Open > Project/Solution....

From csharp folder, select WebhookSampleBot.sln file.
Go to AuthProvider.cs file. Update
contosotoM365x70471008and add HMAC.
Press F5 to run the project.
Select Yes if the following dialog appears:
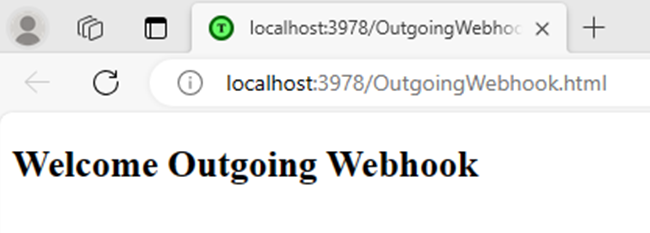
A webpage displays local host information.
Interact with the app in Teams
Go to Teams and select Teams from the left pane.
Go to General > New conversation.
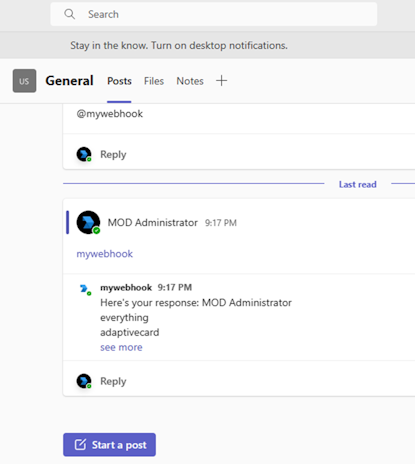
To invoke an Outgoing Webhook in the channel, @mention the Outgoing Webhook name and select the Send icon.

Note
You can send Adaptive Card, Hero card, and text messages as attachment with Outgoing Webhook.
The meeting chat displays a new message.
Complete challenge
Did you come up with something like this?

Congratulations!
You've completed the tutorial to get started with an Outgoing Webhook app!
Have an issue with this section? If so, please give us some feedback so we can improve this section.
