WannaCry/WannaCrypt and other Ransomware
This past week has seen the widespread growth of the WannaCry ransomware attack, which was based on the EternalBlue SMB vulnerability. We released security update MS17-010 on March 14, 2017 to address the vulnerability.
Preliminary reports show at least 300,000 computers have been affected globally by this ransomware that encrypts files, requiring up to $600 in bitcoin payments within 7 days before the data is deleted.
So, what do you do if you've been affected by WannaCry or other ransomware? How do you recover your data?
We can't confirm or deny that paying the ransom will release your data, nor provide guidance or recommendation to do that. A third-party has released a WannaCry decryption tool (https://github.com/gentilkiwi/wanakiwi/releases) that may be able to help you decrypt files (as long as the computer hasn't been restarted since being infected and the memory holding the data necessary to decrypt hasn't been overwritten). Since the tool was written and released by a third-party, we can't confirm its validity, either.
How do you help prevent these types of attacks in the future?
The methods we'll focus on in this blog are
- Enabling on-disk file recovery capabilities (if they're not already enabled) and recovering from backups or file versions
- Enabling file-versioning in OneDrive for Business and SharePoint Online Sites
- Using Software Restriction Policies to block applications from executing from certain paths (such as temporary internet files)
- Using Cloud App Security to target ransomware-type behaviors
As with any security protocols, it's important to keep yourself protected through a variety of means:
- Perform regular and frequent data backups, including Volume Shadow Copies (VSS) and scheduled backups to external storage (Azure, OneDrive for Business, external hard drive, or other cloud storage providers).
- Especially in cases of ransomware or other data modification/deletion attacks, recovering from a point in time prior to compromise is usually the best course of action.
- Keep machines up-to-date with security updates and malware definitions. Microsoft released an update to address the SMB vulnerability that WannaCrypt exploited.
- In the event that one or more systems are compromised, disconnect them from any networks (wired and wireless) to help prevent the spread of the attack. Any removable media (USB hard drives or USB thumb drives, for example) that you used on the affected machine should be destroyed to prevent further spread as well. The safest bet is to recover the data files if possible on the computer, connect to an isolated internet connection, and transfer the recovered data files to a third-party site for re-scanning and retrieval, and then format/re-image/redeploy the machine to ensure that the entire infection has been removed.
- Ensure you have a robust, validated security update process. I recently had a customer that had outsourced desktop management to a vendor, and the vendor had neglected to install Windows and Office updates in over three years.
- Prevent execution of applications from temporary or cache folders (which are frequent locations for drive-by attacks).
- This prevention policy can help protect for applications that are delivered via a browser exploit and run from locations such as "Temporary Internet Files."
- Be vigilant about applications that you download and their sources.
- Implement least privilege operation, which helps prevent attacks that utilize elevated privileges.
- We have published guidelines and recommendations: https://technet.microsoft.com/en-us/library/bb456992.aspx.
- NIST has an excellent guide to this principle: https://nvd.nist.gov/800-53/Rev4/control/AC-6
- Office 365 Cloud App Security Ransomware template in Office 365.
Enabling File History for Windows 10
File versioning in Windows 10 is built on the Volume Shadow Copy Service. It takes periodic snapshots of your file data so that you can recover from accidental modification or deletion. It's disabled by default in Windows 10. You can't recover from what you don't have saved, so we'll want to turn this on to give you a potential avenue for recovery in the future. Note: Since Windows 10 File History saves the files in their native formats, it may not protect you against ransomware attacks that specifically target document types.
- Click Start and type Control. Select Control Panel.
- Under view, choose "Large" or "Small" icons and select File History. Alternatively, type File in the Control Panel search box and select File History.
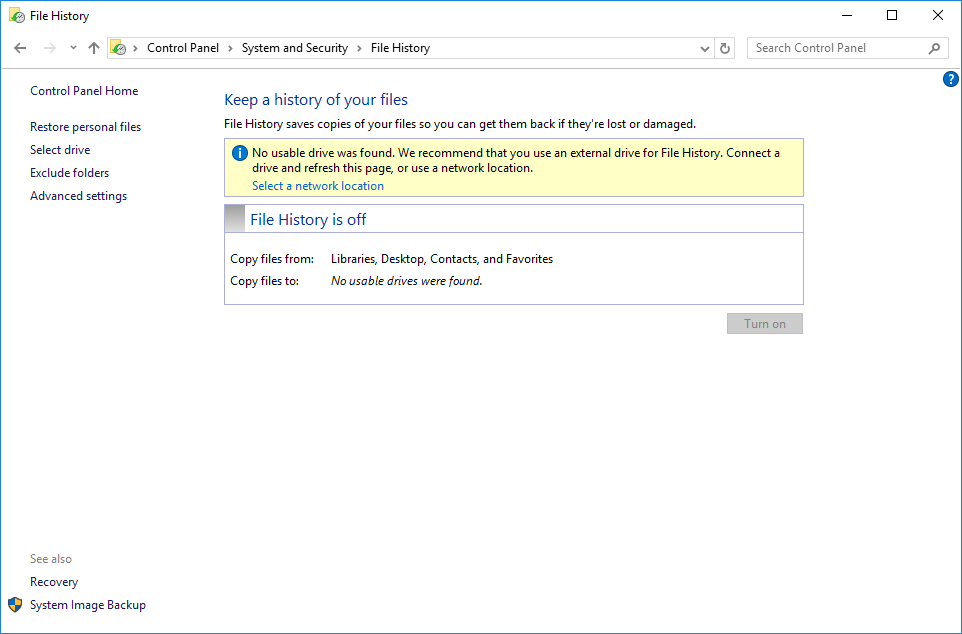
- If you're like most users, your computer probably only has one drive. This presents somewhat of a problem for File History. However, where there's a will, there's a way, as File History allows you to save to a network location. If you have access to a network file share located on a SAN or file server that includes its own snapshot capabilities, that is a much better destination as you will have another layer of file versioning capability on the remote device. In this example, I create a local share on my computer which you can use to enable File History, but it will not provide protection against ransomware that scans your hard drive for document types to encrypt.
- Create a folder on your computer (such as C:\FileVersionsBackup)
- Right-click on the folder, select Share With > Specific People. Your user account will be added to the permissions list by default. Select Share.
- In the File History window, select Select Drive.
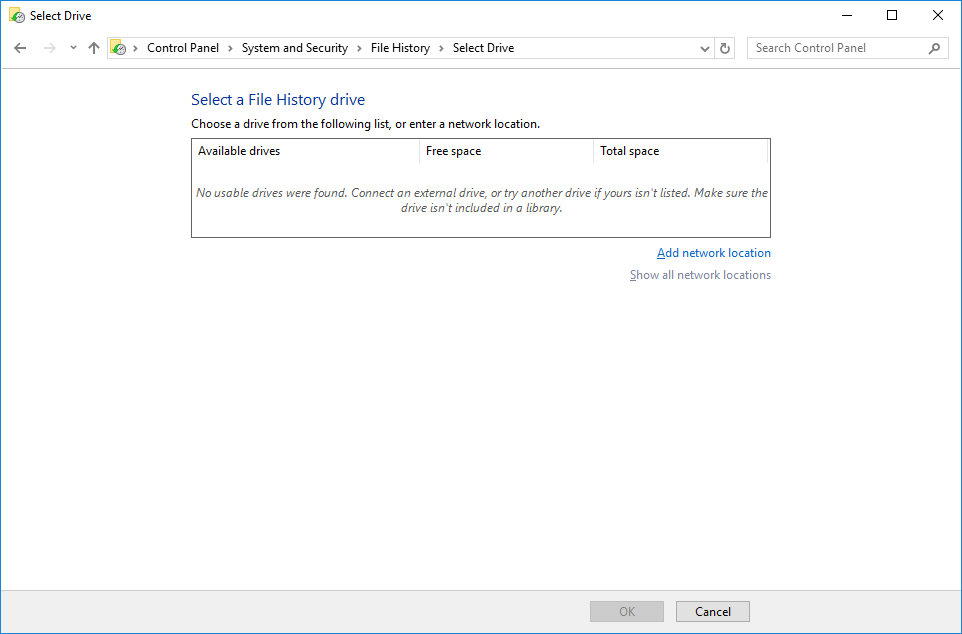
- Click Add network location.
- If prompted, enter the location as \\localhost, and you'll see your file share presented. If you have access to a network file share located on a SAN or file server that includes its own snapshot capabilities, that is a much better destination as you will have another layer of file versioning capability on the remote device.
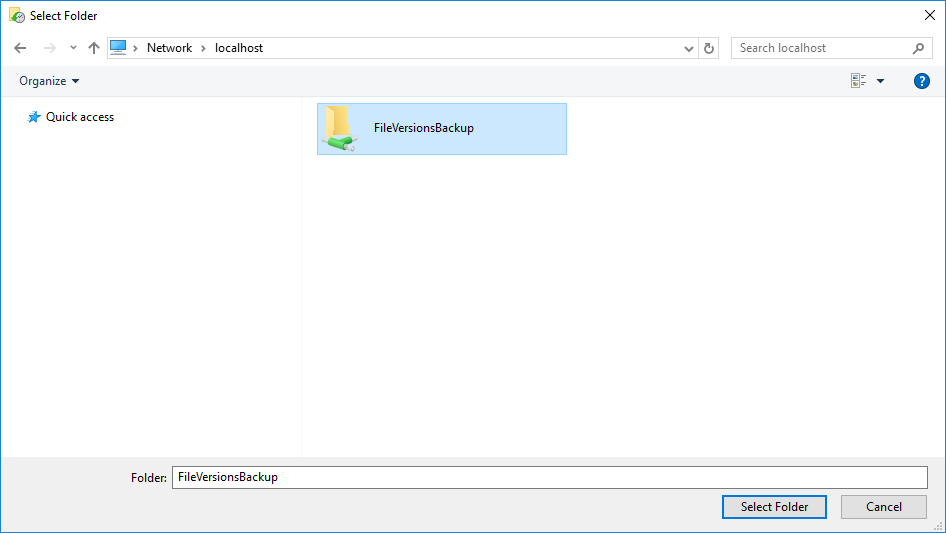
- Select it, and then click Select Folder.
- It should now show up in the "Select a File History drive" window. Click OK.
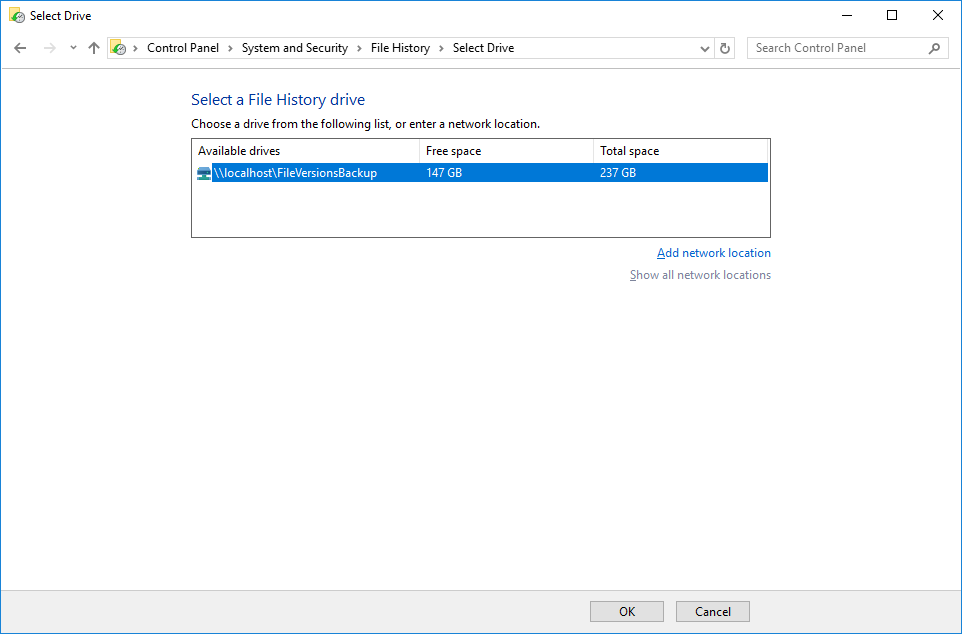
- Select Turn on.
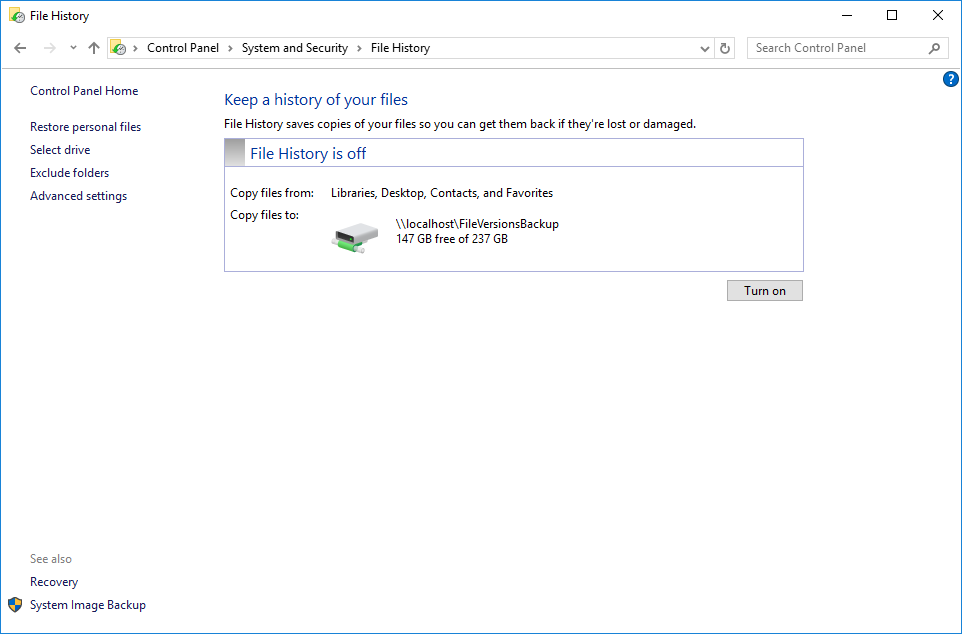
- You'll receive a notification that File History is saving versions of your files.
Versioning in OneDrive for Business
In most Office 365 subscriptions, OneDrive for busines should already have versioning turned on. You can manually redirect My Documents to OneDrive for Business, which means that your documents are automatically taking advantage of OneDrive's versioning. This would allow you to restore from previous versions of files prior to a ransomware attack.
To check to see if your OneDrive site is configured for versioning:
- Log into the Office 365 Portal and navigate to OneDrive.
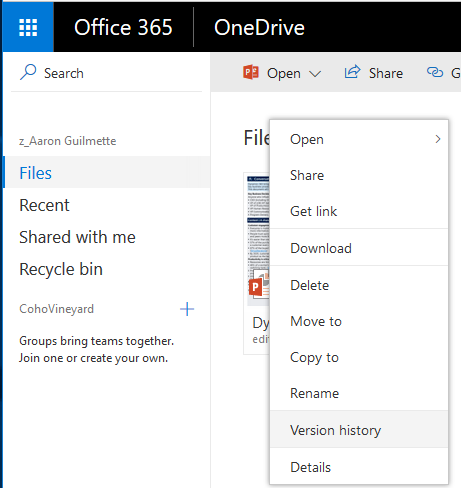
- Select a file, right click and look for Version History.
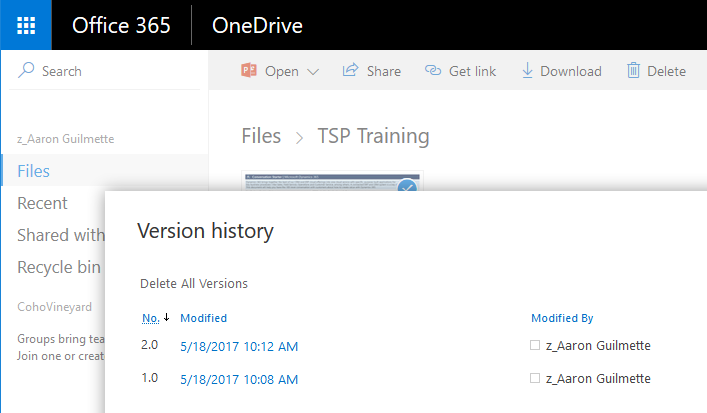
- View the versions.
- Click on the Gear icon (Settings), and select Site Settings.
Enabling Versioning in OneDrive for Business
Version History is turned on by default in OneDrive for Business, but if you don't see the Version History command, version history may be turned off. Depending on how your organization has set up personal sites, you may be able to turn on document versioning for your OneDrive for Business site.
- In OneDrive for Business, click the Gear icon (Settings).
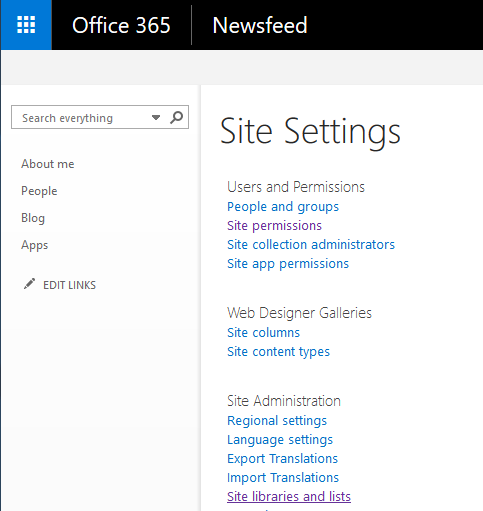
- On the Site Settings page, under Site Administration, click Site libraries and lists.
- Click Customize "Documents."
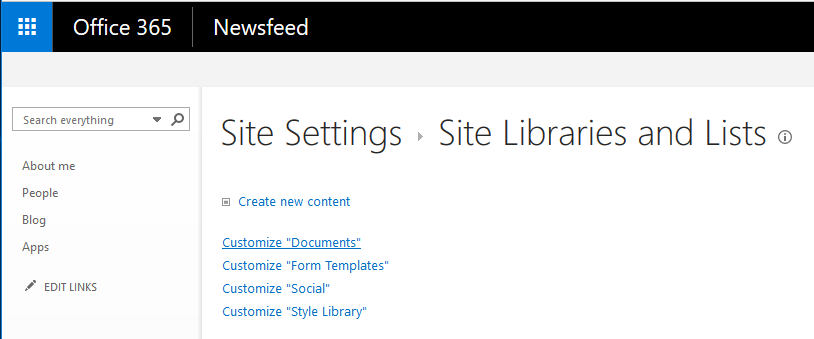
- Select Versioning settings.
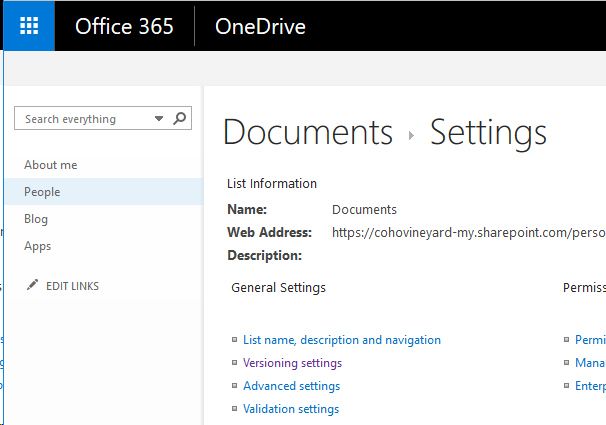
- Select the Create major versions radio button.
- Click OK.
Configure Software Restriction Policies to Prevent Running Executables in Temp Directories
You can do this via either Group Policy (domain-wide) or in the Local Security Policy. We'll focus on doing it via a local policy, which you can evaluate and test in a GPO.
- Click Start and type Local Security Policy.
- Expand Software Restriction Policies.
- Right-click the Additional Rules sub folder, and then select New Path Rule.
- Enter a path (including wildcards). In this test, I'm going to use *temp*\*.bat to prevent batch files from running from any directory that has "temp" in the path.
- Ensure the Security Level is set to "Disallow" and click OK.
- Test running a .bat file from C:\Temp.
- Repeat for file paths such as:
- *\Temp\*.bat
- *\Temp\*.com
- *\Temp\*.exe
- *\Temp\*.ps*
- *\Temp\*.vbs
- C:\Users\*\AppData\Local\Microsoft\Windows\INetCache\*.bat
- C:\Users\*\AppData\Local\Microsoft\Windows\INetCache\*.com
- C:\Users\*\AppData\Local\Microsoft\Windows\INetCache\*.exe
- C:\Users\*\AppData\Local\Microsoft\Windows\INetCache\*.ps*
- C:\Users\*\AppData\Local\Microsoft\Windows\INetCache\*.vbs
- C:\Users\*\AppData\Local\Microsoft\Windows\INetCache\*\*.bat
- C:\Users\*\AppData\Local\Microsoft\Windows\INetCache\*\*.com
- C:\Users\*\AppData\Local\Microsoft\Windows\INetCache\*\*.exe
- C:\Users\*\AppData\Local\Microsoft\Windows\INetCache\*\*.*ps*
- C:\Users\*\AppData\Local\Microsoft\Windows\INetCache\*\*\*.vbs
- C:\Users\*\AppData\Local\Microsoft\Windows\INetCache\*\*\*.bat
- C:\Users\*\AppData\Local\Microsoft\Windows\INetCache\*\*\*.com
- C:\Users\*\AppData\Local\Microsoft\Windows\INetCache\*\*\*.exe
- C:\Users\*\AppData\Local\Microsoft\Windows\INetCache\*\*\*.*ps*
- C:\Users\*\AppData\Local\Microsoft\Windows\INetCache\*\*\*.vbs
Alternatively, you can also configure a Group Policy to *disallow* everything as the default security stance, but do not do it without significant testing. I will post a follow-up blog on deploying a GPO that focuses on using Software Restriction Policies in that method to really lock down workstations.
Cloud App Security Ransomware Template
In response to the rise in ransomware, we have added a new Potential ransomware activity detection policy template for customers that subscribe to Cloud App Security.
To deploy:
- Log into the Cloud App Security portal (https://portal.cloudappsecurity.com).
- From the dashboard, select Create Policy and select Activity policy.
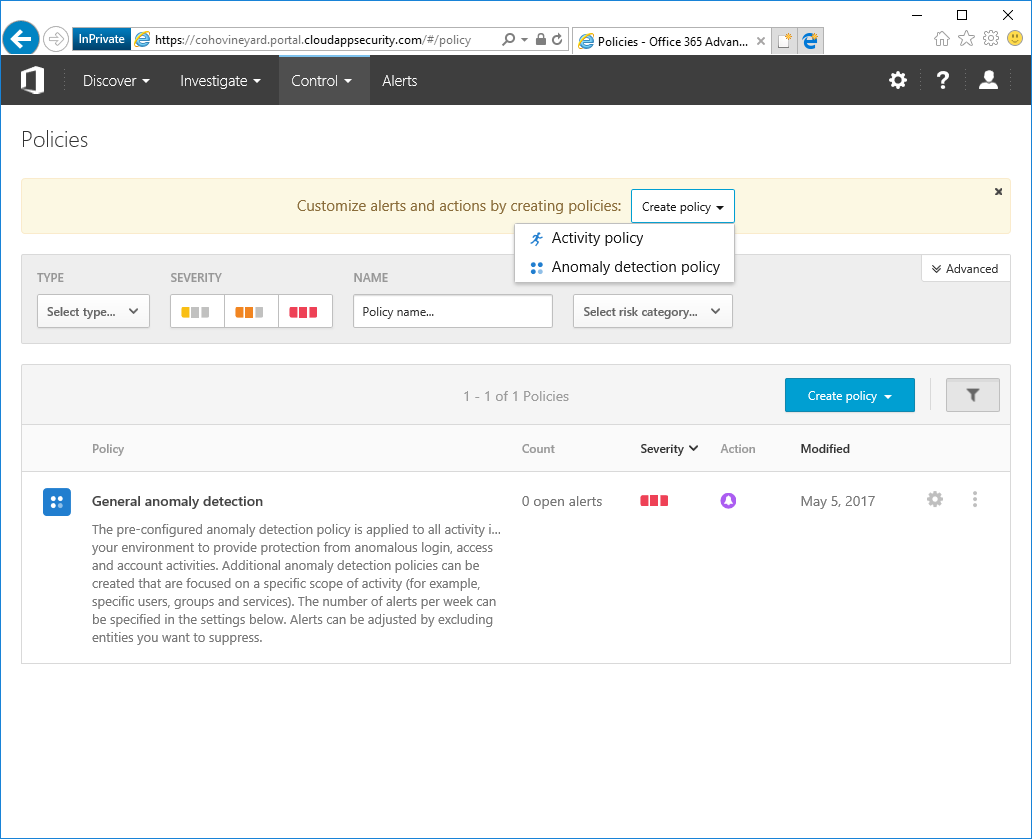
- Select Potential ransomware activity.
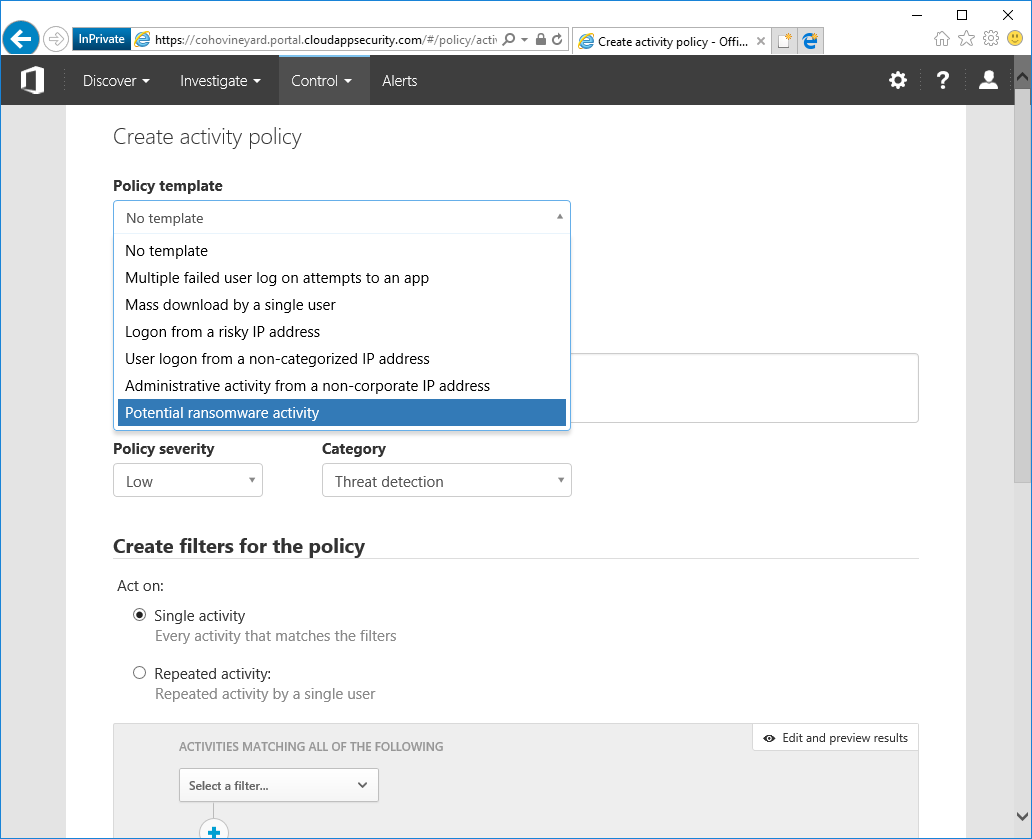
- Select Apply Template.
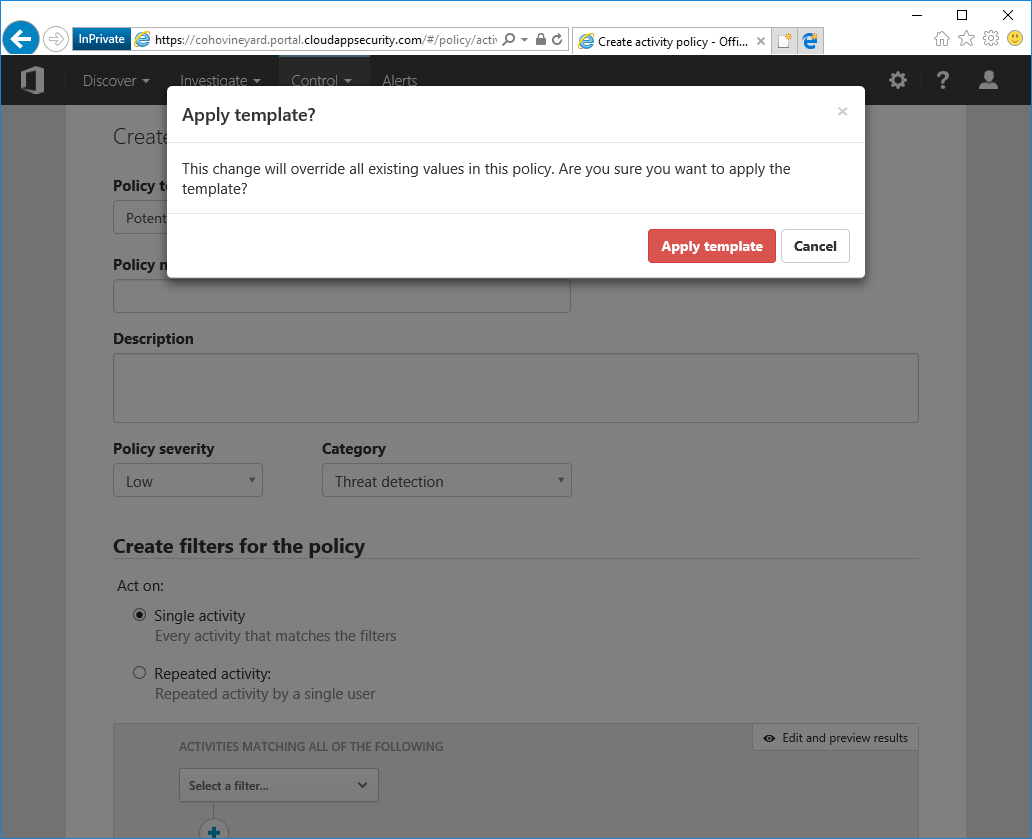
- Optional:
- Under Alerts, select Create alert.
- Create an alert to go along with the detection, and enter a phone number to receive text message alerts (carrier rates may apply to you).
- Under Governance, select Suspend User.
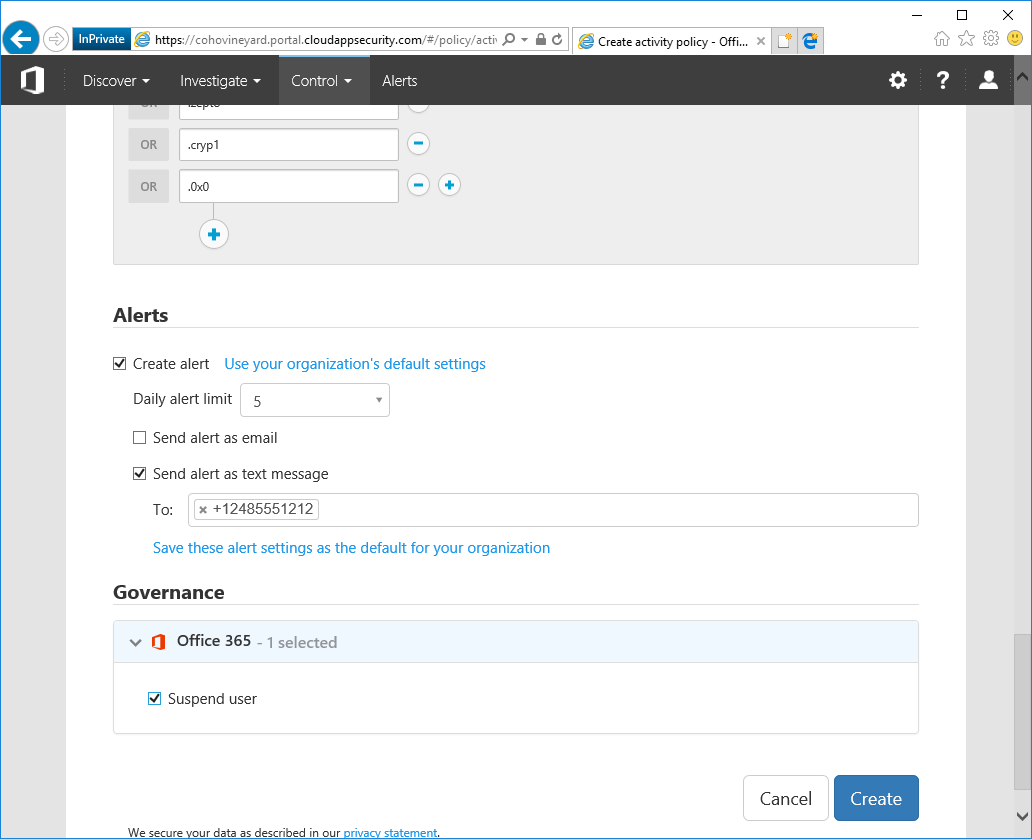
- Click Create.
If you have any questions or other suggestions, please feel free to leave them in the comments section.
Comments
- Anonymous
May 23, 2017
Is there an easy way to Save the settings in the "Configure Software Restriction Policies...." section so it can be copied to other computers in a non-domain setup [i.e. workgroup]?- Anonymous
May 24, 2017
Not that I know of, unfortunately. - Anonymous
May 29, 2017
You might be able to copy %systemroot%\System32\GroupPolicy between the computers. I've not done it, so I don't know what the results would be. :-)
- Anonymous