INTUNE - Intune and Autopilot Part 4 - Enroll your first device
In the last blog posts,
- INTUNE – Intune and Autopilot Part 1 – The Blueprint
- INTUNE – Intune and Autopilot Part 2 – Setting up your environment
- Intune and Autopilot Part 3 – Preparing your environment
we guided you through all the necessary steps to get your Azure trial Tenant up and running, and how to prepare your Intune environment further. Now it is time that we enroll our first device with Autopilot.
We would recommend using a virtual machine for this first step.
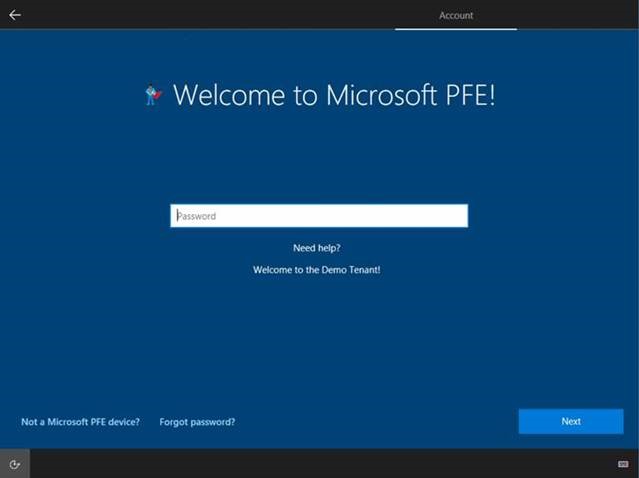
When you are going to follow these steps along, the end result will be that the Out-of-Box experience (OOBE) will be customized with our company name and logo, as shown in the image below:
The requirements to enroll a device with Autopilot:
- Windows 10 Build 1703 Professional, Enterprise or Education
- Internet Access
If your Virtual Machine is located behind a Firewall or Proxy Server, ensure that the following URLs are reachable and ports are open so the device used for Autopilot is able to connect to the required cloud services:
URLs:
- https://login.microsoftonline.com
- https://login.live.com
- https://account.live.com
- https://signup.live.com
- https://licensing.mp.microsoft.com
- https://licensing.md.mp.microsoft.com
- ctldl.windowsupdate.com
- download.windowsupdate.com
Ports:
- HTTPS 443
- HTTP 80
If you run into issues while following this guide, please retry all the steps with a virtual machine directly connected to the internet and ensure all the URL's and ports listed in the following article are reachable https://docs.microsoft.com/en-us/intune/network-bandwidth-use
Now, with all preparations taken care of, we login into our virtual machine and use a Powershell Script provided by Michael Niehaus to harvest the Hardware details. The Script can be found at: https://www.powershellgallery.com/packages/Get-WindowsAutoPilotInfo
The PowerShell script will gather all the required Information and puts it into an csv file that needs to be uploaded. This Script will only run in Windows 10 1703 and higher - it cannot run in any earlier version of Windows nor WindowsPE.
Execute the Script in an elevated powershell prompt
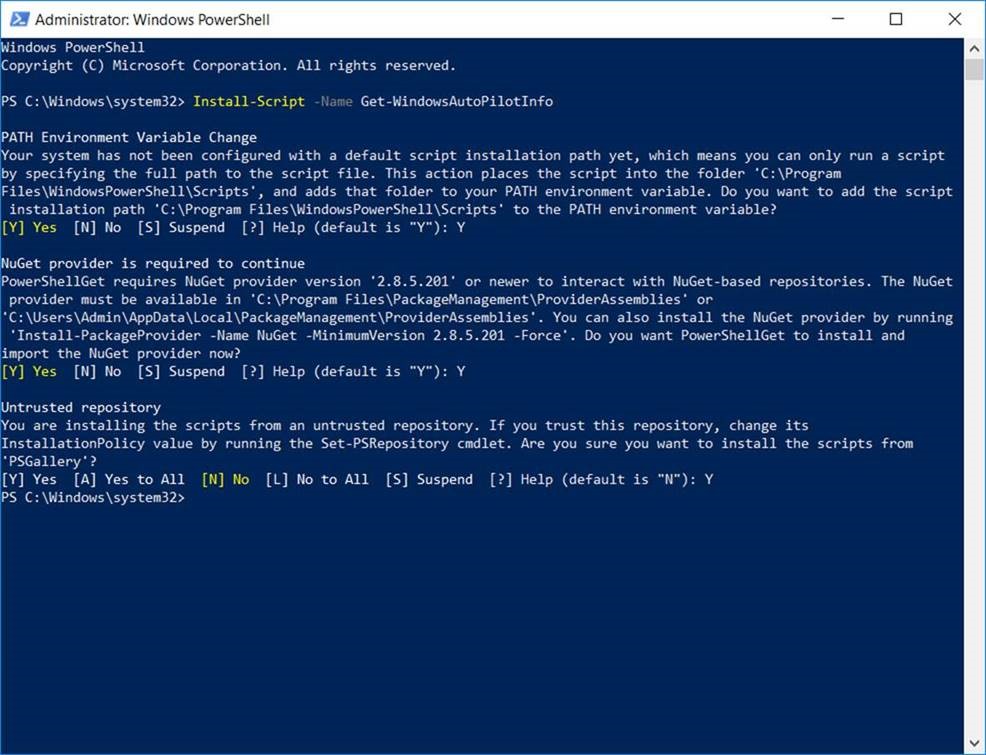
Install-Script -Name Get-WindowsAutoPilotInfo
You'll be prompted 3 times. Please answer with Y to continue
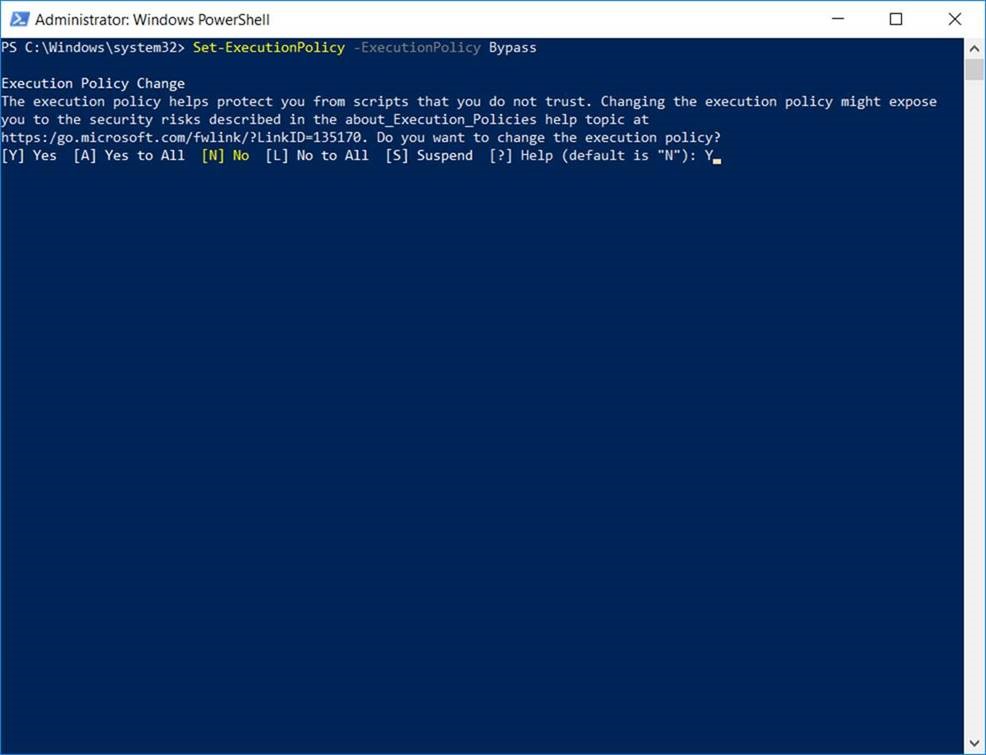
It is also possible to download the script. After we have installed the Script we need to modify the execution policy to be able to successfully run the script:
Set-ExecutionPolicy bypass
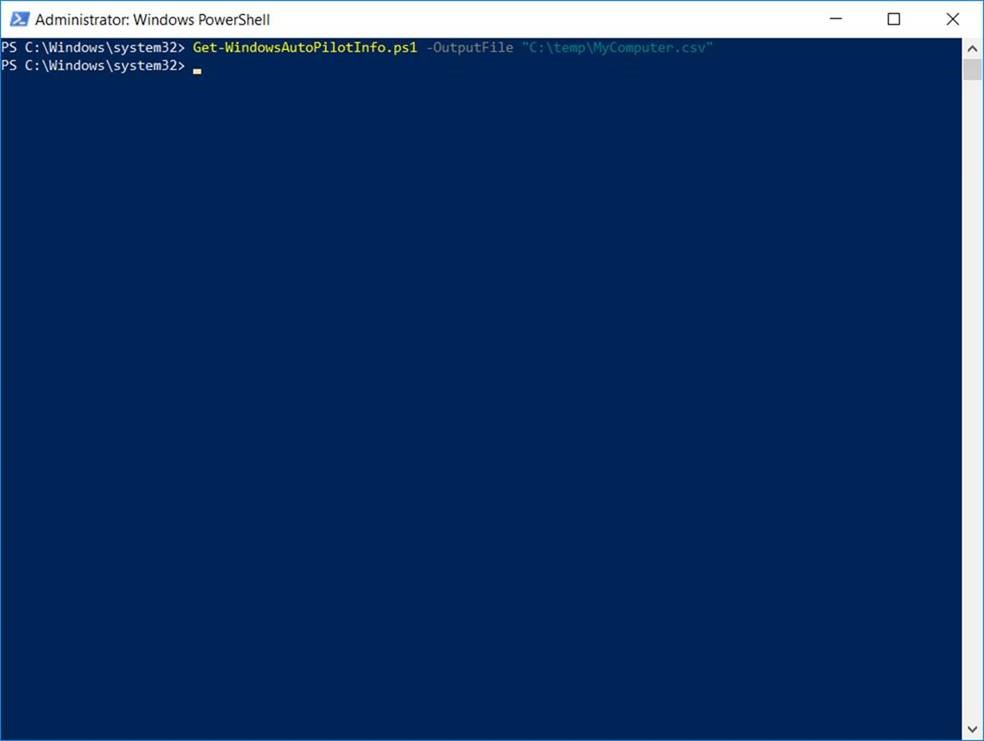
And finally run it to collect the data:
With the CSV file prepared, we can now log in to our Azure Tenant and upload the file to Intune. Login to your Azure Tenant and navigate to the Windows enrollment page within Intune, click on the "Import" button:
Select the file and upload it by pressing "import" on the bottom of this page:
The file will now be uploaded. This could take up to 15 minutes.
Once the upload and sync process have finished successfully we need to assign a Autopilot profile to the newly added device.
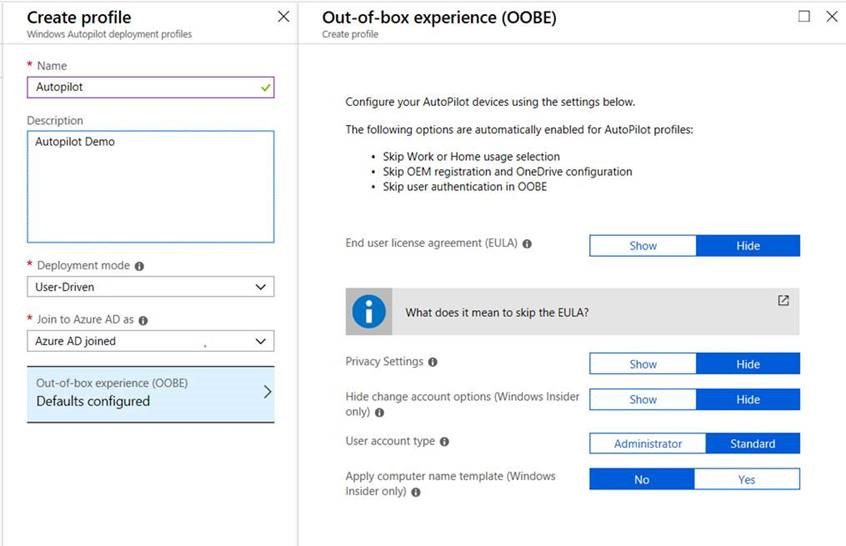
As this is our first enrollment we need to create a new Autopilot profile. Please navigate to the deployment profiles within Intune and click the "Create profile" button.
Now we need to provide a Name, select "User-Driven" as our Deployment Method and select "Azure AD joined" as Join to Azure. Those are our required fields. In the OOBE configuration we can configure the behavior we want. Just keep in mind - the more you show - the more user interaction we have:
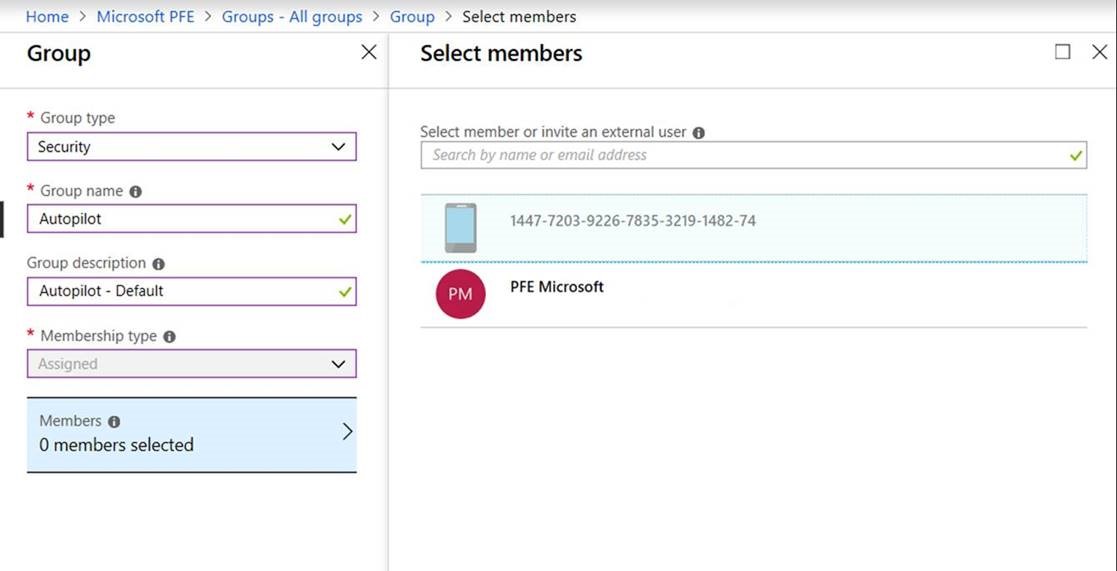
Once you have configured your Autopilot profile click on "create" and head over to Azure Active Directory to create a new Security Group and make the device member of this group:
Once we finish setting up the group, and made the device member of the group, we can proceed assigning the Autopilot Profile to this security group. Head over to the Autopilot Deployment Profiles blade in Intune, select the Autopilot profile we just created, and on the details tab of this profile click on Assignments to add the newly created security group:
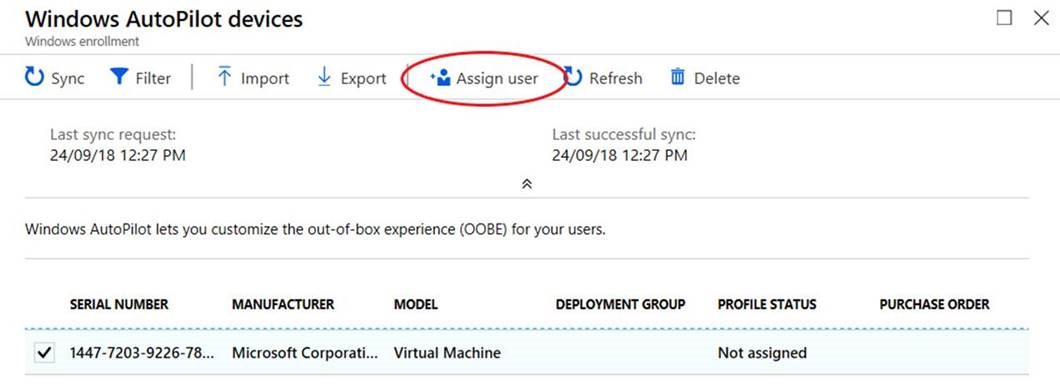
Optional: If preferred you can also assign a specific user to that device:
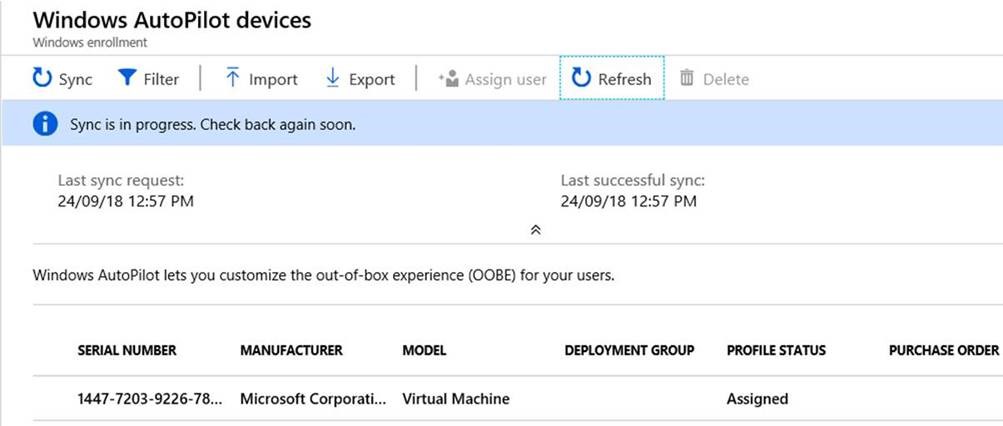
Now we need to wait for the sync in the background to complete. Once that's done, we're ready to deploy.
You can check the Devices Tab if the profile is showing as Assigned for the device. This might take a bit of time
Once that's completed we can start our Virtual Machine and enroll it automatically into Azure AD and Intune with Autopilot.
To reset the machine to the OOBE Phase I use Sysprep and take a Snapshot afterwards. When the VM starts again you have to select region and keyboard layout. If you have done all preparations correctly you should end up with the custom Login of your Azure tenant. In our example I assigned it to a specific user so it prompts me for the password of the user I assigned to that device in the optional step:
After the Setup has been completed you can verify the successful Azure Join of your device as well as the Intune enrollment within the Azure Dashboard
Congratulations - you just enrolled your first device with Autopilot! In following blog entries we will have a more detailed look into some Autopilot scenarios like setting up Kiosk & Multi-Kiosk, Firstline workers, shared devices, using dynamic groups and so on. If you have any question just leave them in the comments.
Matthias Herfurth, Ingmar Oosterhoff and Johannes Freundorfer
