Azure WebJobs with Storage Queue and Exceptions
Azure WebJobs are like console applications running in the same host environment with the Azure WebApplications. You can trigger a console application method when there is a Queue message in Azure queue. In this post we will simply demonstrate how to handle a new queue message with a WebJob and mention about the result of an exception in the Queue message trigger in the WebJob.
Briefly if WebJob method triggered by a queue message, the message is processed by that method successfully and the message automatically removed from the queue. IF there will be an exception occurred during the processing of the message, then WebJob will retry several times, and after some unsuccessful retrial, the message is moved to Poison queue. Below we will showcase this scenario.
1. Create a new azure WebJob project

2. Create a new storage account to create a test scenario.

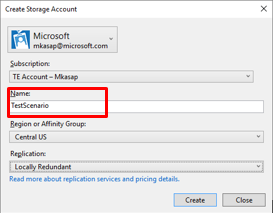
3. Give a name (i.e. "testscenario") and set parameters of the new storage account to be created.

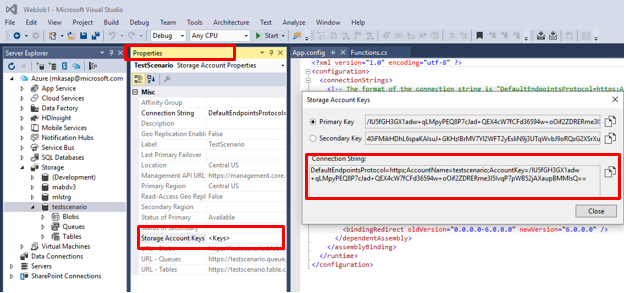
4. Copy the storage connection string. (PS: I have deleted this account/password before the blog post)

5. Open App.Config file from project explorer and paste the connection string into the corresponding fields.

6. In the server explorer window, right click on the "testscenario->Queues" item and select "Create queue". Give a name "queue" to the new queue service. (It must be same as the name given in function.cs file)

7. In a new window it will ask you storage account key. Paste just the accountKey value that you can find either in the properties window of the storage account or inside the connectionstring that you paste into App.Config file.

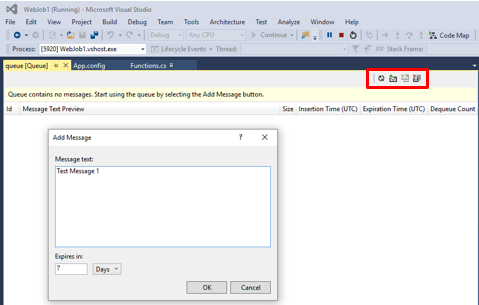
8. Now when you double click on your newly created queue service name, management window will open. In this window you can see existing messages waiting in the queue, add new message to the queue etc.

9. Now without making any changes (except the ones that we made in App.Config file), start the WebJob application in Debug mode locally.

10. Console window will open and waits a new message to arrive to the queue. Once a new queue message arrives, it will process it and finish its job (check Function.cs file)

11. Screenshot of the console application waiting for a new queue message.

12. Now open the queue management window and add a new test message to the queue manually.

13. When you added a new message, you can see the message on the queue management window.

14. Few seconds (1, 5, 10… will mention more on the next post) after adding the new queue message, WebJob will receive it and process it. In the console window you can see the information message telling that a message caught.

15. Press the Refresh button on the Queue management window. You will see that the processed message become invisible, deleted from the queue automatically after got processed.

16. Now for testing our scenario, add the following lines of code by updating function.cs file. This code will print out the received message content in the console window (or in the WebJob output window on Azure management portal) and If the content of the message contains "Hello" than it will throw an exception.
public
static
void ProcessQueueMessage([QueueTrigger("queue")] string message, TextWriter log)
{
log.WriteLine(message);
Console.WriteLine("Received message: {0}", message);
if (message.Contains("Hello"))
throw
new
Exception();
}
17. Before starting the WebJob application (or if it is running, then close it) lets add some messages to the queue. In the below example the third of four message that is added to the queue has the content "Hello".

18. Now start the WebJob in Release mode (if in Debug mode, every time the exception occurs the execution breaks. You need to press continue button in the debug window each time. So we continue our scenario in Release mode) and wait messages to be processed.

19. When you press Start button in Release mode, there will be a warning message, press "Continue Debugging". By this way our application will run without any break in an exception case.

20. In the console window, we will see that all messages are processed. Messages with the content "Hello" are re-processed 5 times and after unsuccessful 5th processing attempt, they are moved into Poison Queue.

21. If you open the "Server Explorer" and refresh the Storage Queue node by right click and then Refresh command, you will see the newly created "Queue-Poison" named queue. Inside this queue you can find the messages that are not successfully processed after 5th processing attempt.

For more details on retrial counts, concurrent queue message processing etc. please refer https://blogs.msdn.com/b/mustafakasap/archive/2015/12/26/azure-webjobs-amp-jobhostconfiguration.aspx