Building your exported Scirra Windows 8 Project in Visual Studio
Have you exported your Windows 8 project from Scirra’s Construct 2 and are you ready to build it for the Windows Store? We’ll assume that you have taken care of the application images and made any required changes to package.appmanifest. We’ll also assume you have Windows 8 and Visual Studio 2012 (they are required to build the app).
In Visual Studio 2012 (Ultimate, Premium, professional)
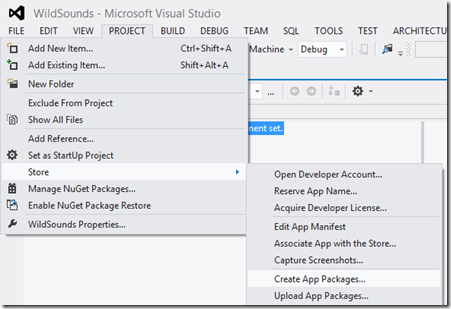
1. Click Visual Studio Project Menu, then Store Menu>then click Create App Packages… – this step will ensure your app is built for the store with your publisher information
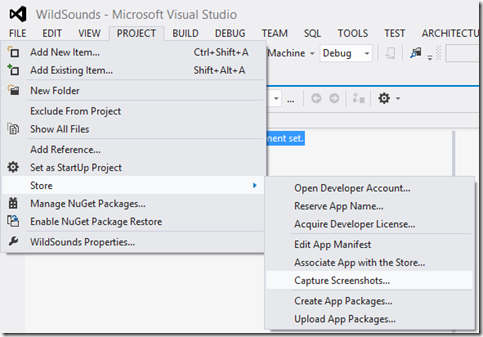
2. (Once setup one is successfully completed) Click Visual Studio Project menu>then Store Menu>then click Capture Screen Shots… - this will launch the Windows Simulator
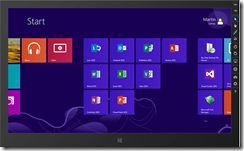
3. Once the Window Simulator is running look at the button on the right hand side (third from the bottom). Toward the bottom is a camera icon. Clicking the camera button will take a screen shot in the simulator. The picture(s) you take are store in the Picture directory in a folder named Windows Simulator.
At this point your project will have a new sub-directory named AppPackages. In the AppPackages sub-directory is a file with a .appxupload extension. This is your application packaged for the store that you’ll be uploading. Additionally, the screen shots you took are in your Pictures folder in the Windows Simulator sub-directory.
Comments
- Anonymous
May 25, 2013
The Houston maid services offer a modern service provider Disinfection Cleaning, Cleaning, repairs in gardens, plumbing services, dry cleaning and many others.


