Windows Server 2012: How to Import a Storage Pool on Another Server
Thanks for great feedback and for reading my prior AskPFEPlat post regarding Storage Spaces in Windows Server 2012. Based on feedback and questions following that post, it seemed like a great time to show how to import a storage pool on another server. Storage Spaces in Windows Server 2012 writes the configuration about the storage pool onto the disks themselves. Therefore, if disaster strikes and the server hardware requires replacement or a complete re-install – there is a relatively simple procedure involved to mount and access a previously created storage pool...perhaps on another server. Notice I said server. The implementation of Storage Spaces on Windows 8 doesn’t offer the same feature set that Windows Server 2012 does, so therefore you can only import a storage pool on the same OS version for which it was created.
Step By Step Example
1. Make the disks available to the server
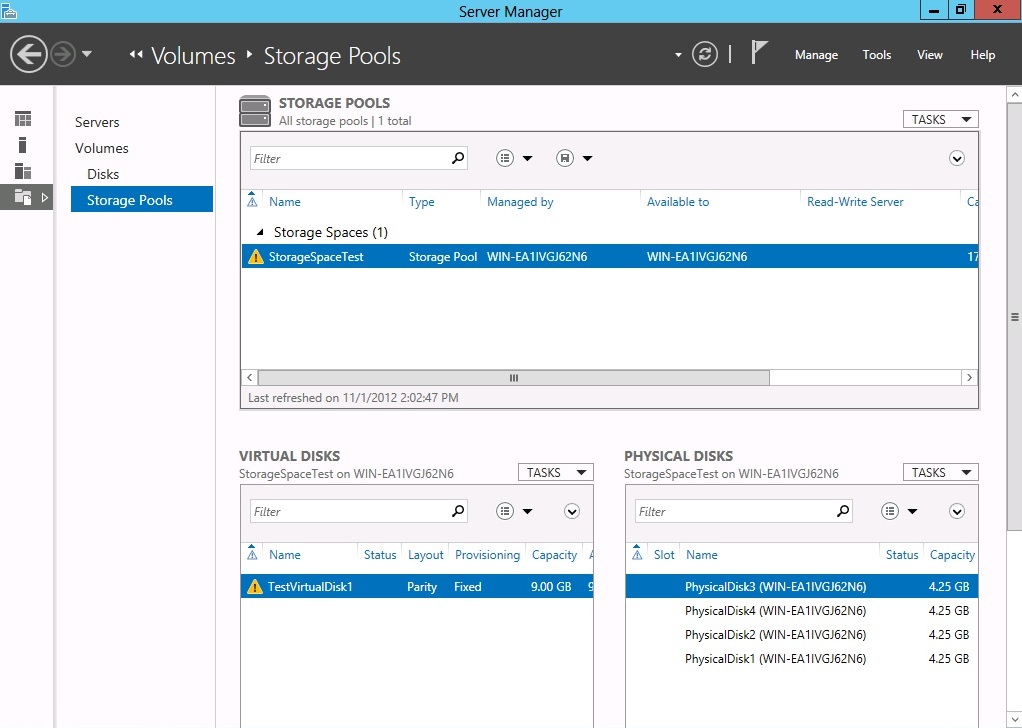
The first step, which may have multiple sub-steps, is to physically attach and successfully make available all drives from the pre-existing storage pool. To be successful in this endeavor, you would need appropriate drivers, cables, firmware, etc. to make this work. Obviously if these are SAS drives and the destination server doesn’t have a SAS interface, this will be somewhat of a difficult task without the proper interface. Once you’ve completed this task, from Server Manager you should see something similar to the following:
2. Make the storage pool read-write.
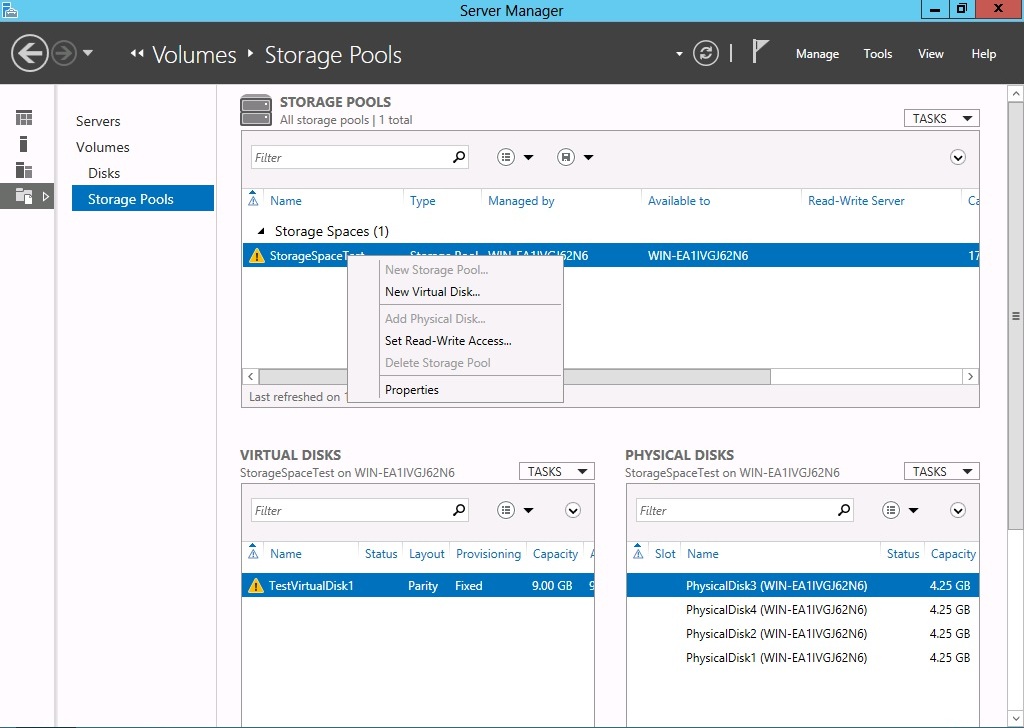
As you can see from the prior screenshot, the storage pool (as well as the virtual disk) has a warning exclamation mark symbol to indicate a problem. By default, Windows Server 2012 will detect the foreign volume and mark it read-only. The indicator appears because of this condition. To proceed, right-click the storage pool and choose Set Read-Write Access…
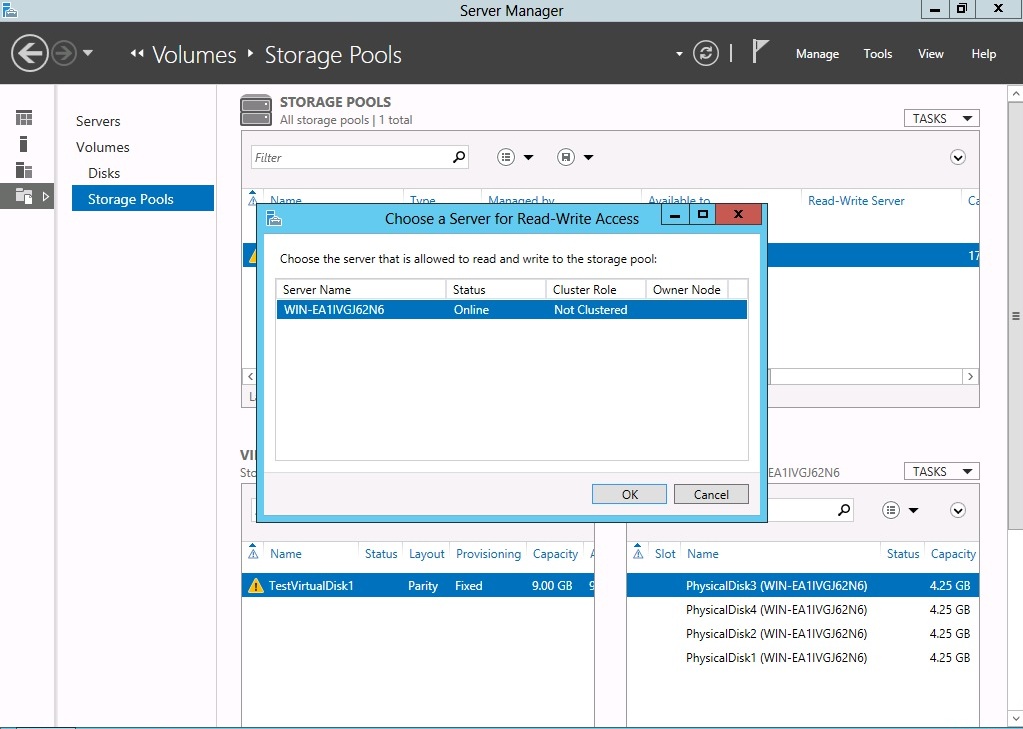
Make it read-write.
Choose the server where the storage pool may be mounted read-write. If this is a clustered storage pool, multiple nodes may appear in the Choose a Server for Read-Write Access dialog.
3. Attach the virtual disk.
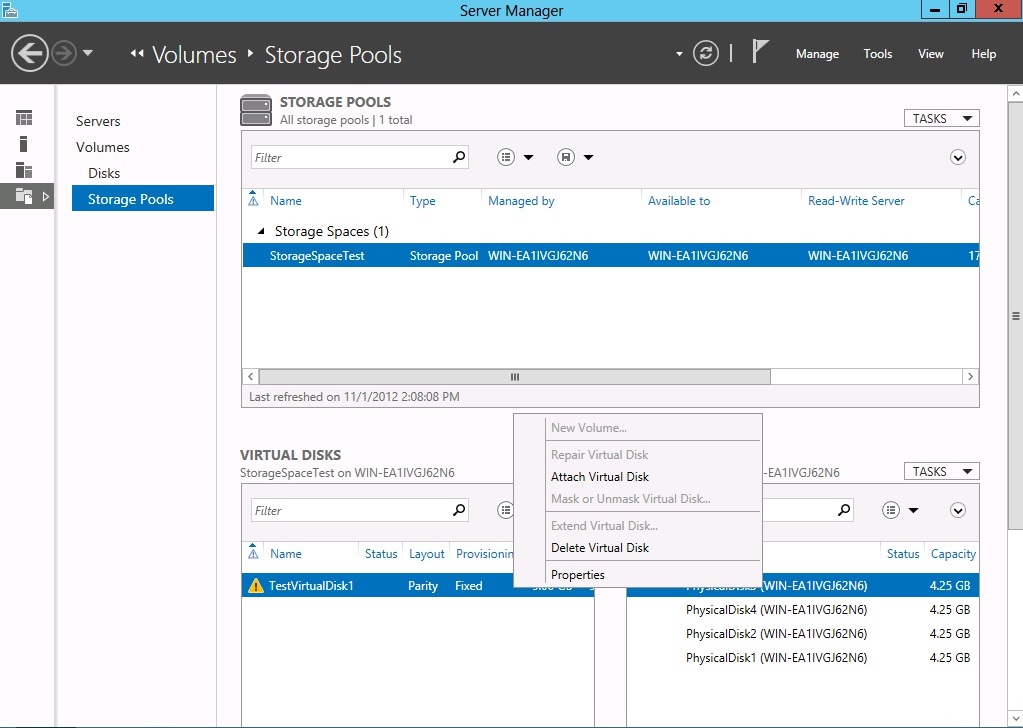
The activities in prior steps make the storage pool available. However, within the storage pool will be any virtual disks previously created using pool resources. Just like a VHD, these must be attached in order to be accessible. Therefore, the yellow exclamation warning sign indicates that the virtual disk is not currently attached. To proceed, right-click on each virtual disk and choose Attach Virtual Disk.
If all is successful, each Virtual Disk chosen will be attached.
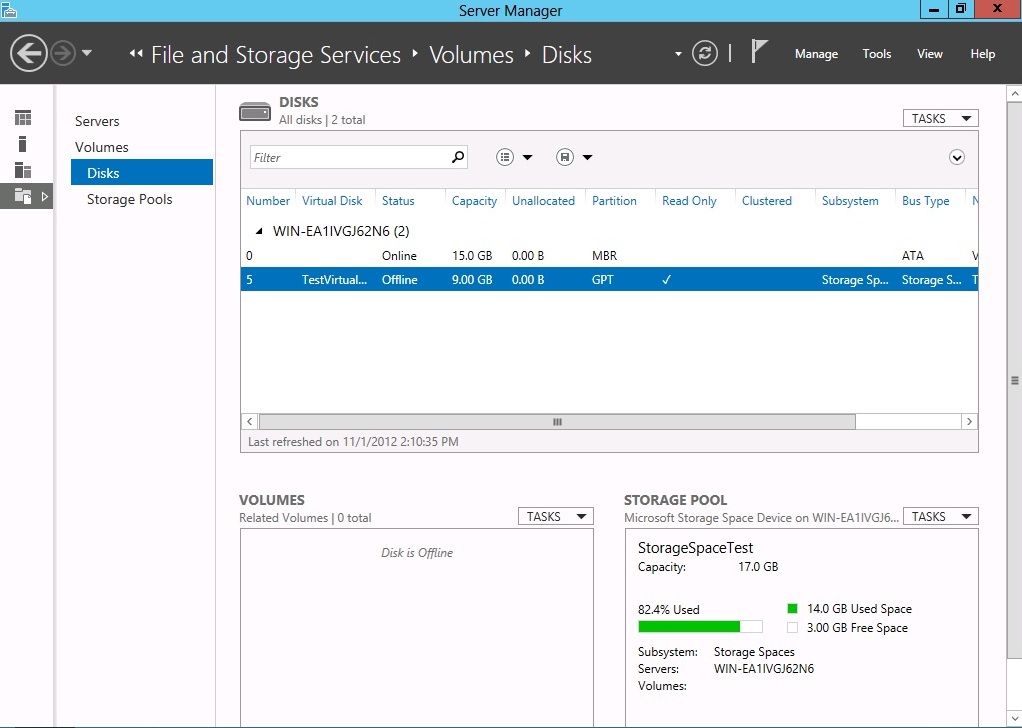
4. Online the resulting logical disk(s).
As you may recall, Windows Server 2008 Enterprise and Datacenter editions, by default do not automatically mount every disk device seen (providing that the default SAN policy has not been changed.) Windows Server 2012 is no different. To use any of the virtual disks that belong to the imported storage pool, you must online them first.
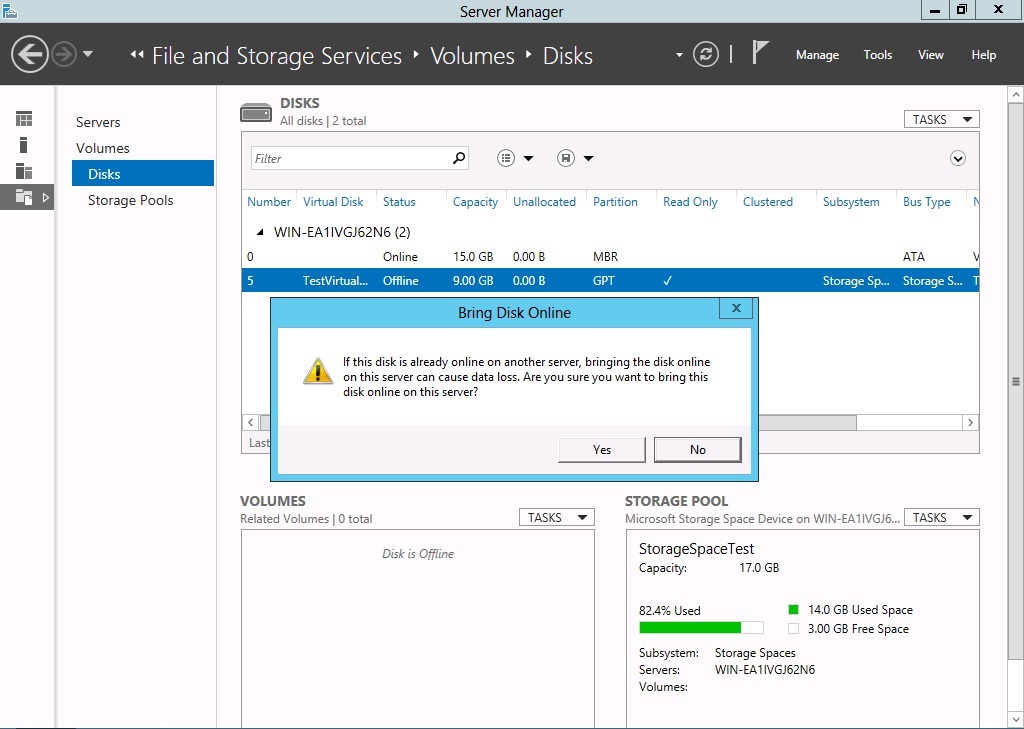
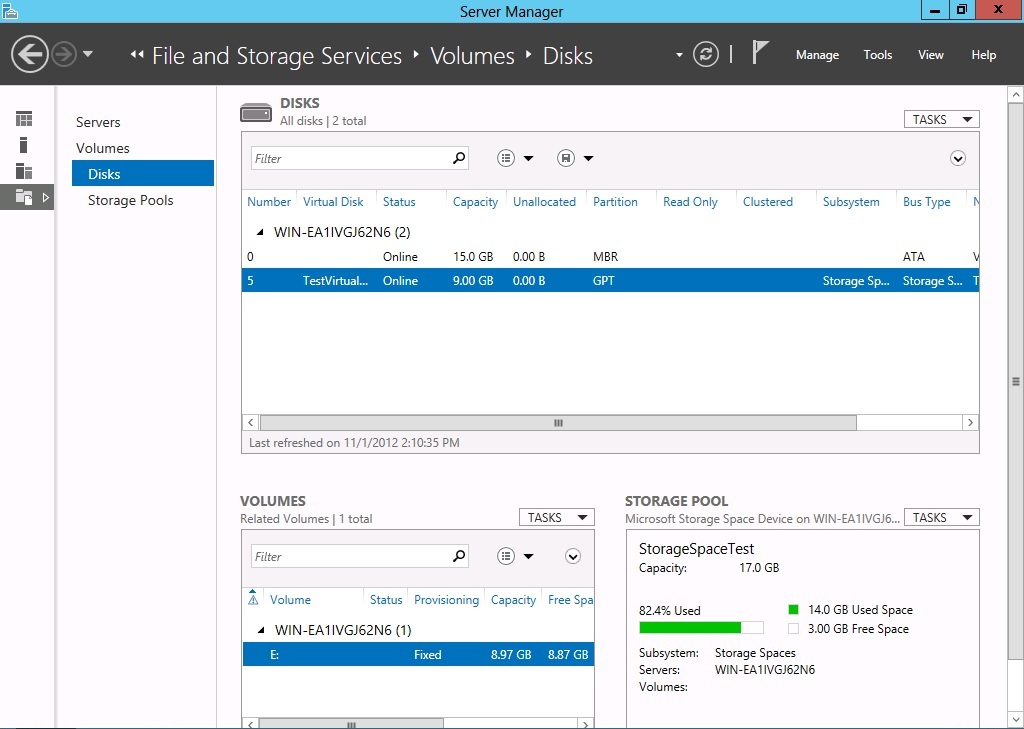
In Server Manager under Volumes\Disks, select the disk, right-click, and choose online.
Notice at this point that the volume now appears and remains accessible.
Concluding Thoughts
Hopefully the above notes and screenshots illustrate how easy it is to import a storage pool when you have a need to do so, or as a proof of concept when learning about Storage Spaces. The example above was created using Hyper-V Virtual Machines, and using iSCSI targets (for example only, not production) made available to a second newly installed VM after the first VM was conveniently destroyed. You could also use individual VHD files as components for the storage pool members.
Comments
Anonymous
September 08, 2013
I did this and most of my files when I try and open give this error "An unknown error occurred while accessing the file" Any ideas? ThanksAnonymous
November 30, 2015
This worked brilliantly for getting my storage pool back after reinstalling Server 2012. Thank you!
