Bringing Bots into an Omni-channel Customer Service Strategy – Part 1
Update: This post was created using v1 of the Bot Framework. See Part 2 for a walk-through of upgrading the bot to v3, and augmenting it with the ability to create cases in Dynamics CRM.
As Satya Nadella highlighted at Microsoft Envision 2016, organizations are undergoing a digital transformation, driven by technological advances in areas such as artificial intelligence and ubiquitous computing. This transformation is being accelerated by the concept of Conversation as a Platform: enabling users to interact with your organization in a natural, conversational way, on the channel or service that they choose, powered by automated intelligence.
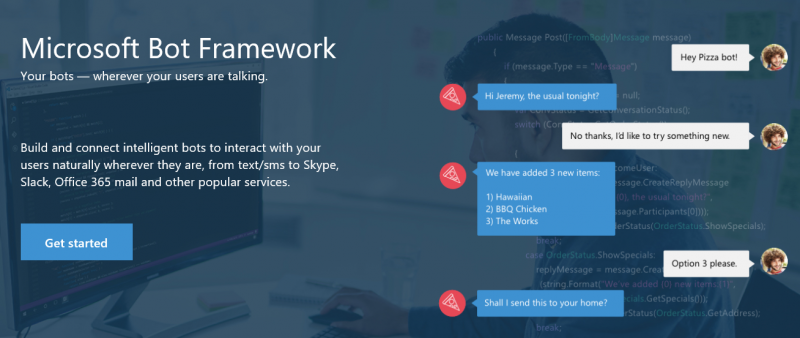
To enable this concept of Conversation as a Platform, Microsoft recently released a public preview of the Microsoft Bot Framework. The Bot Framework enables the building of intelligent bots (or conversational agents), and the connecting of those bots to channels and services such as Skype, Facebook Messenger, web chat, email, and SMS.
Bots offer the promise of transforming the way customers interact with organizations from a Customer Service perspective. They offer the potential of:
- Providing intelligent service at scale, reducing organizational support costs
- Giving customers a natural and intuitive self-service experience
- Enabling customers to engage on the services or channels they prefer - the same services they use today for social interactions
But unless bots are brought into an organization’s overarching omni-channel customer engagement strategy, they will inevitably become a separate silo of the customer interaction story.
This post will be the first in a series in which we explore how we can take advantage of the benefits of scale and channel breadth with bots, making sure the experiences we create with them build upon the investments that we have made in our customer service strategy, and feed into the consolidated customer 360 view using Microsoft Service and Dynamics CRM as our underlying customer engagement platform.
Bots for Self-Service using Consolidated Knowledge
In this post, we will take the first step in bringing bots into the consolidated customer engagement strategy by creating a basic bot that will allow users to access self-service knowledge, tapping into the authoritative knowledge that has been curated and published using the robust knowledge management capabilities in the Dynamics CRM Interactive Service Hub. By tapping into the self-service knowledge in CRM, we will help drive consistency in information and experiences provided to our customers, and avoid re-creating content for our new channel. We will allow our customer to tell us what type of interaction they would like to initiate, then if appropriate, allow them to find authoritative knowledge based on their query.
We will build our bot using the Bot Framework and Bot Builder for C#, retrieving knowledge articles from Dynamics CRM via the Web API.
We will draw on the following resources:
- The Walkthrough for Registering a CRM app with Azure Active Directory
- The Bot Connector Getting Started Guide
- Sample code for connecting to CRM Web API from C# found in CrmWebApiCSharp on GitHub
Pre-requisites
The pre-requisites for building our knowledge-powered bot include:
- An instance of Dynamics CRM Online; you can request a trial of Dynamics CRM Online here
- Administrator credentials to access the O365 Admin Portal for our tenant that our CRM instance is connected to
- A Microsoft Azure subscription for application registration; A trial account will also work, and we will use a trial account in our walkthrough
- Dynamics CRM credentials for a user with privileges to allow us to read Knowledge Articles in CRM
- Visual Studio 2015
- Update all Visual Studio extensions using Tools->Extensions and Updates->Updates
- A Microsoft Account
- The Bot Builder SDK
- You can download the SDK on GitHub here
- The Bot Framework Emulator (for Windows)
- You can download the Bot Framework Emulator from here
- The Bot Connector Visual Studio Project Template
- You can download the template from here
- Save the downloaded zip file to your Visual Studio 2015 templates directory, which is typically found in %USERPROFILE%\Documents\Visual Studio 2015\Templates\ProjectTemplates\Visual C#
Obtaining our CRM Web API Credentials
Our first task will be obtaining the credentials that we will need to access CRM data via the Dynamics CRM Web API. To do this, we will follow the steps in the Walkthrough: Register a CRM app with Azure Active Directory, starting with the instructions under Register an application with Microsoft Azure.
Note: if you are familiar with the steps involved in authenticating to the CRM Web API, you may want to skip ahead to Building our Bot using the Bot Framework.
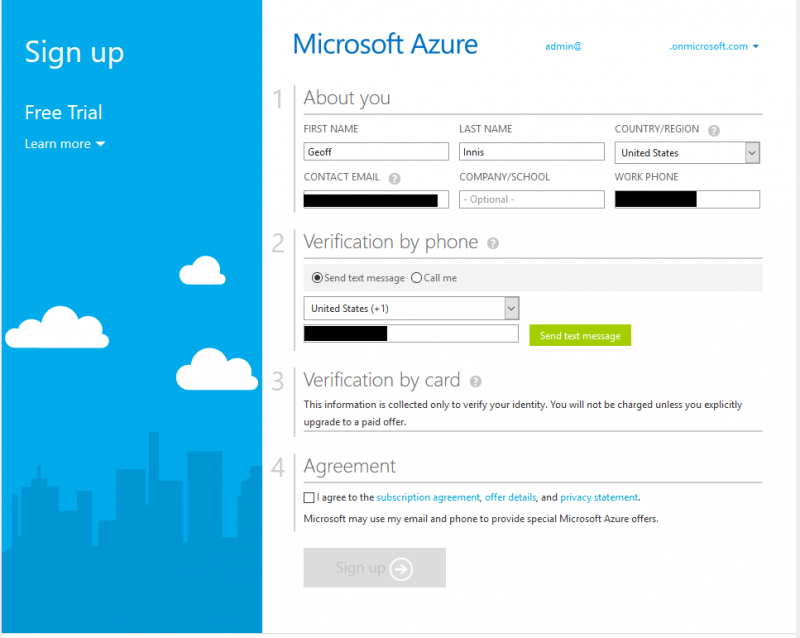
There are some nuances that we will call out here. If an existing Azure subscription is not already available on the same tenant, we can sign into the Azure management portal with our administrator credentials, and sign up for a free trial:
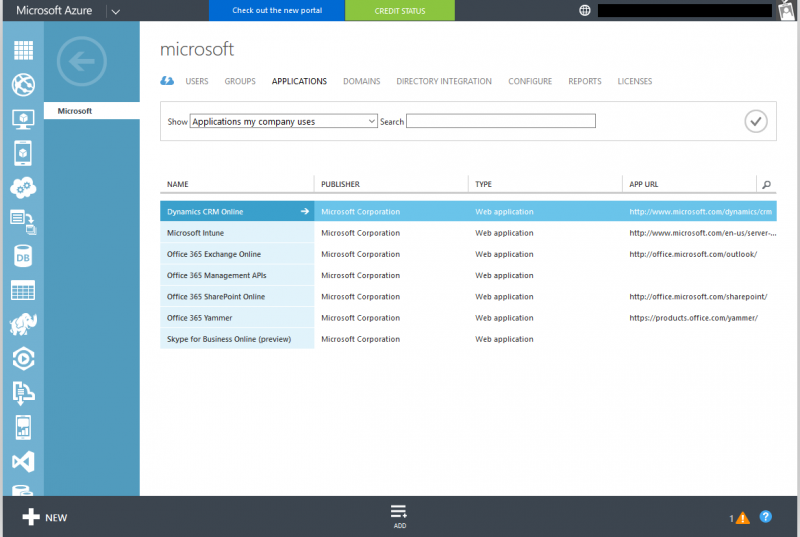
While logged into the Azure management portal, navigate to Active Directory from the left hand menu (via Browse > if necessary).
After having selected the appropriate directory, choose APPLICATIONS in the top navigation, and then click the ADD button at the bottom of the page:
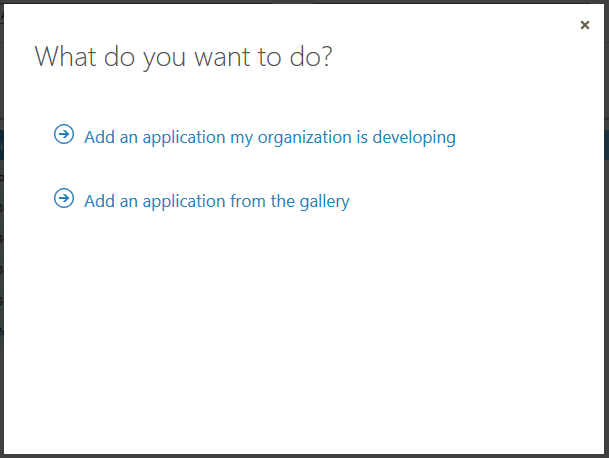
In the dialog, select Add an application my organization is developing:
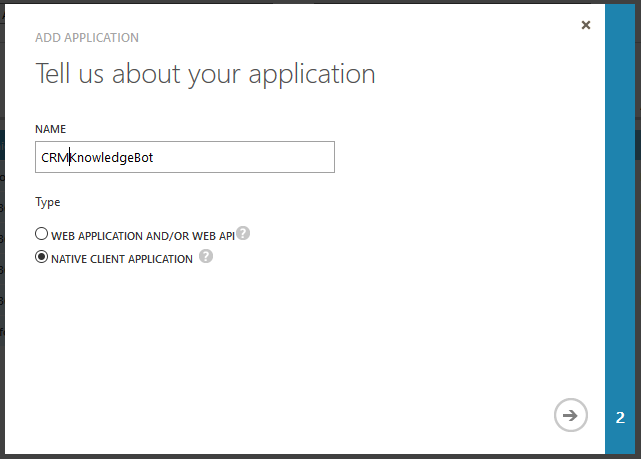
Next, name your application, and make sure you choose NATIVE CLIENT APPLICATION:
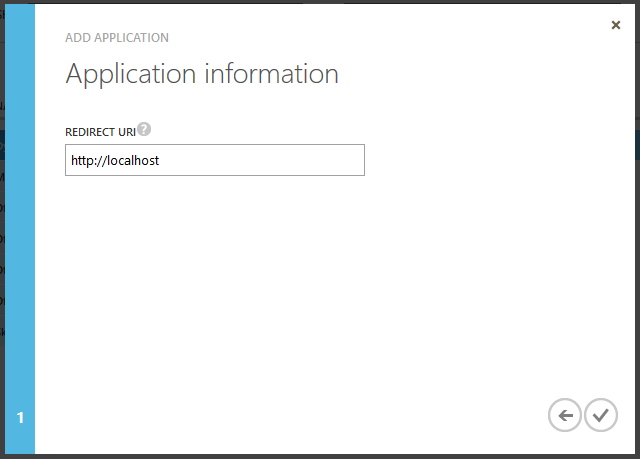
Enter any valid URL for the redirect URL:
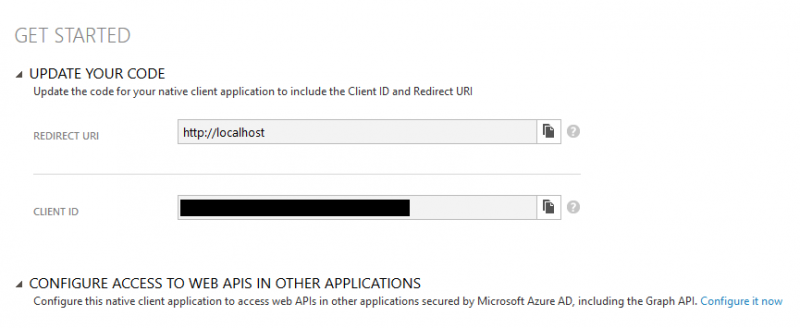
Copy the CLIENT ID, which will be needed later. Next, click the Configure it now link to configure access to Web APIs:
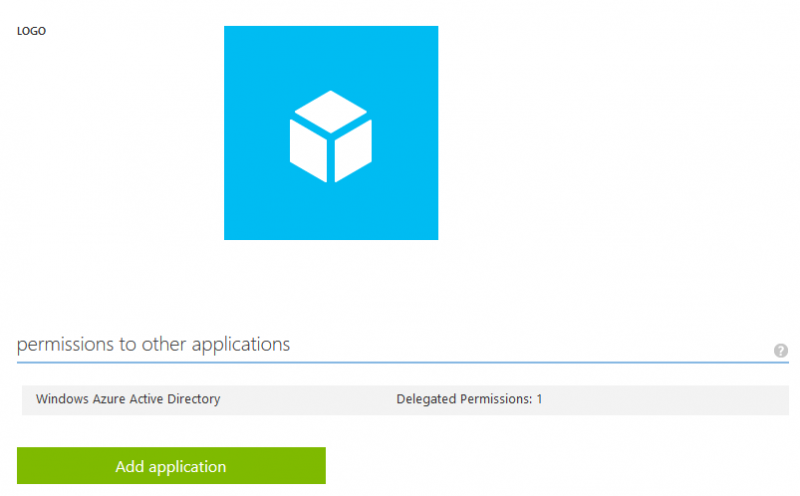
On the configuration screen, scroll down, and click the Add application button:
With Microsoft Apps selected in the dropdown, click the plus button next to Dynamics CRM Online, then click Complete:
Ensure you choose Access CRM Online as organization users in the Delegated Permissions dropdown:
Then click the Save button in the bottom bar.
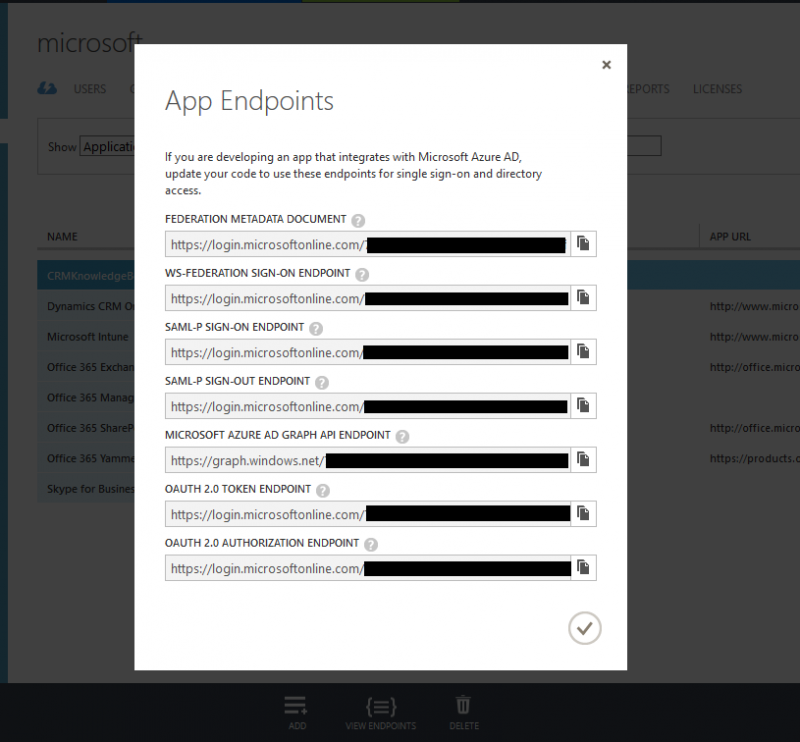
With your directory selected, click View Endpoints in the bottom bar, and copy and save the endpoint URL for the OAUTH 2.0 AUTHORIZATION ENDPOINT:
We now have all of the information we need to access the Web API from our bot.
Building our Bot using the Bot Framework
We will now start putting together the code for our bot, using steps found in the Bot Connector Getting Started Guide.
We will be using the Dialogs model to create our bot’s interaction flow. As stated in the Bot Builder documentation, dialogs model a conversational process, where the exchange of messages between bot and user is the primary channel for interaction with the outside world. The conversation state, or where the user is in the dialog process or path, is passed back and forth in the messages exchanged between user and bot.
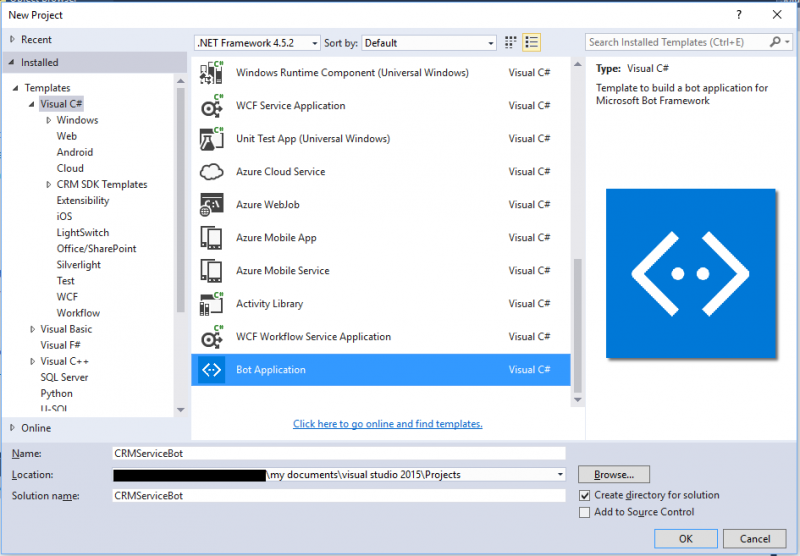
We Open Visual Studio, and create a new project using the Bot Application template that we downloaded as a part of our pre-requisites:
We will now use NuGet to install the Microsoft.Bot.Builder and Microsoft.Bot.Connector packages (along with any dependencies), using the Package Manager console.
To assist with our authentication to the CRM Web API, we also use NuGet to install the Active Directory Authentication Library. We will use a specific version (2.26) to work with our code. See the following URL for the specific NuGet Package Manager console command:
Since we are using the Dialogs model for our bot, we will base our code on the Echo Bot with State example in the Bot Builder documentation.
To the existing MessageController.cs class in our Bot Application template, we add in a number of using statements, and add in some constants to hold our CRM Web API authentication information:
[snippet slug=bot_pt1_using lang=c-sharp]
When our dialog with the user starts, our StartAsync method will await a message from our user, which will be passed to the MessageReceivedAsync method. This method sends our first message to our user, asking them how our bot can help them. We offer three options, and present them using PromptDialog.Choice , to which we pass our dialog context, our resume handler method, and the options that our user can select:
[snippet slug=bot_pt1_messagereceivedasync lang=c-sharp]
When a message is received from the user, it is handled by the resume handler method we specified: AfterServiceChoiceAsync. This method will check to see what selection the user made, and respond appropriately. Note how we are only catering for the Information option in this post. If the user specifies that they are interested in Information, we prompt them to provide us a search term, representing what type of information they are interested in. This time, we use PromptDialog.Text to prompt the user to provide us freeform text. Once the user provides us with their search term, our resume handler method AfterSearchTermProvidedAsync will receive it:
[snippet slug=bot_pt1_afterservicechoiceasync lang=c-sharp]
The search term message that the user provides is received by the AfterSearchTermProvidedAsync method, and this is where we will call back to CRM to retrieve knowledge from our consolidated, authoritative knowledgebase. In this method, we construct a URL for our Web API request. We search for Knowledge Articles that have a status of Published, and which have keywords that contain the search term provided by the user.
It is worth noting that an alternative approach to searching for knowledge from CRM is to use the FullTextSearchKnowledgeArticleRequest Message request class in the Organization Service, to benefit from a more robust search. In this instance, we will use the newer Web API, however.
We pass our request URL to the CRMWebAPIRequest method, which will manage the issuing of the request, returning the results as an HttpResponseMessage.
If our request was successful, we use the Newtonsoft.Json JSON framework to parse our results, and obtain an array of JObjects representing our article results. If we have results, we start building a new Message that we will send back to our user, with the results. For each result, we return the title of the article, which will link to the article on our customer self-service portal, and we return the description of the article as well.
Note that we are using Markdown to format our message. Markdown is suitable for formatting messages on many of the channels that you may deploy your bot to, including the Web Chat channel. Other channels such as Facebook Messenger will benefit from the use of Attachments, Cards and Actions to format messages. The downloadable code includes some commented-out code showing how we could present our knowledge article results using attachments and actions, if desired.
We use a different technique for sending our formatted results message, via the SendMessage method, to allow us to also use PromptDialog.Confirm to ask the user if they wish to search again:
[snippet slug=bot_pt1_aftersearchtermprovidedasync lang=c-sharp]
To issue our request to the Web API, we used our CRMWebAPIRequest method, which uses our OAuth2 endpoint, our CRM User credentials, and our Active Directory Client ID to obtain a token. The token is then used in our HTTP request headers to authenticate our request to the Web API, and the response is returned (see CrmWebApiCSharp for more details):
[snippet slug=bot_pt1_crmwebapirequest lang=c-sharp]
We add a few more methods to handle repeat searches, which are included in the full code download at the end of this post.
We are now ready to test our bot!
We press F5 in Visual Studio, which will Start Debugging. Once debugging has started, an Internet Explorer window should pop up, containing your bot endpoint information.
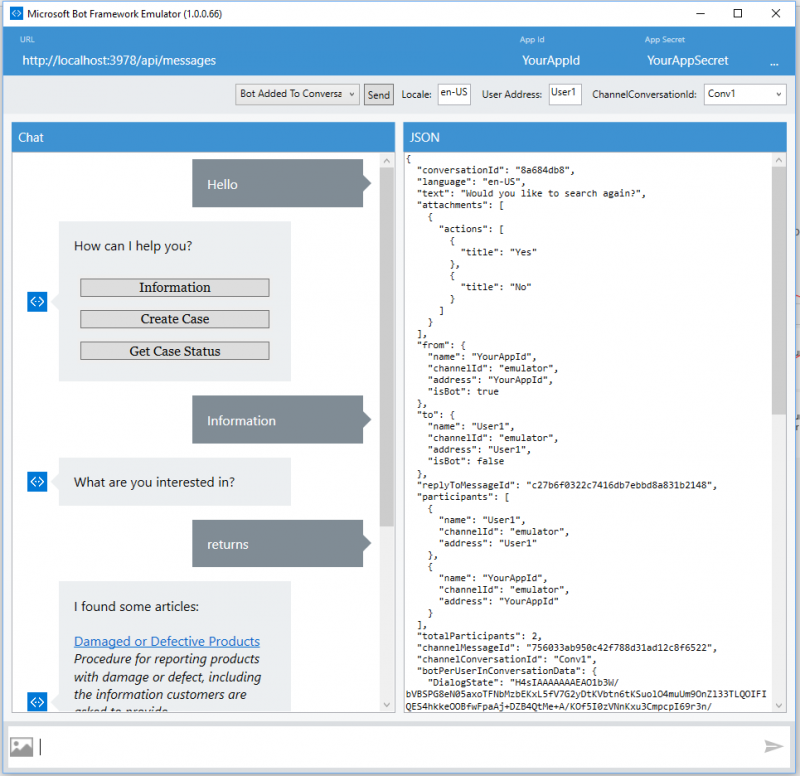
We also launch our Bot Framework Emulator which we downloaded earlier. We take the URL from the IE window address bar, append /api/messages, and enter this in the URL field of the emulator. We can use the default App Id (YourAppId) and App Secret (YourAppSecret) from the application template Web.Config file, and add them in the appropriate inputs in the emulator as well.
We can now have a conversation with our bot, via the emulator. We are able to get authoritative answers using a basic conversational engagement with our bot:
Our bot is now ready to be published to Microsoft Azure, registered with the Bot Framework, and made available on a variety of channels including Web Chat, Skype, Email, SMS, Facebook Messenger, and more.
In future posts, we will continue to build out our Bot’s capabilities, and further integrating it into our cohesive, omni-channel customer engagement approach. In the meantime, if you wish to walk through the publishing of your bot and configuring of channels, you can find details here.
Here is a 38 second video showing our bot’s behavior when published and deployed to the Web Chat channel:
[video width="404" height="728" mp4="https://msdnshared.blob.core.windows.net/media/2016/06/ServiceBot_Part1.mp4"][/video]
You can download the full source code for the solution here.
Stay tuned for more posts, in which we will continue extending our Customer Service reach via bots, using other capabilities of the Bot Framework and Cognitive Services.
