How to isolate the installation of individual UDDI Services on Windows 2003 Server
In order to install UDDI components on a Windows 2003 server you use the Add/Remove Windows Components wizard to install UDDI components by taking the following steps:
- Click Start then click Run
- At the Run dialog box enter “appwiz.cpl” without quotes and click the OK button
- This launches the Add or Remove Programs window where you can then click the Add/Remove Windows Components button to launch the wizard.
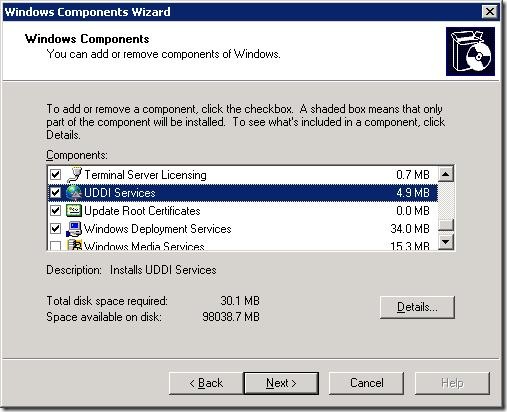
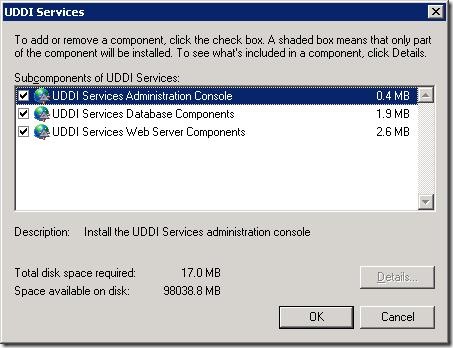
This will launch the Windows Components Wizard that will allow you to install various components onto the server, including the UDDI Services component. When you click the check box for UDDI Services this will automatically select the three subcomponents of UDDI Services Administration Console, UDDI Services Database Components and UDDI Services Web Server Components.
In step three above, when you click on the Add/Remove Windows Components button this will launch the sysocmgr.exe process. This executable loads a specific *.inf file found at %SYSTEMROOT%\inf\sysoc.inf. Sysocmgr.exe parses the sysoc.inf file to list which components a user can select within the Add/Remove Components Wizard. As you proceed to install the selected components the installation process will go through each checked component and either install or configure that component. This may affect some of the components that you have already installed on the machine, like the Transaction Manager.
Below are the steps to follow if you want to install the UDDI Services components onto a Windows 2003 machine without touching any of the other previously installed Windows components.
Installing the UDDI Services Windows component on Windows 2003 in isolation
Open up Notepad and paste in the following contents. The text below will configure sysocmgr.exe to only display the UDDI Services component as a selection and it also sets the wizard window title to “Uddi Services Installation Wizard”:
[Version]
Signature = "$Windows NT$"
DriverVer=10/01/2002,5.2.3790.3959[Components]
UDDIServices=uddiocm.dll,OcEntry,uddi.inf,,6[Global]
WindowTitle.StandAlone="UDDI Services Installation Wizard"Save the text file as UddiInstall.inf to the root of your hard drive at C:\UddiInstall.inf
Make sure that you are logged into the Windows 2003 server as an Administrator and then open a command prompt by going to Start –> Run –> type in “cmd” without quotes and click Ok.
At the command prompt type in the following line to launch the modified Add/Remove Windows Components wizard that uses our saved UddiInstall.inf file
sysocmgr /i:c:\UddiInstall.inf /r
Notice that we added the ‘/r’ switch to the sysocmgr.exe command line to prevent any possible reboot requests during the installation of UDDI even though one should not be required for installing UDDI only.
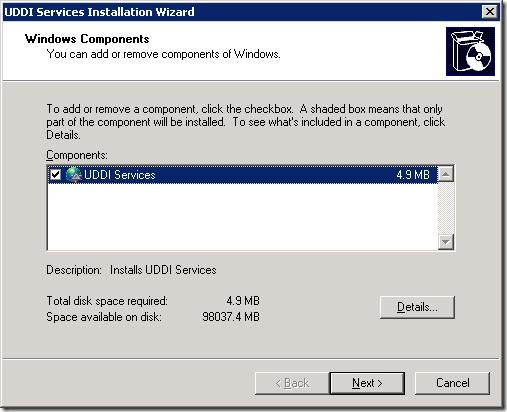
When you run the command above, it will launch the familiar Add/Remove windows component wizard, however this time you’ll notice that only UDDI Servcies is listed as a component to configure.
From there you would proceed with the installation of UDDI as normal. You can click the Details button to select the UDDI Database component to install and then proceed from there without affecting any of the previously installed Windows Components.
NOTE: This entry only applies to UDDI 2.0 on Windows 2003. The installation of UDDI 2.0 on Windows 2008 is handled by the Server Manager as a Server Role. Sysocmgr.exe is not used to install UDDI on a Windows 2008 server.
Related Information
====================
- 222444 How to add or remove Windows Components by using Sysocmgr.exe
- Installing UDDI Services
Cheers,
Todd Foust


