Configuration Manager 1602 on Windows 2008 R2 & SQL 2008 R2–Upgrading to Windows 2012 R2 & SQL 2014
Here’s the Scenario. You’re running ConfigMgr 2012 R2 or 1511 on the following:
Operating System: Windows 2008 R2
SQL Server: SQL 2008 R2
Configuration Manager Version: If you’re currently running Configuration Manager 2012 R2 (with or without SP1) with co-located SQL 2008 or higher on your CAS or Primaries, you must first do an in-place upgrade to ConfigMgr 1511, and then upgrade to ConfigMgr 1602, as long as you’re running a supported version of SQL along the way for each version of ConfigMgr. ConfigMgr 1602 supports an in-place OS upgrade of Windows 2008 R2 to Windows 2012 R2.
You can upgrade from SQL 2008 or SQL 2008 R2 to SQL 2012 or 2014, but I would recommend going to SQL 2014 so you don’t have to worry about upgrading SQL again for awhile. As of this writing, SQL 2014 is the latest GA release of SQL.
You may choose to either do an in-place upgrade of SQL 2008 or 2008 R2 to 2014, or you may choose to uninstall SQL 2008 or 2008 R2 and install SQL 2014.
I’ll cover the in-place upgrade method first. If you’re already on SQL 2012 or 2014, you can skip ahead to the Operating System upgrade steps.
Warning: This has not been tested in an environment with non domain-joined clients. You may have issues with these clients which require manual intervention on the client to remediate them after this upgrade.
In-Place Upgrading SQL 2008 or 2008 R2 to SQL 2014
Stop SMS_EXECUTIVE service on the site server you are upgrading. You may even want to temporarily set it to “Manual” start type in the event you need to restart.
Launch the SQL 2012 or 2014 Setup.exe
Select the “Upgrade from SQL” option under “Installation”
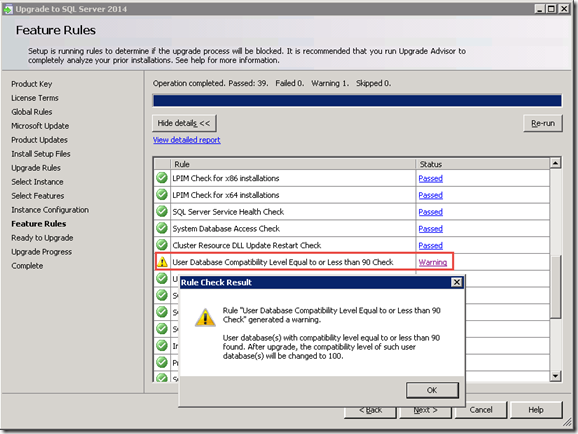
You will receive a warning about the User Database Compatibility Level being equal or less than 90. The upgrade will change this compatibility level to 100 which is OK as long as you aren’t using SQL for anything other than Configuration Manager, SQL Reporting, or WSUS. If you are using it for other applications, make sure your applications support the newer version before doing the upgrade.
If you fail any of the rules, you will need to take action to remediate them as necessary.
Click OK –> Next –> Upgrade to begin the upgrade process.
If there are any failures, the default directory for logs is C:\Program Files\Microsoft SQL Server\120\Setup Bootstrap\Log in a directory with the name format of YYYYMMDD_HHMMSS. Look for log files in this directory and open them to determine the cause. Also open the file named “Detail.txt” and scroll to the bottom to determine the error which prevented the upgrade.
One common issue you may run into is an error in the sqlncli_cpu64_1.log. An error in this log may state “Product: Microsoft SQL Server 2012 Native Client -- Configuration failed.” The error in Detail.txt may state “Error result: –2068643839” and “Condition "Is the user's scenario set to EditionUpgrade" did not pass as it returned false and true was expected.” If you receive this error, you may have the SQL 2012 Native Client installed. Uninstall it and you should be able to proceed with the upgrade.
You can set SMS_EXECUTIVE back to Automatic start if you set it to Manual, and start it. Launch the ConfigMgr Administration Console and verify it connects as expected.
Now that you have successfully upgraded SQL, you may want to uninstall the SQL 2008 or 2008 R2 Management Studio so that you don’t accidently continue using it. To do so, just go to Programs and Features, and select SQL 2008 or 2008 R2, right-click and select Uninstall/Change, and the SQL 2008 or 2008 R2 Setup will launch. Select all of the components you wish to remove, and the SQL 2008 or 2008 R2 components will uninstall.
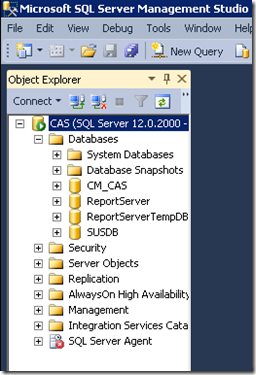
Now your SQL Management Studio should show 12.2.2000 assuming you installed SQL 2014.
Windows 2008 R2 –> Windows 2012 R2 Upgrade Process
Next we will upgrade the Windows 2008 R2 OS to Windows 2012 R2.
If WSUS is currently installed on your Windows 2008 R2 based stand-alone primary or CAS, you must uninstall it first. Of course, this also means you must uninstall your Software Update Point (SUP) role as well. If you prefer to keep your SUSDB intact, you can export it first using the WSUSUTIL.EXE EXPORT <package filename> <logpath> command-line tool located by default in the %ProgramFiles%\Update Services\Tools directory. Note, you may need to export the package filename using filename.xml.gz extension as a .cab is only sufficient for smaller files, and you may need a hotfix for WSUSUTIL EXPORT command to work properly. See https://blogs.technet.microsoft.com/wsus/2013/04/09/problem-solved-the-wsus-export-bug/ for more details. Once you install the WSUS role on your 2012 R2 server, you can then re-import it using WSUSUTIL.EXE IMPORT. Also I recommend installing KB3095113 hotfix after re-installing WSUS on your upgraded Windows 2012 server so that you can service Windows 10 clients.
Once this is completed, insert the Windows 2012 R2 with Update 1 media.
Run SETUP.EXE and click “Install Now” to begin.
Select “Go online to install updates (recommended)”
Enter your product key
Select the edition of Windows 2012 R2 to install
Select “Upgrade: Install Windows and keep files, settings, and applications”
The Compatibility Report will be saved to the desktop at this point. Review it for any compatibility issues you may run into.
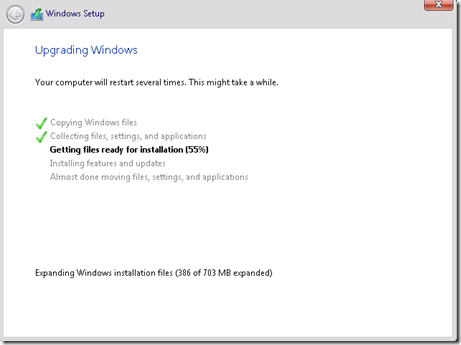
The upgrade process will begin
After the upgrade is complete, launch the ConfigMgr Admin Console, and if you have a hierarchy, verify your database replication is functioning properly. It may temporarily show “Link failed” due to the site server being down for a period of time, but should clear up after replication resumes normal operation.
Windows 2008 or 2008 R2 will now be sitting in a directory in C:\Windows.old. After you’re comfortable that things are working as they should be, feel free to run the disk cleanup utility and remove it to free up disk space on C:.
You will need to reinstall the BITS Feature as it will not be installed following the in-place upgrade, but you’ll need it for ConfigMgr, so make sure to re-add the BITS feature at this time.
Also the Windows Process Activation and World Wide Web Publishing services will most likely be disabled (I found this true on a child primary, but not my CAS). Re-enable them and re-start them as needed.
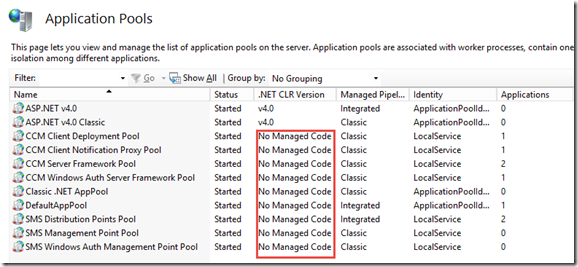
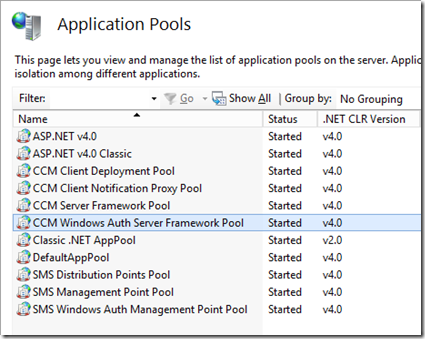
Lastly, if you launch IIS Manager, you will probably find that the various application pools are set for “No managed code” under the .NET CLR Version column:
Set them back to their previous .NET CLR Versions as follows (note that the Classic .NET AppPool should be v2.0 and the rest should be v4.0), and restart the server afterwards.
Now I’ll cover the uninstall->reinstall method to get to SQL 2014.
Uninstalling SQL 2008 or 2008 R2 and Installing SQL 2014
First, we will uninstall SQL 2008 or 2008 R2.
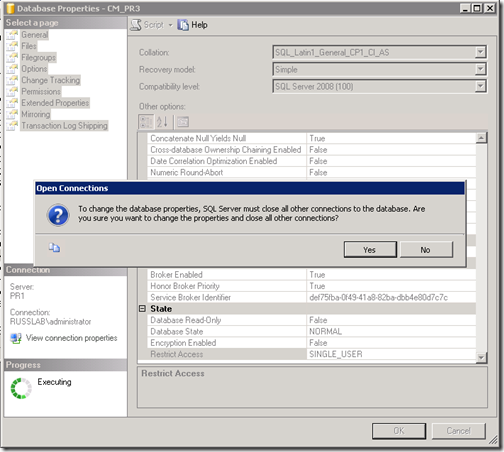
First we need to run a PREINST /STOPSITE on the site server in order to successfully close all the connections so you can detach the database.
Right-click the ConfigMgr site database, select Tasks and Detach.
Check the boxes to drop connections and update statistics (if they appear) and click OK
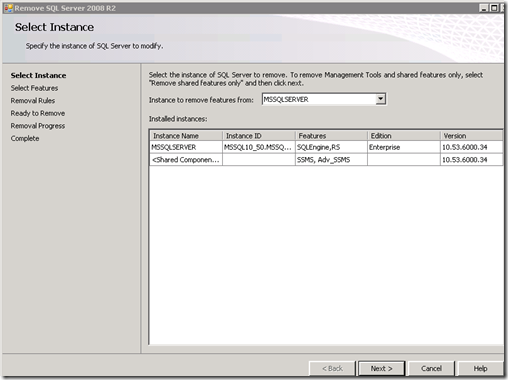
Once all of the needed databases are detached, we can now uninstall SQL by launching Programs and Features, selecting Microsoft SQL 2008 or 2008 R2 from the list, and clicking Uninstall/Change
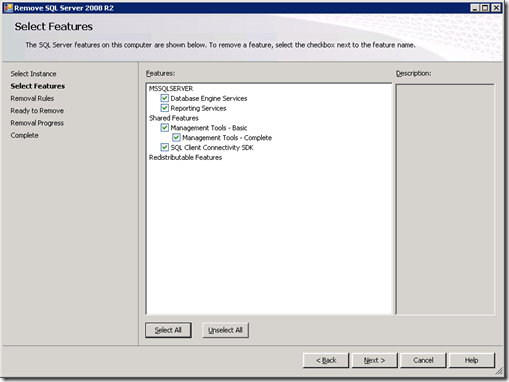
Click Select all to de-install all SQL 2008 or 2008 R2 features/components and click Next
SQL will now uninstall.
Following completion of the SQL 2008 or 2008 R2 uninstallation, proceed to the Windows 2008 –> Windows 2012 Upgrade Process above to do an in-place upgrade of the OS.
After the OS is upgraded, go through the normal SQL 2014 installation process, making sure to specify the ConfigMgr SQL Service account when prompted.
After SQL 2014 is installed, launch SQL Management Studio
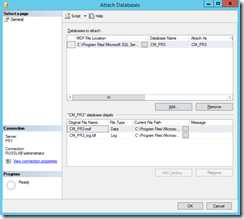
Right-click Databases and click Attach
Click “Add” and browse to your detached ConfigMgr database MDF (it should find the LDF as well).
Click OK
Now click New Query, and make sure the CM_XYZ (replace XYZ with your site code) database is selected. Next paste the following commands into the query window:
EXEC SP_CHANGEDBOWNER ‘SA’
ALTER Database CM_XYZ SET TRUSTWORTHY ON
ALTER DATABASE CM_XYZ SET SINGLE_USER WITH ROLLBACK IMMEDIATE
ALTER DATABASE CM_XYZ SET ENABLE_BROKER
ALTER DATABASE CM_XYZ SET MULTI_USER WITH ROLLBACK IMMEDIATE
SP_CONFIGURE 'CLR ENABLED', 1
RECONFIGURE
Now restart the SQL service, start the SMS_EXECUTIVE service, and launch the ConfigMgr admin console to verify it connects successfully and that if you have a hierarchy, DRS replication is functioning as expected.
If you have any issues connecting, review SMSPROV.LOG in the ConfigMgr logs directory or SMSADMINUI.LOG in your AdminConsole\Logs directory for clues
If you had to remove your SUP and WSUS, you may re-install WSUS, and then your SUP at this time.
