Update your Windows desktop app to .NET Core 3.0.100-preview-009754
Recently we have learned how we can use the daily builds of .NET Core 3.0 to start experimenting with the upcoming support for WPF and Windows Forms. In the post we took a WPF project, a sample LOB app which I often use for my articles and sessions, and we migrated it to use .NET Core 3.0 instead of the traditional .NET Framework.
However, as highlighted in the previous post, the current .NET Core 3.0 support is highly experimental. The framework hasn't reached the public preview stage yet and we can play with it only using the daily build. As such, it isn't a big surprise that the newest version of .NET Core 3.0, specifically build 3.0.100-preview-009754, has broken a few things 😃
If you would try to open the project we have created the last time, we won't be able to do it anymore due to an error returned by Visual Studio. Let's see in this post how to fix them. As first step, remember to download the latest .NET Core 3.0 daily build from GitHub.
Welcome Visual Studio 2017 15.9
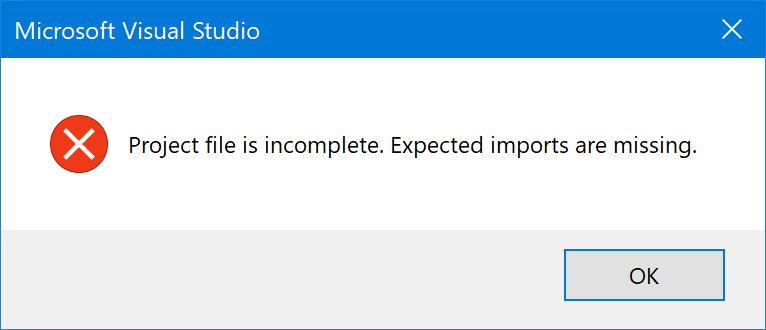
In the meantime the Visual Studio team has released a newer version of the IDE, 15.9 (previously available in the Preview channel), which includes an important change regarding .NET Core. By default, in fact, Visual Studio will now use only the latest stable version of .NET Core, even if you have a preview version installed on your machine. As such, after upgrading to Visual Studio 2017 15.9, if you try to open the project we have created the last time you will get the error Project file is incomplete. Expected imports are missing. :

To enable the usage of the preview version of .NET Core 3.0 we have just installed you need to go to Tools -> Options -> Projects and Solutions -> .NET Core. You will find an option called Use previews of the .NET Core SDK, which you must turn on.

Now you can safely open the project we have built the last time. Well, more or less, since you'll get again the same error. The reason is that the definition of the project has changed with the last build. We can see that by opening a command prompt and creating a new project with the command:
dotnet new wpf
If we open the .csproj file with a text editor and we match it with the one of our existing project, we'll notice some differences:
 <Project Sdk="Microsoft.NET.Sdk.WindowsDesktop">

  <PropertyGroup>
    <OutputType>WinExe</OutputType>
    <TargetFramework>netcoreapp3.0</TargetFramework>
    <UseWPF>true</UseWPF>
  </PropertyGroup>

</Project>
The file is simpler than the previous one. Other than a few key changes (like the name of the SDK), we can notice in fact that we don't have anymore an entry for each file which compose the project. Now, in fact, the project will automatically consider all the files which are included in the folder as part of the application.
Let's update the .csproj file of our previous project to include the new changes. This is the final result:
 <Project Sdk="Microsoft.NET.Sdk.WindowsDesktop">

  <PropertyGroup>
    <OutputType>WinExe</OutputType>
    <TargetFramework>netcoreapp3.0</TargetFramework>
    <UseWpf>true</UseWpf>
  </PropertyGroup>

  <ItemGroup>
    <Content Include="Watermark.png">
      <CopyToOutputDirectory>PreserveNewest</CopyToOutputDirectory>
    </Content>
  </ItemGroup>
</Project>
Here are the changes we've made:
- We have changed the Sdk name in the Project entry from Microsoft.NET.Sdk.Wpf to Microsoft.NET.Sdk.WindowsDesktop. Now, in fact, the SDK is unique regardless of the platform's choice (WPF or Windows Forms).
- We have added the UseWpf entry and we have set it to true. This is the new approach to specify the application's platform, in this case WPF.
- We have removed all the previous entries inside the ItemGroup section, like ApplicationDefinition or Page. The only exception is for the Watermark.png file, since we need to customize the build action and to set it as Content.
That's it. Now try to reload the project in Visual Studio and it should be opened without problems. The application should compile and run just fine, even if with the same limitations we have seen in the previous post (like some debugging issues).
The new build of .NET Core 3.0 has brought also an improvement in the compilation chain. If you remember, in the previous post we were forced to build and run the project using MSBuild and Visual Studio. Trying to do the same using the .NET Core CLI was resulting in a compilation error.
Now, instead, we can compile and run our project also using the command line interface. Open a command prompt and move to the folder which contains your project, then execute the following command:
dotnet build
Unlike the last time, the operation will complete successfully.

And if you type:
dotnet run
your WPF application will start just fine.
Wrapping up
In this post we have seen how we can migrate our WPF .NET Core 3.0 project to use the latest daily build, which introduced some breaking changes in the project's definition.
Remember that .NET Core 3.0 is still experimental. Starting to migrate your WPF and Windows Forms applications can be a good exercise to plan the future of your desktop application, but it shouldn't be used to move applications used in production.
You can find the updated code on GitHub.
Happy coding!
Comments
- Anonymous
November 20, 2018
Awesome! - Anonymous
March 05, 2019
You do I enabled "Use previews of the .NET Core SDK" on VS2019 Build Tools? Is there a registry key to set?- Anonymous
March 07, 2019
If you're using a preview version of Visual Studio 2019, you don't need to enable it because it automatically uses the preview versions of .NET Core on your machine. If you're using VS2017 or the recently released VS2019 RC, instead, you need to turn the option on, otherwise you will get errors because it will try to open your WPF / Windows Forms project with .NET Core 2.2.
- Anonymous