Installing Windows Azure BizTalk Services SDK
This is just a simple step by step guide to help you understand how to install the Windows Azure BizTalk Services SDK and what are the key components.
Downloading the SDK Files
You can download the SDK from this location:
https://www.microsoft.com/en-us/download/details.aspx?id=39087
If you plan to use EDI integrations, then you need to select the file MicrosoftEdiXSDTemplates.zip
The Tools.zip File
This is an interesting file that contains two important tools if you are already using BizTalk Server on premise
- BTM Migration Tool: The BTM to TRFM convertor is a command line tool which takes inputs as BTM File (BizTalk on premise map format), input and output schemas and produces the new mapper (.trfm) file as an output (BizTalk Services map format)
- TPM Migration Tool: The trading partner data migration tool migrates partner and agreement settings from BizTalk Server 201x to Windows Azure BizTalk Services.
Installing the Windows Azure SDK
Before installing, make sure that Visual Studio is not open, because the installation will fail like this:
Run the WindowsAzureBizTalkServicesSetup.exe
Accept the terms and click Next
Select Tools (Basically PowerShell cmdlets) and RunTime (if you plan to use LOB adapters, then you need to install this)
Review the summary section and click on Install
After several minutos like 5 to 10, you will see the BizTalk Adapter Service Setup Wizard:
Click Next, accept the terms
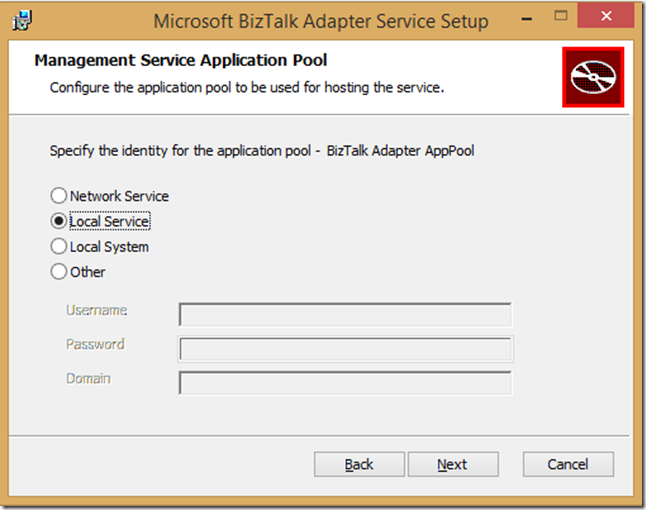
Choose the appropiated Identity management for the BizTalk adapter application pool.The BizTalk Adapter Service application pool in IIS is created and executes as this identity
In Azure BizTalk Services Deployment Details, provide the BizTalk Services deployment URL, and select Next.
This URL is used to ascertain the artifact store associated with your BizTalk Services subscription. The configuration settings for BizTalk Adapter Service components you create, such as LOB Relays and LOB Targets, are stored in the artifact store.Select the certificate bindings for the BizTalk Adapter Service website and select Next.
Use SSL to secure the management service: Select this option to encrypt the HTTP requests with SSL.
Select an existing SSL certificate: Select this option to select an existing certificate from the Certificates personal store. The certificate should be from a trusted certificate authority.
Port: Enter the port number for the BizTalk Adapter Service website. By default, port 8080 is specified. Confirm the port is open in your firewall.
Note that in my case i have disabled SSL to simplify development.
Click Next and then Install.
After a couple of minutes, you will be ready to create you first Windows Azure BizTalk Service integration
Ready to go! Good Luck in this new world! ![]()
Main Source: https://msdn.microsoft.com/en-us/library/azure/hh689760.aspx
Comments
- Anonymous
May 20, 2016
wow Great Relief before selected SSL but finally got errors and it was rolled back so plan to uninstall and reinstall luckily l got into this site within 30 secs its completed without selecting SSL great :DAugstin _/_


