Configure On-Premises Conditional Access using registered devices
The following document will guide you through installing and configuring on-premises conditional access with registered devices.
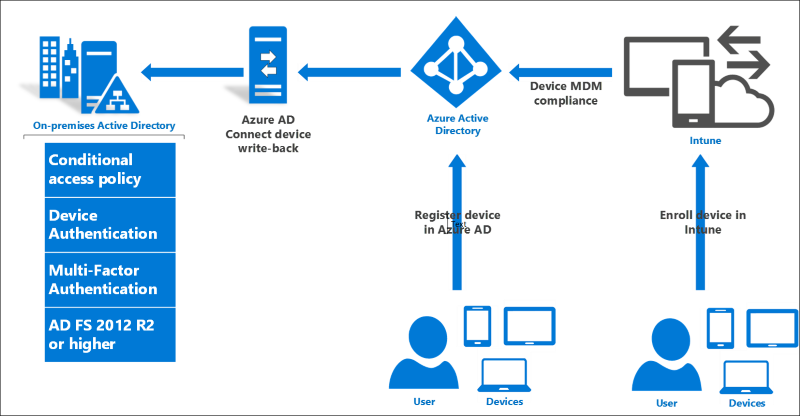
Infrastructure pre-requisites
The following per-requisites are required before you can begin with on-premises conditional access.
| Requirement | Description |
|---|---|
| A Microsoft Entra subscription with Microsoft Entra ID P1 or P2 | To enable device write-back for on premises conditional access - a free trial is fine |
| Intune subscription | only required for MDM integration for device compliance scenarios -a free trial is fine |
| Microsoft Entra Connect | November 2015 QFE or later. Get the latest version here. |
| Windows Server 2016 | Build 10586 or newer for AD FS |
| Windows Server 2016 Active Directory schema | Schema level 85 or higher is required. |
| Windows Server 2016 domain controller | This is only required for Hello For Business key-trust deployments. Additional information can be found at here. |
| Windows 10 client | Build 10586 or newer, joined to the above domain is required for Windows 10 Domain Join and Windows Hello for Business scenarios only |
| Microsoft Entra user account with Microsoft Entra ID P1 or P2 license assigned | For registering the device |
Upgrade your Active Directory Schema
In order to use on-premises conditional access with registered devices, you must first upgrade your AD schema. The following conditions must be met: - The schema should be version 85 or later - This is only required for the forest that AD FS is joined to
Note
If you installed Microsoft Entra Connect prior to upgrading to the schema version (level 85 or greater) in Windows Server 2016, you will need to re-run the Microsoft Entra Connect installation and refresh the on-premises AD schema to ensure the synchronization rule for msDS-KeyCredentialLink is configured.
Verify your schema level
To verify your schema level, do the following:
- You can use ADSIEdit or LDP and connect to the Schema Naming Context.
- Using ADSIEdit, right-click on "CN=Schema,CN=Configuration,DC=<domain>,DC=<com> and select properties. Replace domain and the com portions with your forest information.
- Under the Attribute Editor locate the objectVersion attribute and it will tell you, your version.
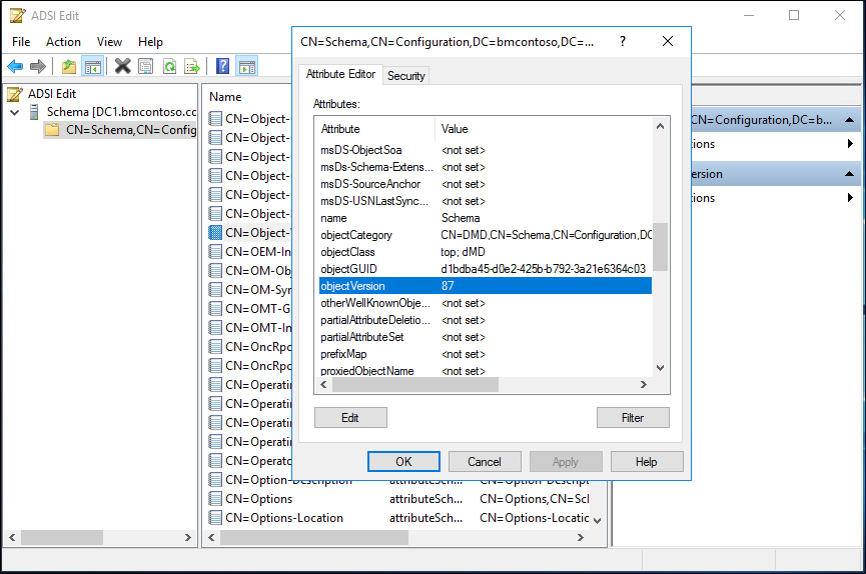
You can also use the following PowerShell cmdlet (replace the object with your schema-naming context information):
Get-ADObject "cn=schema,cn=configuration,dc=domain,dc=local" -Property objectVersion

For more information on upgrading, see Upgrade Domain Controllers to Windows Server 2016.
Enable Microsoft Entra Device Registration
To configure this scenario, you must configure the device registration capability in Microsoft Entra ID.
To do this, follow the steps under Setting up Microsoft Entra join in your organization
Set up AD FS
- Create a new AD FS 2016 farm.
- Or migrate a farm to AD FS 2016 from AD FS 2012 R2
- Deploy Microsoft Entra Connect using the Custom path to connect AD FS to Microsoft Entra ID.
Configure Device Write Back and Device Authentication
Note
If you ran Microsoft Entra Connect using Express Settings, the correct AD objects have been created for you. However, in most AD FS scenarios, Microsoft Entra Connect was run with Custom Settings to configure AD FS, so the below steps are necessary.
Create AD objects for AD FS Device Authentication
If your AD FS farm is not already configured for Device Authentication (you can see this in the AD FS Management console under Service -> Device Registration), use the following steps to create the correct AD DS objects and configuration.
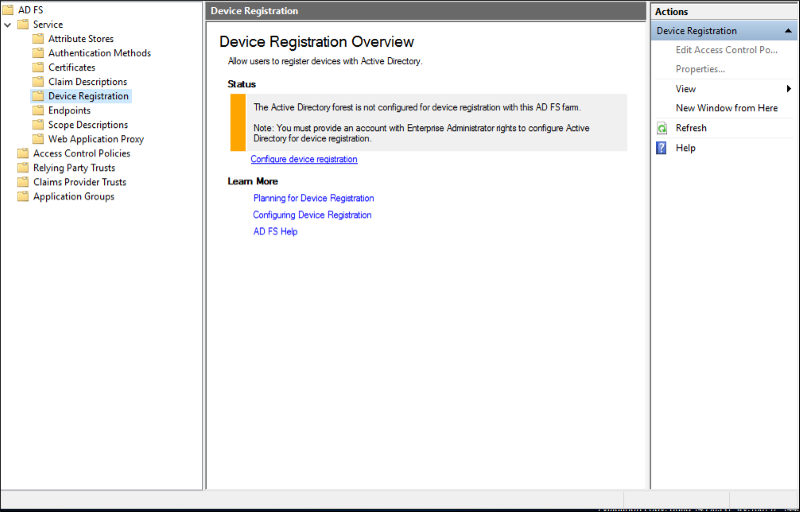
Note: The below commands require Active Directory administration tools, so if your federation server is not also a domain controller, first install the tools using step 1 below. Otherwise you can skip step 1.
- Run the Add Roles & Features wizard and select feature Remote Server Administration Tools -> Role Administration Tools -> AD DS and AD LDS Tools -> Choose both the Active Directory module for Windows PowerShell and the AD DS Tools.
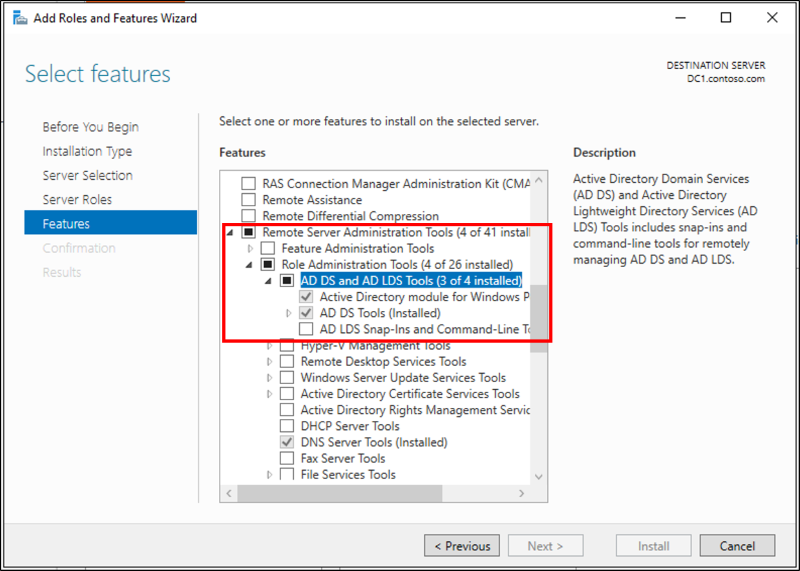
On your AD FS primary server, ensure you are logged in as AD DS user with Enterprise Admin (EA) privileges and open an elevated PowerShell prompt. Then, execute the following PowerShell commands:
Import-module activedirectoryPS C:\> Initialize-ADDeviceRegistration -ServiceAccountName "<your service account>"On the pop-up window hit Yes.
Note: If your AD FS service is configured to use a GMSA account, enter the account name in the format "domain\accountname$"

The above PSH creates the following objects:
- RegisteredDevices container under the AD domain partition
- Device Registration Service container and object under Configuration --> Services --> Device Registration Configuration
- Device Registration Service DKM container and object under Configuration --> Services --> Device Registration Configuration
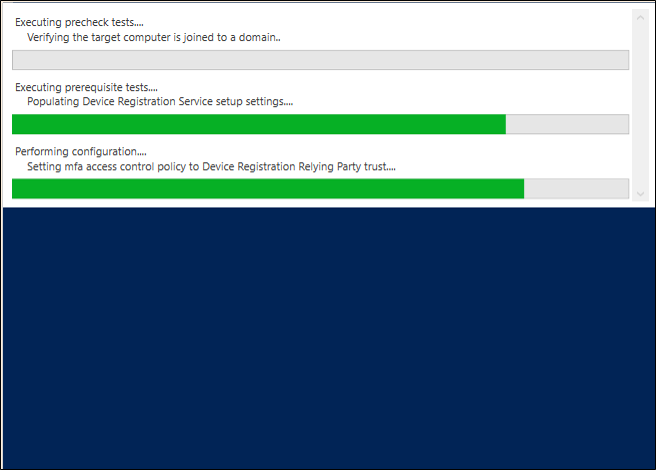
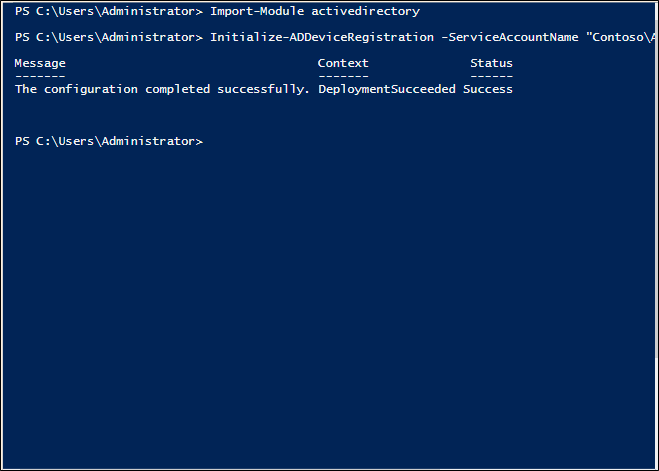
- Once this is done, you will see a successful completion message.
Create Service Connection Point (SCP) in AD
If you plan to use Windows 10 domain join (with automatic registration to Microsoft Entra ID) as described here, execute the following commands to create a service connection point in AD DS
Open Windows PowerShell and execute the following:
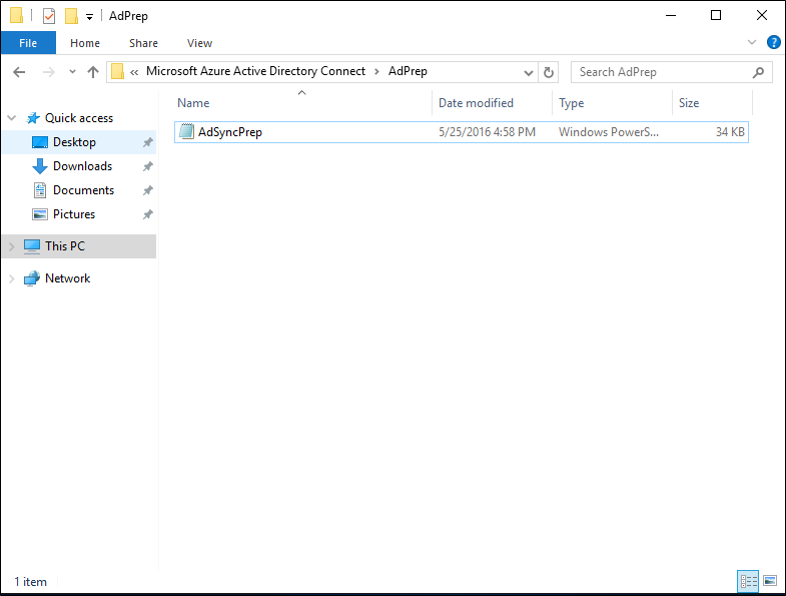
PS C:>Import-Module -Name "C:\Program Files\Microsoft Azure Active Directory Connect\AdPrep\AdSyncPrep.psm1"
Note
If necessary, copy the AdSyncPrep.psm1 file from your Microsoft Entra Connect server. This file is located in Program Files\Microsoft Entra Connect\AdPrep
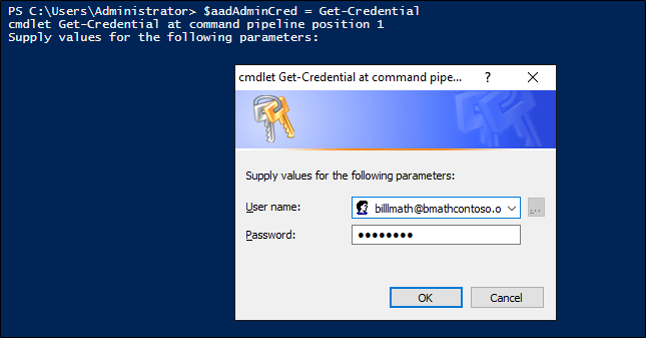
Provide your Microsoft Entra Global Administrator credentials.
PS C:>$aadAdminCred = Get-Credential
Run the following PowerShell command
PS C:>Initialize-ADSyncDomainJoinedComputerSync -AdConnectorAccount [AD connector account name] -AzureADCredentials $aadAdminCred
Where the [AD connector account name] is the name of the account you configured in Microsoft Entra Connect when adding your on-premises AD DS directory.
The above commands enable Windows 10 clients to find the correct Microsoft Entra domain to join by creating the serviceConnectionpoint object in AD DS.
Prepare AD for Device Write Back
To ensure AD DS objects and containers are in the correct state for write-back of devices from Microsoft Entra ID, do the following.
Open Windows PowerShell and execute the following:
PS C:>Initialize-ADSyncDeviceWriteBack -DomainName <AD DS domain name> -AdConnectorAccount [AD connector account name]
Where the [AD connector account name] is the name of the account you configured in Microsoft Entra Connect when adding your on-premises AD DS directory in domain\accountname format
The above command creates the following objects for device write-back to AD DS, if they do not exist already, and allows access to the specified AD connector account name
- RegisteredDevices container in the AD domain partition
- Device Registration Service container and object under Configuration --> Services --> Device Registration Configuration
Enable Device Write Back in Microsoft Entra Connect
If you have not done so before, enable device write-back in Microsoft Entra Connect by running the wizard a second time and selecting "Customize Synchronization Options", then checking the box for device write-back and selecting the forest in which you have run the above cmdlets
Configure Device Authentication in AD FS
Using an elevated PowerShell command window, configure AD FS policy by executing the following command
PS C:>Set-AdfsGlobalAuthenticationPolicy -DeviceAuthenticationEnabled $true -DeviceAuthenticationMethod All
Check your configuration
For your reference, below is a comprehensive list of the AD DS devices, containers, and permissions required for device write-back and authentication to work
Object of type ms-DS-DeviceContainer at CN=RegisteredDevices,DC=<domain>
- Read access to the AD FS service account
- read/write access to the Microsoft Entra Connect Sync AD connector account
Container CN=Device Registration Configuration,CN=Services,CN=Configuration,DC=<domain>
Container Device Registration Service DKM under the above container
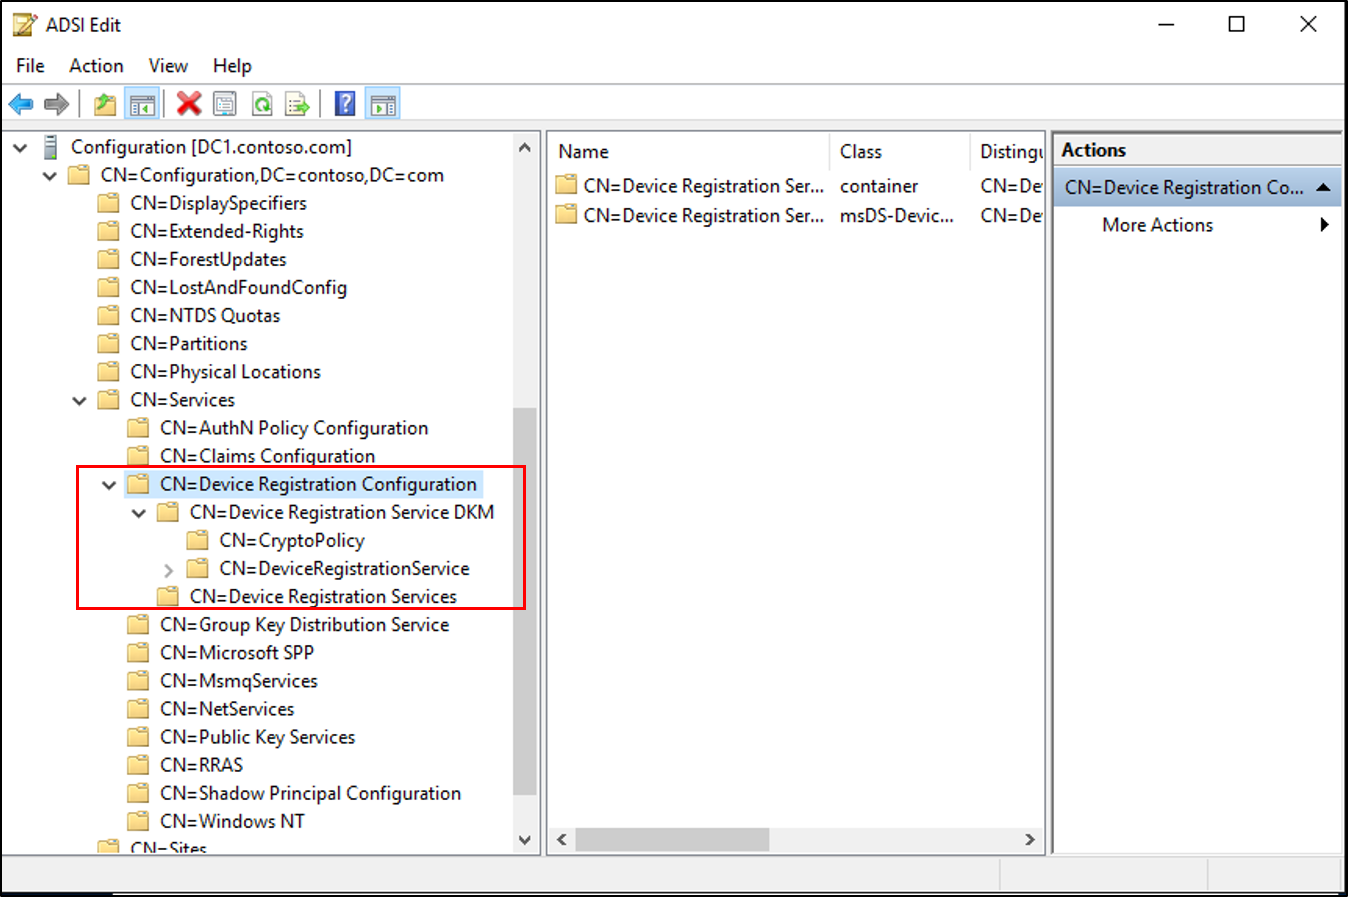
Object of type serviceConnectionpoint at CN=<guid>, CN=Device Registration
Configuration,CN=Services,CN=Configuration,DC=<domain>
- read/write access to the specified AD connector account name on the new object
- read/write access to the specified AD connector account name on the new object
Object of type msDS-DeviceRegistrationServiceContainer at CN=Device Registration Services,CN=Device Registration Configuration,CN=Services,CN=Configuration,DC=<domain>
Object of type msDS-DeviceRegistrationService in the above container
See it work
To evaluate the new claims and policies, first register a device. For example, you can Microsoft Entra join a Windows 10 computer using the Settings app under System -> About, or you can setup Windows 10 domain join with automatic device registration following the additional steps here. For information on joining Windows 10 mobile devices, see the document here.
For easiest evaluation, sign on to AD FS using a test application that shows a list of claims. You will be able to see new claims including isManaged, isCompliant, and trusttype. If you enable Windows Hello for Business, you will also see the prt claim.
Configure Additional Scenarios
Automatic Registration for Windows 10 Domain Joined computers
To enable automatic device registration for Windows 10 domain joined computers, follow steps 1 and 2 here. This will help you achieve the following:
- Ensure your service connection point in AD DS exists and has the proper permissions (we created this object above, but it does not hurt to double check).
- Ensure AD FS is configured properly
- Ensure your AD FS system has the correct endpoints enabled and claim rules configured
- Configure the group policy settings required for automatic device registration of domain joined computers
Windows Hello for Business
For information on enabling Windows 10 with Windows Hello for Business, see Enable Windows Hello for Business in your organization.
Automatic MDM enrollment
To enable automatic MDM enrollment of registered devices so that you can use the isCompliant claim in your access control policy, follow the steps here.
Troubleshooting
- If you get an error on
Initialize-ADDeviceRegistrationthat complains about an object already existing in the wrong state, such as "The DRS service object has been found without all the required attributes", you may have executed Microsoft Entra Connect PowerShell commands previously and have a partial configuration in AD DS. Try deleting manually the objects under CN=Device Registration Configuration,CN=Services,CN=Configuration,DC=<domain> and trying again. - For Windows 10 domain joined clients
- To verify that device authentication is working, sign on to the domain joined client as a test user account. To trigger provisioning quickly, lock and unlock the desktop at least one time.
- Instructions to check for STK key credential link on AD DS object (does sync still have to run twice?)
- If you get an error upon trying to register a Windows computer that the device was already enrolled, but you are unable or have already unenrolled the device, you may have a fragment of device enrollment configuration in the registry. To investigate and remove this, use the following steps:
- On the Windows computer, open Regedit and navigate to HKLM\Software\Microsoft\Enrollments
- Under this key, there will be many subkeys in the GUID form. Navigate to the subkey that has ~17 values in it and has "EnrollmentType" of "6" [MDM joined] or "13" (Microsoft Entra joined)
- Modify EnrollmentType to 0
- Try the device enrollment or registration again