Test your Data Loss Prevention policies
You should test and tune the behavior of your Microsoft Purview Data Loss Prevention (DLP) policies as part of your DLP policy deployment. This article introduces you to two of the basic methods you can use to test policies in your DLP environment.
Simulation mode
When you deploy a new policy or need to modify an existing one, you should run it in simulation mode, and then review the alerts to assess its accuracy. Simulation mode allows you to see how an individual policy affects all the items that are in the policies scope without actual enforcement. You use it to find out what items match a policy.
Get Insights with Security Copilot
Note
The Get insights with Copilot feature is in preview.
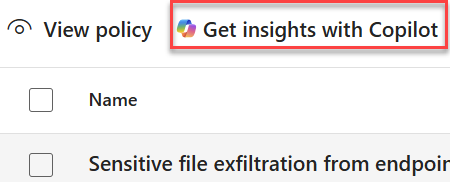
Get insights with Copilot is a Security Copilot skill that is embedded in the Microsoft Purview Data Loss Prevention policy page. It can help you understand what you policies are doing in your organization, and where they're active.

Select one or multiple policies, then select the Get insights with Copilot. Copilot then generates a response that gives you information about the selected policies like:
- Where your policies are looking for sensitive information.
- What kind of sensitive information your policies are looking for.
- What scenarios trigger the policies.
- How end users are impacted by the policies.
- How the admins are notified.
You can further pivot your investigation by administrative units, locations DLP protects and, types of data that's been classified
Prerequisites
- Your organization must be licensed for Security Copilot.
- The account you use to access the Get insights with Copilot feature must be in the Information protection admin role.
Test-DlpPolicies
Test-DlpPolicies is a cmdlet that allows you to see which DLP policies scoped to SharePoint and OneDrive match (or don't match) an individual item in SharePoint or OneDrive.
Before you begin
- You must be able to connect to Exchange Online PowerShell.
- You must have a valid SMTP address to send the report to. For example:
dlp_admin@contoso.com - You must have the site ID where the item is located.
- You must have the direct link path to the item.
Important
- Test-DlpPolicies only works for items that are in SharePoint or OneDrive.
- Test-DlpPolices only reports results for policies that include SharePoint alone, OneDrive alone, or both SharePoint and OneDrive in their scope.
- Test-DlpPolices works only with simple conditions. It doesn't work with complex, grouped, or nested conditions.
Use Test-DlpPolices
To see which DLP policies an item matches, follow these steps:
Get the direct link path to the item
Open the SharePoint or OneDrive folder in a browser.
Select the file's ellipsis and select details.
In the details pane, scroll down and select Path. Copy the direct link and save it.
For example:
https://contoso.sharepoint.com/personal/user_contoso_com/Documents/test.docx
Get the site ID
For SharePoint, use the following syntax to get the site ID and save it:
$reportAddress = "email@contoso.com"

$siteName = "SITENAME@TENANT.onmicrosoft.com"

$filePath = "https://Contoso.sharepoint.com/sites/SOMESITENAME/Shared%20Documents/TESTFILE.pptx"

$r = Get-Mailbox -Identity $siteName -GroupMailbox

$e = $r.EmailAddresses | Where-Object {$_ -like '*SPO*'}

Test-DlpPolicies -SiteId $e.Substring(8,36) -FileUrl $filePath -Workload SPO -SendReportTo $reportAddress
For OneDrive, use the following syntax to get the site ID and save it.
$reportAddress = "email@contoso.com"

$odbUser = "USER@TENANT.onmicrosoft.com"

$filePath = "https://contoso-my.sharepoint.com/personal/userid_contoso_onmicrosoft_com/Documents/TESTFILE.docx"

$r = Get-Mailbox -Identity $odbUser

$e = $r.EmailAddresses | Where-Object {$_ -like '*SPO*'}

Test-DlpPolicies -SiteId $e.Substring(8,36) -FileUrl $filePath -Workload ODB -SendReportTo $reportAddress
Here's an example of a returned value:
36ca70ab-6f38-7f3c-515f-a71e59ca6276
Run Test-DlpPolicies
Run the following syntax in the PowerShell window:
Test-DlpPolicies -workload <workload> -Fileurl <path/direct link> -SendReportTo <smtpaddress>For example:
Test-DlpPolicies -workload <ODB> -Fileurl <https://contoso.sharepoint.com/personal/user_contoso_com/Documents/test.docx> -SendReportTo <dlp_admin@contoso.com>
Interpret the report
The report is sent to the SMTP address that you passed the Test-DlpPolicies PowerShell command to. There are multiple fields. Here are explanations of the most important ones.
| Field name | Means |
|---|---|
| Classification ID | The sensitive information type (SIT) the item is categorized as |
| Confidence | The confidence level of the SIT |
| Count | The total number of times the SIT value was found in the item, this includes duplicates |
| Unique Count | The number SIT values found in the item with duplicates eliminated |
| Policy Details | The name and GUID of the policy that was evaluated |
| Rules - Rule Details | The DLP rule name and GUID |
| Rules - Predicates - Name | The condition defined in the DLP rule |
| Rules - Predicates - IsMatch | Whether the item matched the conditions |
| Predicates - Past Actions | Any actions, like notify user, block, block with override that 's been taken on the item |
| Predicates - Rule's Actions | The action defined in the DLP rule |
| Predicates - IsMatched | Whether the item matched the rule |
| IsMatched | Whether the item matched the overall policy |
See Also
- Test-DataClassification explains how to use the PowerShell cmdlet
Test-DataClassification. - Test-Message explains how to use the PowerShell cmdlet
Test-Message.