Manage Teams licenses
Important
Starting April 1, 2024, all new Enterprise customers who wish to provide workers with both Microsoft Teams and the value in existing Microsoft 365 or Office 365 Enterprise suites (E1/E3/E5) will need to purchase two SKUs: one E1/E3/E5 (no Teams) suite and one Teams standalone (Microsoft Teams Enterprise or Microsoft Teams EEA). Microsoft 365 Business suites (up to 300 users) and Frontline worker suites will be available in versions both with and without Teams.
For Enterprise customers in the European Economic Area (EEA) and Switzerland, this change became effective on October 1, 2023.
Enterprise customers already subscribed to Microsoft 365 or Office 365 suites that include Teams prior to April 1, 2024 will continue to be able to use, renew, upgrade, and otherwise adjust their subscriptions that include Teams as before.
For more information on this licensing change in the EEA and Switzerland, see New subscription structure for Microsoft 365 in Europe.
For more information on this licensing change for all other global regions, see Microsoft Teams licensing announcement.
You manage access to Teams at the user level by assigning or removing a Microsoft Teams product license. Except for joining Teams meetings anonymously, each user in your organization must have a Teams license before they can use Teams. You can assign a Teams license for new users when new user accounts are created or to users with existing accounts.
Use messaging policies, managed from the Teams admin center, to control what chat and channel messaging features are available to users in Teams. You can use the default policy or create one or more custom messaging policies for people in your organization. To learn more, read Manage messaging policies in Teams. You manage Teams licenses in the Microsoft 365 admin center or by using PowerShell. You must be a User management admin to manage licenses.
Note
We recommend that you enable Teams for all users so that teams can be formed organically for projects and other dynamic initiatives. Even if you're running a pilot, it might still be helpful to keep Teams enabled for all users, but only target communications to the pilot group of users.
Using the Microsoft 365 admin center
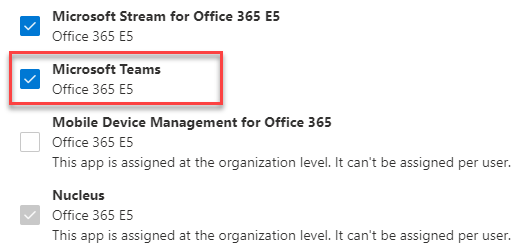
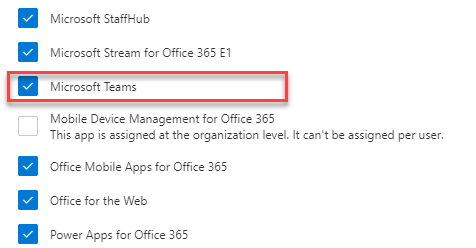
Teams user-level licenses are managed directly through the Microsoft 365 admin center user management interfaces. An administrator can assign licenses to new users when new user accounts are created, or to users with existing accounts.
Important
The administrator must have at least User Management Administrator privileges to manage Microsoft Teams licenses.
Use the Microsoft 365 admin center to manage Teams licenses for individual users or small sets of users at a time. You can manage Teams licenses on the Licenses page (for up to 20 users at a time) or Active users page. The method you choose depends on whether you want to manage product licenses for specific users or manage user licenses for specific products.
If you need to manage Teams licenses for a large number of users, such as hundreds or thousands of users, use PowerShell or group-based licensing in Microsoft Entra ID.
Assign a Teams license
The steps are different depending on whether you use the Licenses page or Active users page. For step-by-step instructions, see Assign licenses to users.
 |
 |
Remove a Teams license
Important
It takes about 24 hours for disabling a Teams SKU to take effect.
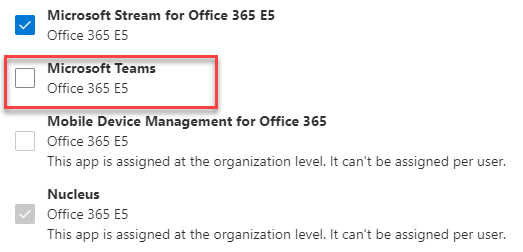
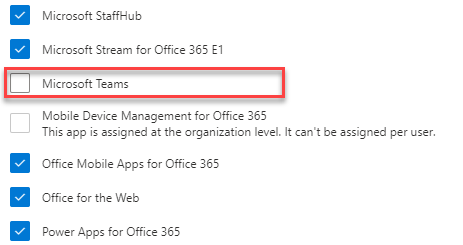
When you remove a Teams license from a user, Teams is disabled for that user, and they'll no longer see Teams in the app launcher or homepage. For detailed steps, see Unassign licenses from users.
 |
 |
Using PowerShell
Use PowerShell to manage Teams licenses for users in bulk. You enable and disable Teams through PowerShell in the same way that you would for any other service plan license. You'll need the identifiers for the service plans for Teams, which are as follows:
- Microsoft Teams: TEAMS1
- Microsoft Teams for GCC: TEAMS_GOV
- Microsoft Teams for DoD: TEAMS_DOD
Assign Teams licenses in bulk
For detailed steps, see Assign licenses to user accounts with PowerShell.
Remove Teams licenses in bulk
For detailed steps, see Disable access to services with PowerShell and Disable access to services while assigning user licenses.
Example
The following is an example of how to use the Set-MgUserLicense cmdlet to disable Teams for users who have a specific licensing plan. For example, follow these steps to first disable Teams for all users who have a particular licensing plan. Then enable Teams for each individual user who should have access to Teams.
Important
The Set-MgUserLicense cmdlet will enable all services that were previously disabled unless explicitly identified in your custom script. For example, if you want to leave both Exchange and Sway disabled while also disabling Teams, you'll need to include this in the script or both Exchange and Sway will be enabled for those users you identified.
Run the following command to display all available licensing plans in your organization. To learn more, see View licenses and services with PowerShell.
Get-MgSubscribedSku
Run the following commands, where <CompanyName:License> is your organization name and the identifier for the licensing plan that you retrieved in the earlier step. For example, ContosoSchool:ENTERPRISEPACK_STUDENT.
    $acctSKU="<CompanyName:License>"
    $x = Set-MgUserLicense -AccountSkuId $acctSKU -DisabledPlans "TEAMS1"
Run the following command to disable Teams for all users who have an active license for the licensing plan.
Get-MgUser | Where-Object {$_.licenses[0].AccountSku.SkuPartNumber -eq ($acctSKU).Substring($acctSKU.IndexOf(":")+1, $acctSKU.Length-$acctSKU.IndexOf(":")-1) -and $_.IsLicensed -eq $True} | Set-MgUserLicense -LicenseOptions $x