Integrate with a Perforce depot
Important
Azure Game Development Virtual Machine is scheduled for retirement on February 1st, 2024. Learn more.
Perforce Helix Core is a commonly used version control solution for the top AAA game studios. The Perforce depot is a file repository hosted on the Helix Core server. The Azure Game Development Virtual Machine comes with Perforce Helix Visual Client (P4V) pre-installed, which enables the option to configure the integration with a Perforce depot to pull down your assets during and after the VM creation. This means you can spin up a brand new VM, pull down your assets onto the VM asynchronously, and have you ready to build your game project and collaborate with your team soon after logging in. If you don’t already have Perforce deployed, you can deploy Perforce from Azure.
Configure the Perforce depot connection during VM creation
If you already have a Perforce Helix Core server, you can configure this game development VM to connect to the Perforce server during VM creation in the Azure portal.
- Navigate to Game Developer Tools tab when creating your Azure Game Development Virtual Machine.
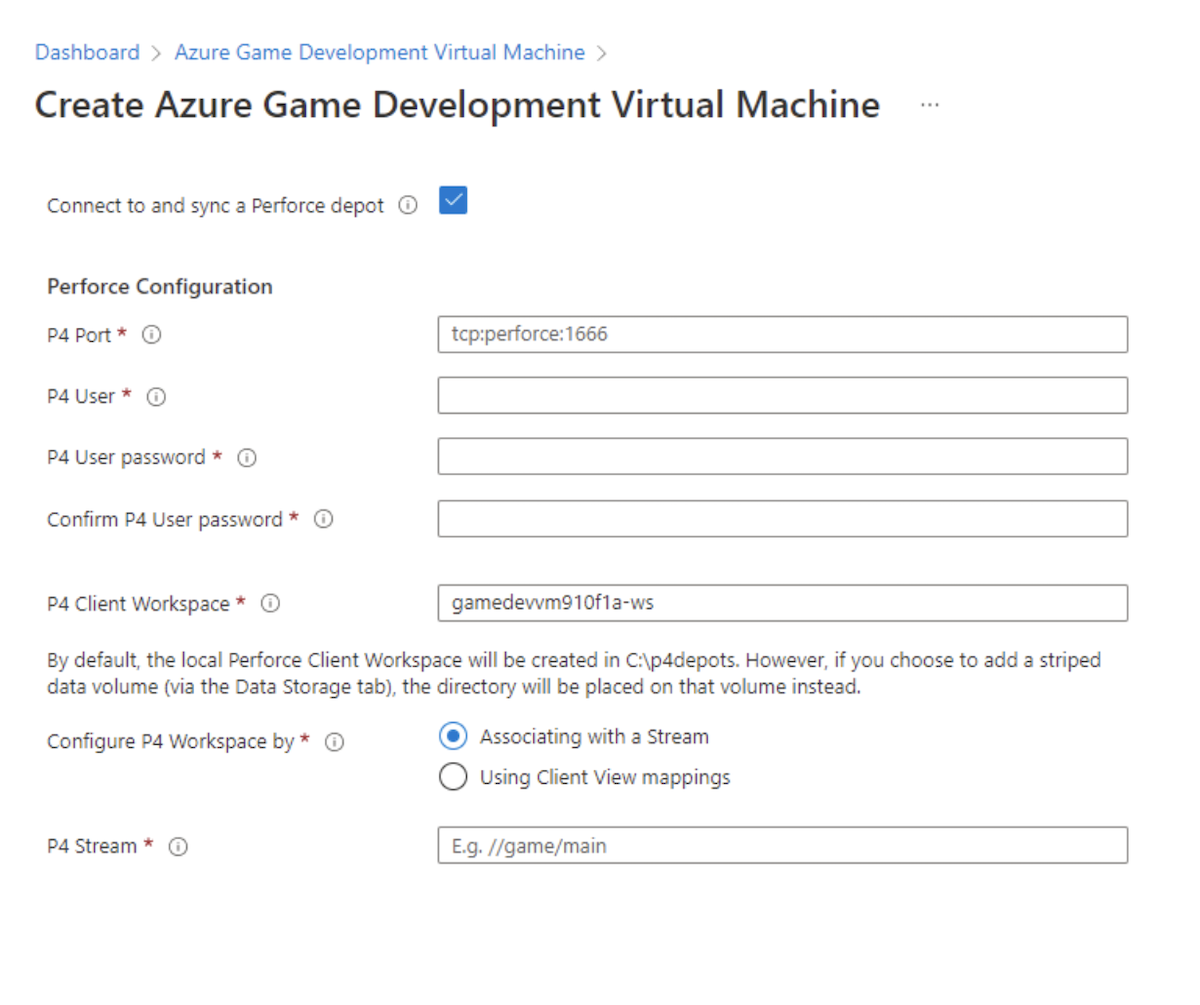
- Select a Game Engine, and under the Version Control Tools Installed section, check the box Connect to and sync a Perforce depot.
- Fill in the required parameters. It is a similar experience as you configure the Perforce connection inside your workstation.

Once your game development VM is up and running, the pre-installed P4V client will be configured to know where the Perforce server is; and will start the synchronization process from the server depot to your VM’s client workspace automatically.
Note
Please check the size of your Perforce depot and make sure you have enough disk space on your VM. This will be a full sync between your Perforce server and VM client. If the size of depot is large and you leave the VM client workspace to C:\p4depots as default, you may run into the issue of not having enough space on your C drive. It is strongly recommended to choose a striped data disk with the VM deployment, as this will ensure the Perforce depot is saved to the new faster and larger drive.
Connect to the Perforce depot
If you have finished the above steps and your VM is running, you can click the “perforce” icon on the desktop. It connects to the depot automatically.
If you have chosen not to configure the Perforce depot connection during VM creation and want to do it manually after the VM is running, please follow the Helix Core Visual Client (P4V) Guide. To learn more about setting up Perforce on Azure, please check out the Enhanced Studio Pack solution, along with the Best Practices for Deploying Perforce Helix Core on Microsoft Azure.
Next steps
- Read more about the Game Development Virtual Machine.
- Choose the right GPU SKU for a seamless gaming experience
- Learn about game development on Azure by reading Azure for Gaming and trying out tutorials.