Point Kudu to a Particular Web Worker Instance
Overview
Kudu is the .SCM interface for Azure App Services. If you are running more than one instance of Azure App Services (for instance you have scaled out to 4 instances) and you need to get to the Kudu console to do something like kill a process, profile an instance or get a dump of a particular instance… you can use this technique. This technique does not rely on ARRAffinity being set for the Application because that setting does not affect the Kudu site.
Steps (with Instance Detective Extension)
Note that ASE is a special case and the Instance Detective Extension will not work. You can use a powershell command to get the instances: Get-AzureRmResource -ResourceGroupName <RG name>-ResourceType Microsoft.Web/sites/instances -ResourceName "<App Name>" -ApiVersion 2016-08-01
In this example, I have a particular instance of my site (jsandersscale) that is problematic and I logged an error that point to Azure Instance ID 92294a. I will use Chrome to ensure I am on the correct instance (1 of 4 allocated for this site) and profile that instance.
Download Publish Profile
a. From the Azure Portal, navigate to the Overview section of your app and download the publish portal from there by selecting ‘Get publish profile’ (make a note of where it downloads to so you can find it later:

Install Instance Explorer
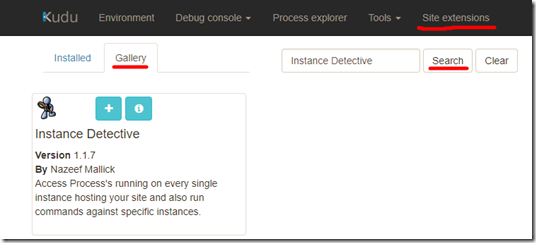
a. Open you site’s Kudu page (https://<yourappname>.scm.azurewebsites.net) and select the ‘Site extensions’ section. Click on the ‘Gallery’ tab then enter ‘Instance Detective’ in the search box and click on the ‘Search’ button.
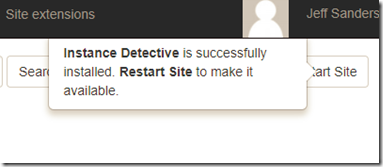
b. Click the ‘+’ icon to install the extension. When it is done installing it tells you to ‘Restart Site’ so hit the ‘Restart Site’ button so you can use this:
c. From this (or the Installed tab) you can hit the Run Icon to start the extension. The first time you run it, you need to supply the Publish Profile as pictured below.
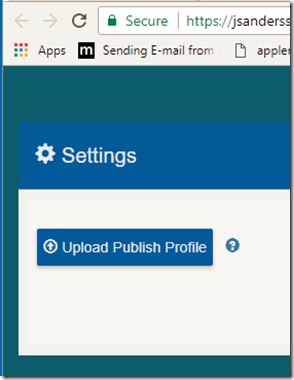
d. Press the ‘Upload Publish Profile’ button and navigate to the publish profile you downloaded in step 1.
Use the Extension!
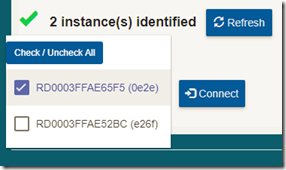
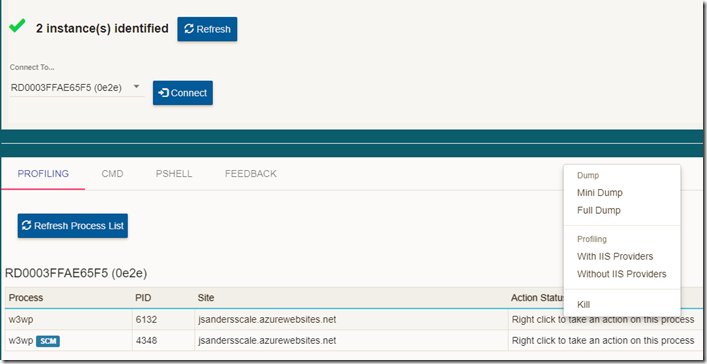
Now the extension is loaded and you can connect to and perform various operations on the individual instances:
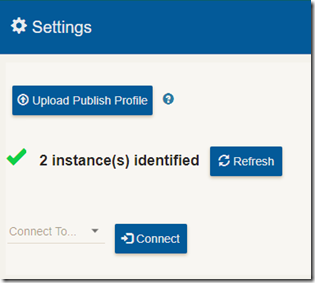
When finished you can uninstall the Extension
Simply go back to the Installed Site extensions section and click on the ‘x’ icon to remove the extension:
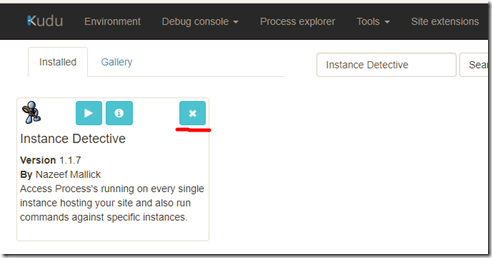
Steps (without Extension)
In this example, I have a particular instance of my site (jsandersscale) that is problematic and I logged an error that point to Azure Instance ID 92294a. I will use Chrome to ensure I am on the correct instance (1 of 4 allocated for this site) and profile that instance.
Identify the full Instance ID
a. Go to Azure Resource Explorer (https://resources.azure.com), log in and click on the subscription node
b. Type the name of your site in search box and click on the app to navigate to it:
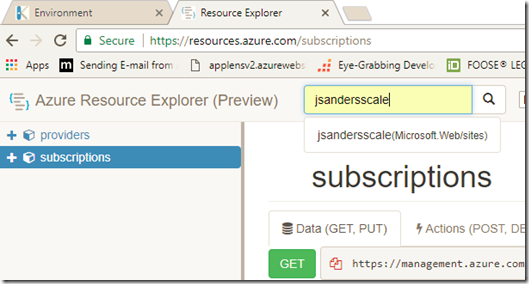
c. Click on the ‘instances’ node of your app to get a list of the instances and search for the partial Instance ID:
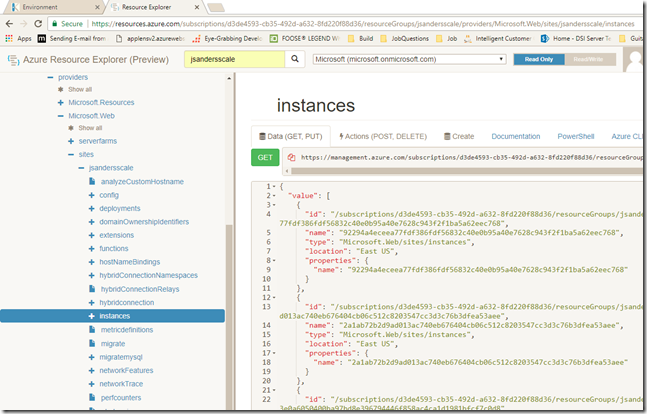
d. Copy the full “name” that starts with the partial instance id. This is what we will use for the ARRAffinity Cookie.

In this case it is: 92294a4eceea77fdf386fdf56832c40e0b95a40e7628c943f2f1ba5a62eec768
Set the ARRAffinity cookie in Kudu
a. Log into Kudu using Chrome and go to the Environment tab to see what instance you are currently on (it will be one of the instances you see in Azure Resource Explorer above).
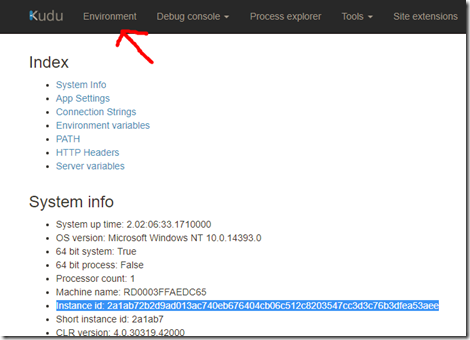
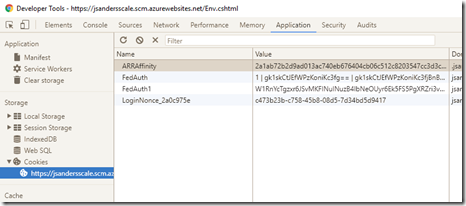
b. Hit the F12 key (or right click on the page and choose ‘Inspect’) and click on the ‘Application’ Tab. Then click on ‘Cookies’ and the page (<yourapp>.scm.azurewebsites.net) and find the ARRAffinity cookie (you will see in this example it is not the one I want… as expected):
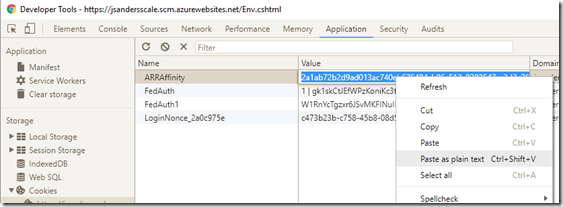
c. Change the ARRAffinity cookie value to be the target by double clicking on the old value and pasting in the new. Then Tab out of the field In this case it is: 92294a4eceea77fdf386fdf56832c40e0b95a40e7628c943f2f1ba5a62eec768
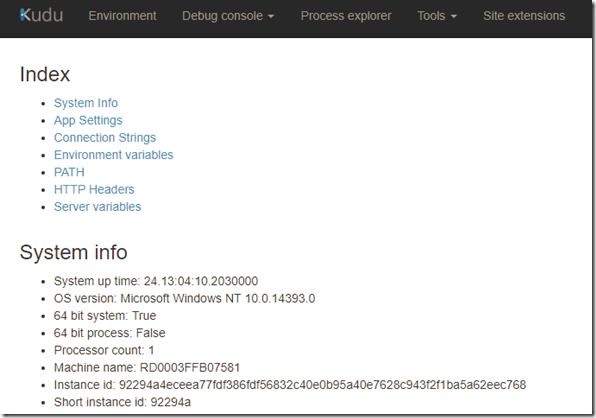
d. Now refresh the browser and close the developer tools. You can confirm you are on the correct instance by looking at that value in the Environment Tab once again:
Conclusion
That’s it! Now you can profile or get a dump of a particular process (note the ‘SCM’ process is not your app but is the Kudu process that hosts this Kudu site).
Please drop me a note if you found this useful!
Links
ARRAffinity
Disable: https://blogs.msdn.microsoft.com/appserviceteam/2016/05/16/disable-session-affinity-cookie-arr-cookie-for-azure-web-apps/
General Discussion: https://azure.microsoft.com/en-us/blog/disabling-arrs-instance-affinity-in-windows-azure-web-sites/
Kudu https://github.com/projectkudu/kudu/wiki
Azure Resource Explorer https://azure.microsoft.com/en-us/blog/azure-resource-explorer-a-new-tool-to-discover-the-azure-api/
