Azure Web Apps for Containers–Simple Walkthrough of Node.JS app deployment
Overview
This is a super simple walkthrough to show how to use Git and push your app to Azure Web Apps for Containers. It will not persist your Git repo but is a super quick way to show how this is done and perhaps help you if you are having troubles getting your app configured!
Walkthrough
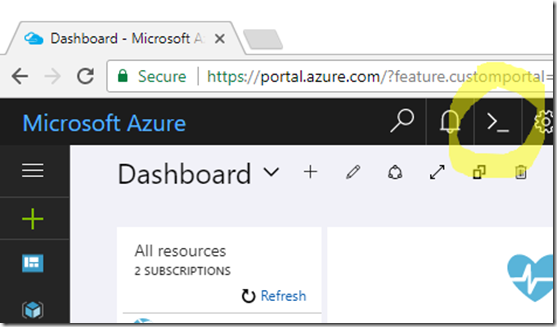
Get a Cloud Shell by clicking on the >_ icon on the right side of the Azure Portal
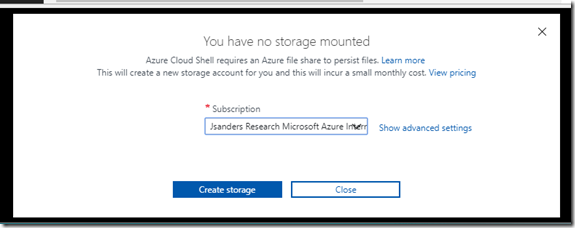
You may have to create a Storage Account (if so you will be prompted):
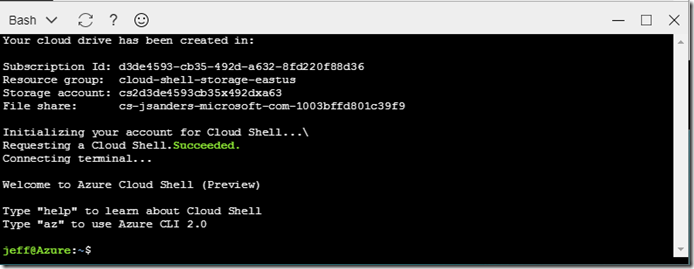
Finally you will get a terminal session like this:
In the terminal, pull down this sample from GitHub to the terminal using this command:
git clone https://github.com/Azure-Samples/nodejs-docs-hello-world
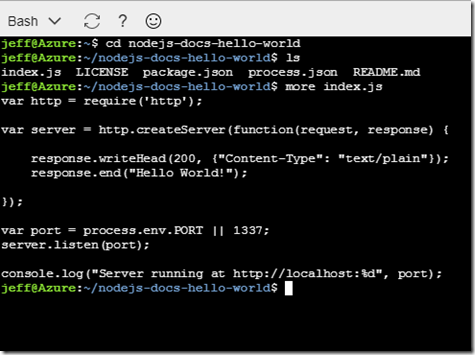
Change to the directory that contains the sample code with this command:
cd nodejs-docs-hello-world
Inspect the files that are there with this command:
ls
Display the contents of the index.js file with this command:
more index.js
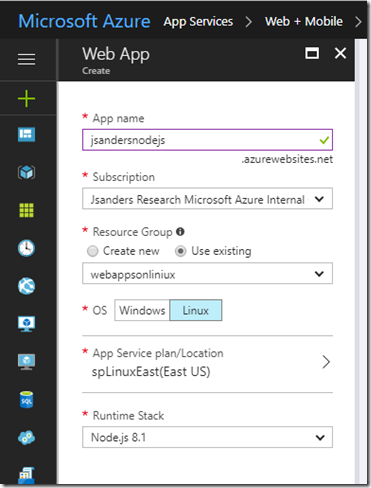
Create an Azure Web App, choosing Linux for the OS and the latest Node.js for the Runtime stack:
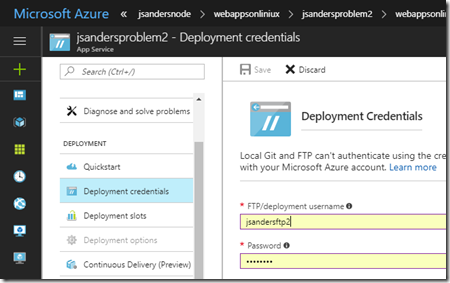
Once app is created, you need to ensure you have Deployment Credentials. If you already have Deployment Credentials great! If you don’t or you forgot your password, create a new user and pwd (and remember them):
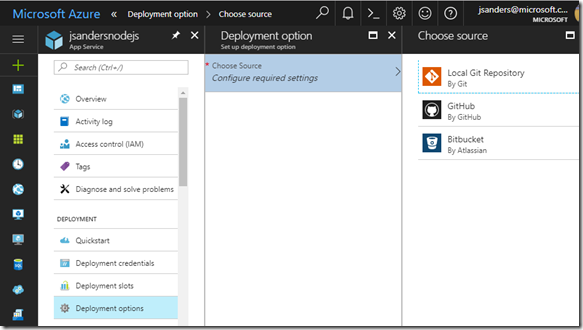
Go to Deployment options and choose ‘Local Git Repository’ (don’t forget to save by hitting the ‘OK’ button) :
Go to Properties and copy the GIT URL for future use:
In the local terminal window, add an remote repo named azure to your local Git repository:
git remote add azure <URI from previous step>
Add the files and a commit message:
git add -A
git commit -m "my first node app push"
Notice you will get this next in the Bash terminal:
*** Please tell me who you are.
Run
git config --global user.email "you@example.com"
git config --global user.name "Your Name"
to set your account's default identity.
Omit --global to set the identity only in this repository.
Don’t panic, just add an email and name like this (you do not have to use a real email or name… it is just a local identifier):
git config --global user.email jsanderstesting@hotmail.com
git config --global user.name jeff
And then do the commit again:
git commit -m "my first node app push"
On branch master
Your branch is up-to-date with 'origin/master'.
nothing to commit, working directory clean
Push to the Azure remote to deploy your app with the following command. When prompted for a password, make sure that you enter the password you got from the publish profile, not the password you use to log in to the Azure portal.
git push azure master
Password for 'https://jsandersftp2\@jsandersnodejs.scm.azurewebsites.net:443':
Counting objects: 37, done.
Compressing objects: 100% (36/36), done.
Writing objects: 100% (37/37), 5.13 KiB | 0 bytes/s, done.
Total 37 (delta 16), reused 0 (delta 0)
remote: Updating branch 'master'.
remote: Updating submodules.
….
remote: Running post deployment command(s)...
remote: Deployment successful.
remote: App container will begin restart within 10 seconds.
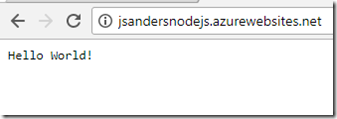
And you should be able to browse to your app!
Closing Notes
This is just a super easy way to explore this! The container is not persisted so you will not be able to use this for development. The Git repo and your code will disappear when this container is brought down or recycled. If you are doing real development you should install node and git and push from your local machine. Try playing with an editor like vim and changing the app.js file response.end statement to say something else and commit and push your changes!
