Contributing to ASP.NET Web Stack Source on CodePlex
In the blog Getting Started With ASP.NET Web Stack Source on CodePlex we describe how to set up a read-only clone of the ASP.NET Web Stack source repository. This allows you to sync your tree to the latest changes as soon as they appear but you can’t update the code, fix bugs, or suggest changes. In short, it is read-only.
This blog describes how to set up and then use a fork to be able to contribute to the project. It first describes setting up a fork as a one-time process and then it describes three common workflows for working with the fork on a regular basis.
If you haven’t already, then now is a good time to check out the process for contributing to the ASP.NET Web Stack project. It describes in detail what you need to do in order to contribute with as little pain as possible.
Why a Fork?
A common way for open source projects to allow contributions is by using forks. A fork is not actually a Git concept but a way for you to host your own copy of the ASP.NET Web Stack repository in CodePlex where you have write access and can submit changes without interfering with anybody else. The fork also allows you to work on your changes simultaneously across multiple machines or even with other people with whom you collaborate.
Creating a Fork
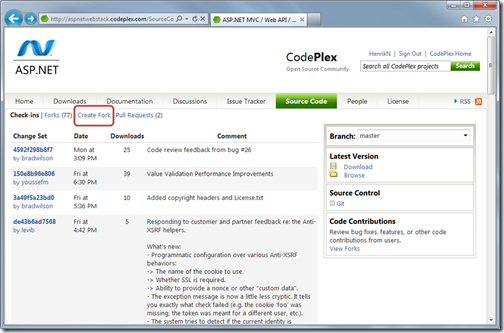
The first step is to create a fork which you do by going to the CodePlex repository and selecting Create Fork:
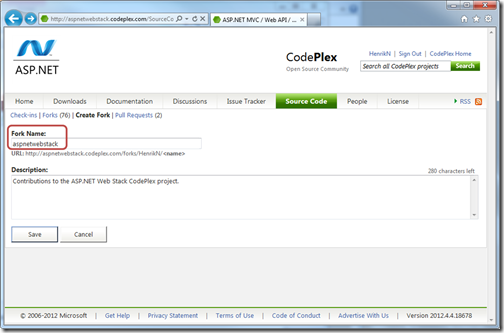
You will now see another page where you can fill in the fork name and a description. A good name to use for your fork is aspnetwebstack.
Now hit Save to create the fork. Select the Forks menu and you will see the fork you just created along with a clone URI.
Cloning the Fork
As the fork lives on CodePlex you need to clone it to your local dev machine in order to work on it. As in the previous blog we use PowerShell with Git extensions so if you haven’t yet set that up then please check that blog for details.
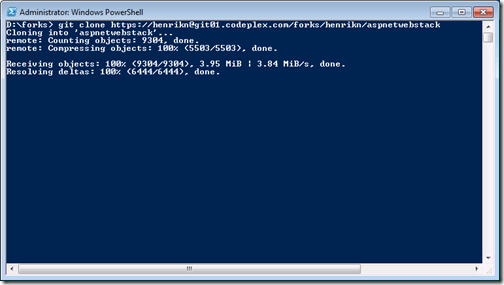
We use the fork URI that you got above to create a clone on your local dev machine. This looks similar to when you cloned the main repository in the previous blog – the only difference is the repository URI which has your CodePlex user name in two places:
- https:// <CodePlexUserName> @git01.codeplex.com/forks/ <CodePlexUserName> /aspnetwebstack
You use it with the clone command like this:
- git clone https://<UserName>@git01.codeplex.com/forks/<UserName>/aspnetwebstack
Make sure the folder aspnetwebstack doesn’t conflict with anything you already have in the folder where you do the clone.
The next step of getting the fork up and running is configuring Git with your name and email alias so that it is clear that the commits come from you. From the same prompt as above run the two commands from the aspnetwebstack folder:
- git config user.name YourCodePlexUserName
- git config user.email name@example.com
Also, if you run a commit from the command line and you don’t include the –m option, it will pop up a text editor for you to compose the commit message. That text editor is VIM by default. If you’re not a VI person, then you might want to set an alternative editor (I use notepad2 but you can also use GitPad). You can do this with this command (note the forward slashes instead of backslashes):
- git config core.editor C:/Path/To/MyFavoriteEditor.exe
In order not to get confused about the setup, the thing to keep in mind is that there are three repositories in play:
- The upstream repository which is the main repository on CodePlex
- The origin repository which is your fork on CodePlex
- The local repository on your dev machine
To make it easy to refer to the upstream repository we create an alias in addition to origin. You add an alias called upstream referring to the main repository URI and not the fork URI by running the command from the aspnetwebapi folder:
- git remote add upstream https://git01.codeplex.com/aspnetwebstack.git
This command merely creates a local alias – nothing else happens so you won’t see more than this:
Ok, that’s it for setting up the repositories. While it took some effort to get here the good part is that up to this point the process is something you only have to do once. With some care (as will be described below) a fork can last you a long time serving as your environment for fixing any number of bugs, suggesting new features, and more. In short, it is your environment for actively working on the source.
The actual day-to-day process of working in a fork typically involves the following three steps:
- Synchronizing master branches across the three repositories.
- Creating a feature branch for each bug fix or feature work you work on.
- Submitting pull requests with your feature branch changes.
In the following we will describe all three of these workflows in detail.
Workflow 1: Synchronizing Master Branches
The term origin is now referring to your fork repository and not to the upstream repository. That is, when you push to origin, you push to your fork, not to the upstream repository. In other words, the fork acts in all respects like the upstream repository except that you can submit your changes whenever you want.
After you created your origin and your local repository, changes will continue to happen in the upstream repository. In order to see these changes in your origin and local repositories you need to pull them – it is not done automatically. The goal of this workflow is to ensure that your local master is in sync with your origin master which is in sync with the upstream master.
The synchronization actually happens in your local repository on your dev box – the origin won’t get updated until you push the edits to it. That is, you sync your local master with the upstream master and push that to the origin master. Here is what you do:
- git checkout master
- git pull --rebase upstream master
- git push origin
It should look something like this:
Workflow 2: Creating a Feature Branch
In order to keep the fork clean and use it for a long time you should do all your work in feature branches and not in the master branch. Keeping the master branch clean will make it easier to stay in sync with the upstream repository and generally avoid heartaches.
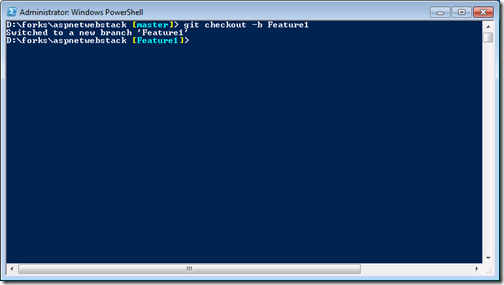
Whenever you create a new feature branch, make sure you are in the master branch (you don’t want to create a branch of a branch just yet). That is, you should see [master] in your prompt. You create a branch using the command
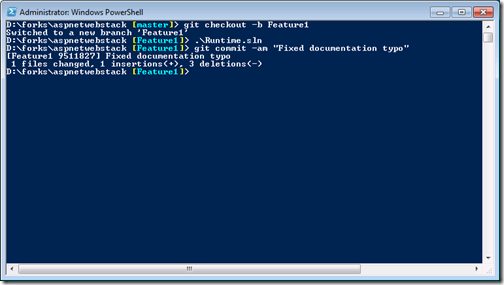
- git checkout -b Feature1
which will look like this:
Note that the prompt now says [Feature1] and not [master] . Within the new branch we start Visual Studio and load the runtime.sln solution as described in the previous blog. Here it doesn’t matter what the change is but for illustration purposes we fix a typo in the class MediaTypeHeaderValueExtensions where we change the documentation to say “subset” instead of “superset”.
We then compile and run unit tests to see that everything is as we expect. Once the fix has been verified you can either commit it using TortoiseGit or the Git Source Control Provider directly from within Visual Studio. For simplicity we here just commit it using the PowerShell and the command
- git checkout Feature1
- git commit -am "Fixed documentation typo"
which will show this (note the red numbers which tells you that you have 1 modified file):
You now make sure that your feature branch is up to date with the local master branch by typing this command:
- git checkout Feature1
- git rebase master
Depending on your changes and the changes in your local master you may be asked to merge but in this scenario there are no merges.
Once you are done with your change and want to submit it back to the origin (the fork) you push to origin
- git checkout Feature1
- git push origin
Workflow 3: Submitting a Pull Request
When you are done with your change in the feature branch and committed it to origin you can now suggest that it be incorporated into the main repository. You do this by submitting a pull request with your change. Before submitting a pull request please review carefully the process for submitting contributions. The pull request will then go through a process of review looking at things like how it fits with the overall design, whether it has unit tests, whether the coding guidelines are used, etc.
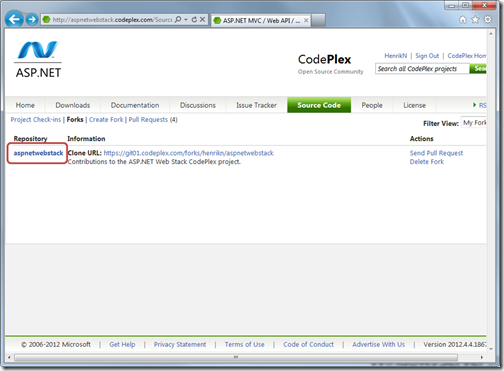
To submit a pull request go to your fork and select the repository link as shown below:
Now set Branch to your feature branch and you should see the submits that you have done:
Now select Send Pull Request, fill in the details including which issue you are submitting a pull request for.
Once the change passes the process and gone through a full review it will get checked into the main repository and voila – you have contributed to the project!
Have fun!
Henrik
del.icio.us Tags: Asp.net,webapi,mvc,codeplex
Comments
Anonymous
April 10, 2012
Thanks for the blog, can you do another one using TortoiseGit?Anonymous
April 25, 2012
The GitHub mirror seems to be easier to work with: https://github.com/ASP-NET-MVC Are the pull requests to the GH mirror also kept in sync w/ CodePlex repo?
