【Visual Studio Code 1.2以降】統合TerminalをコマンドプロンプトからPowerShellに変更する (Windows版)
皆さん、こんにちは。テクニカルエバンジェリスト戸倉彩です。
今回は、Visual Studio Codeのバージョン1.2以降から利用できるようになったターミナル機能の統合の設定に関する話です。
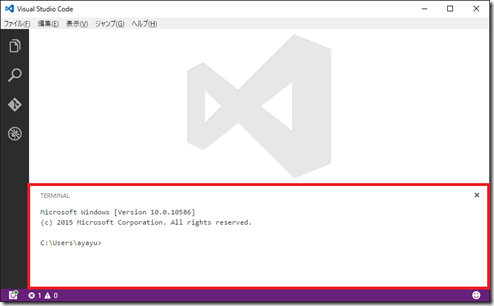
初期設定では、統合ターミナル(Integrated Terminal)を呼び出すと、Windowsの場合はコマンドプロンプトがVisual Studio Codeの画面の中で統合して使えるようになります。
▼こんな感じ。

↑↑↑ コマンドプロンプトがVisual Studio Codeの中で使える ↑↑↑

これを、 「PowerShellにしたい!!!」 と思った方もいらっしゃるのではないでしょうか?
統合ターミナルの設定の内容は、メニューの「ファイル」→「基本設定」→「ユーザー設定」で表示されるファイル内で確認することができます。
ちょうど449行目あたりに下記のように記述してあります。
Windowsのターミナルのところに 「コマンドプロンプトを実行するためのcmd.exeいたいた!」 ということで、ここをPowerShellに変更する必要ああります。
【既定の設定】
| //-------- Integrated terminal configuration --------// The path of the shell that the terminal uses on Linux."terminal.integrated.shell.linux": "sh",// The path of the shell that the terminal uses on OS X."terminal.integrated.shell.osx": "sh",// The path of the shell that the terminal uses on Windows."terminal.integrated.shell.windows": "C:\\WINDOWS\\system32\\cmd.exe",// The font family used by the terminal (CSS font-family format)."terminal.integrated.fontFamily": "Menlo, Monaco, Consolas, \"Droid Sans Mono\", \"Courier New\", monospace, \"Droid Sans Fallback\"", |
Visual Studio Codeでは、個別に設定変更したい場合には、Settings.jsonファイルを使います。
Settings.jsonで下記を追加して、ファイルを保存します。
※初めて記述する場合は、最初に { 最後に } も忘れずに。
"terminal.integrated.shell.windows": \\windows\\system32\\WindowsPowerShell\\v1.0\\powershell.exe
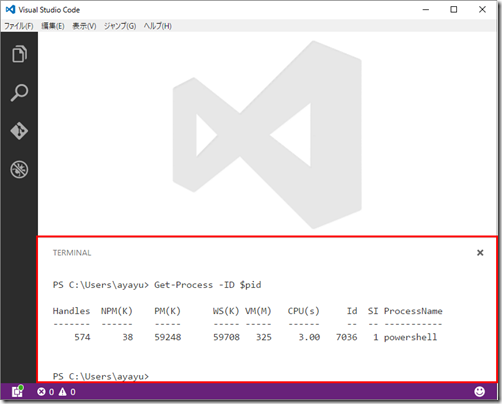
そして、再び統合ターミナルを呼びなおすと、今度はPowerShellが使えるようになります。

【参考文献】
Set PowerShell as Visual Studio Code's Integrated Terminal
Have a nice Code♪
