Customize the Visual Studio IDE
You can customize Visual Studio IDE settings in various ways to best support your own development style and requirements. Many of your settings roam with you across Visual Studio instances. See Synchronized settings. This article briefly describes different personalizations and where you can find more information.
Default environment settings for Visual Studio
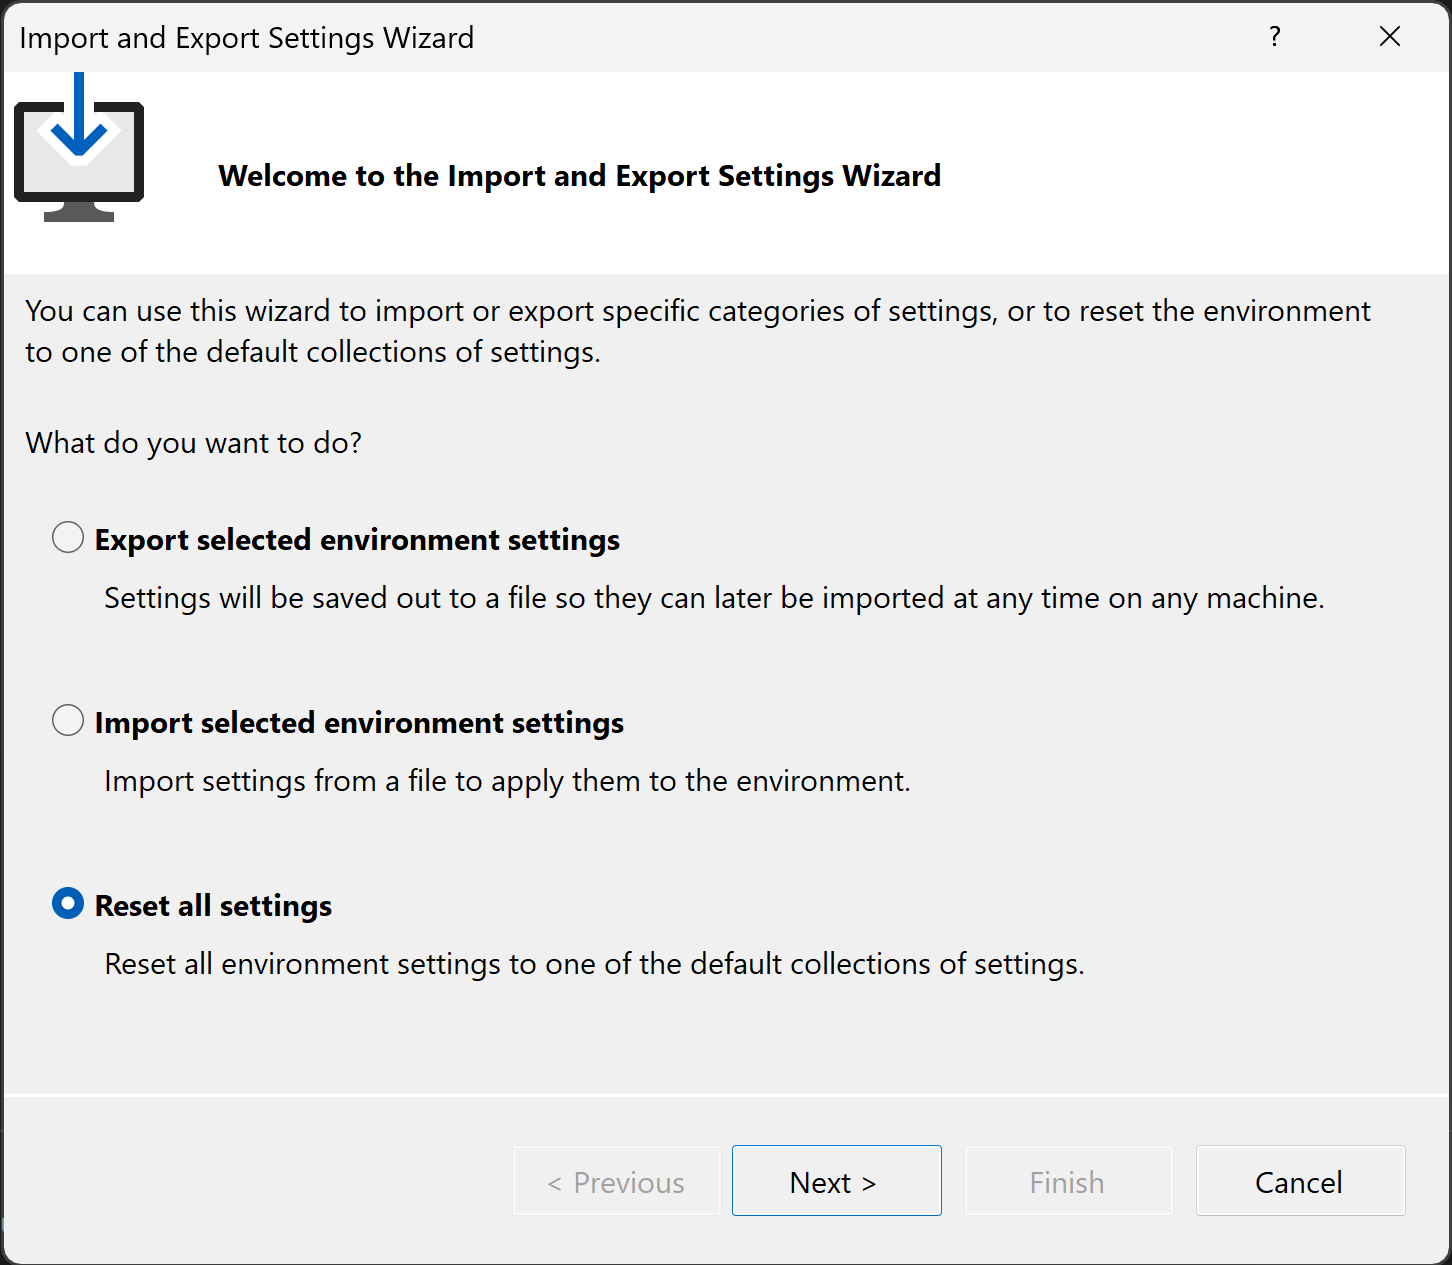
In Visual Studio, you can optimize your development environment for the type of development work you do by selecting Tools > Import and Export Settings. You can use the wizard to import or export specific categories of setting, or to reset the environment to one of the default collections of settings. Each collection of settings optimizes elements such as keyboard shortcuts, window layouts, project and item templates, and command visibility.
Reset all settings
You can also use the wizard to reset the environment to one of the default collections of settings.
From the menu bar, select Tools > Import and Export Settings.
In the Import and Export Settings Wizard, select Reset all settings, and then select Next.

On the Save Current Settings page, select either Yes, save my current settings or No, just reset settings, overwriting my current settings, and then select Next.
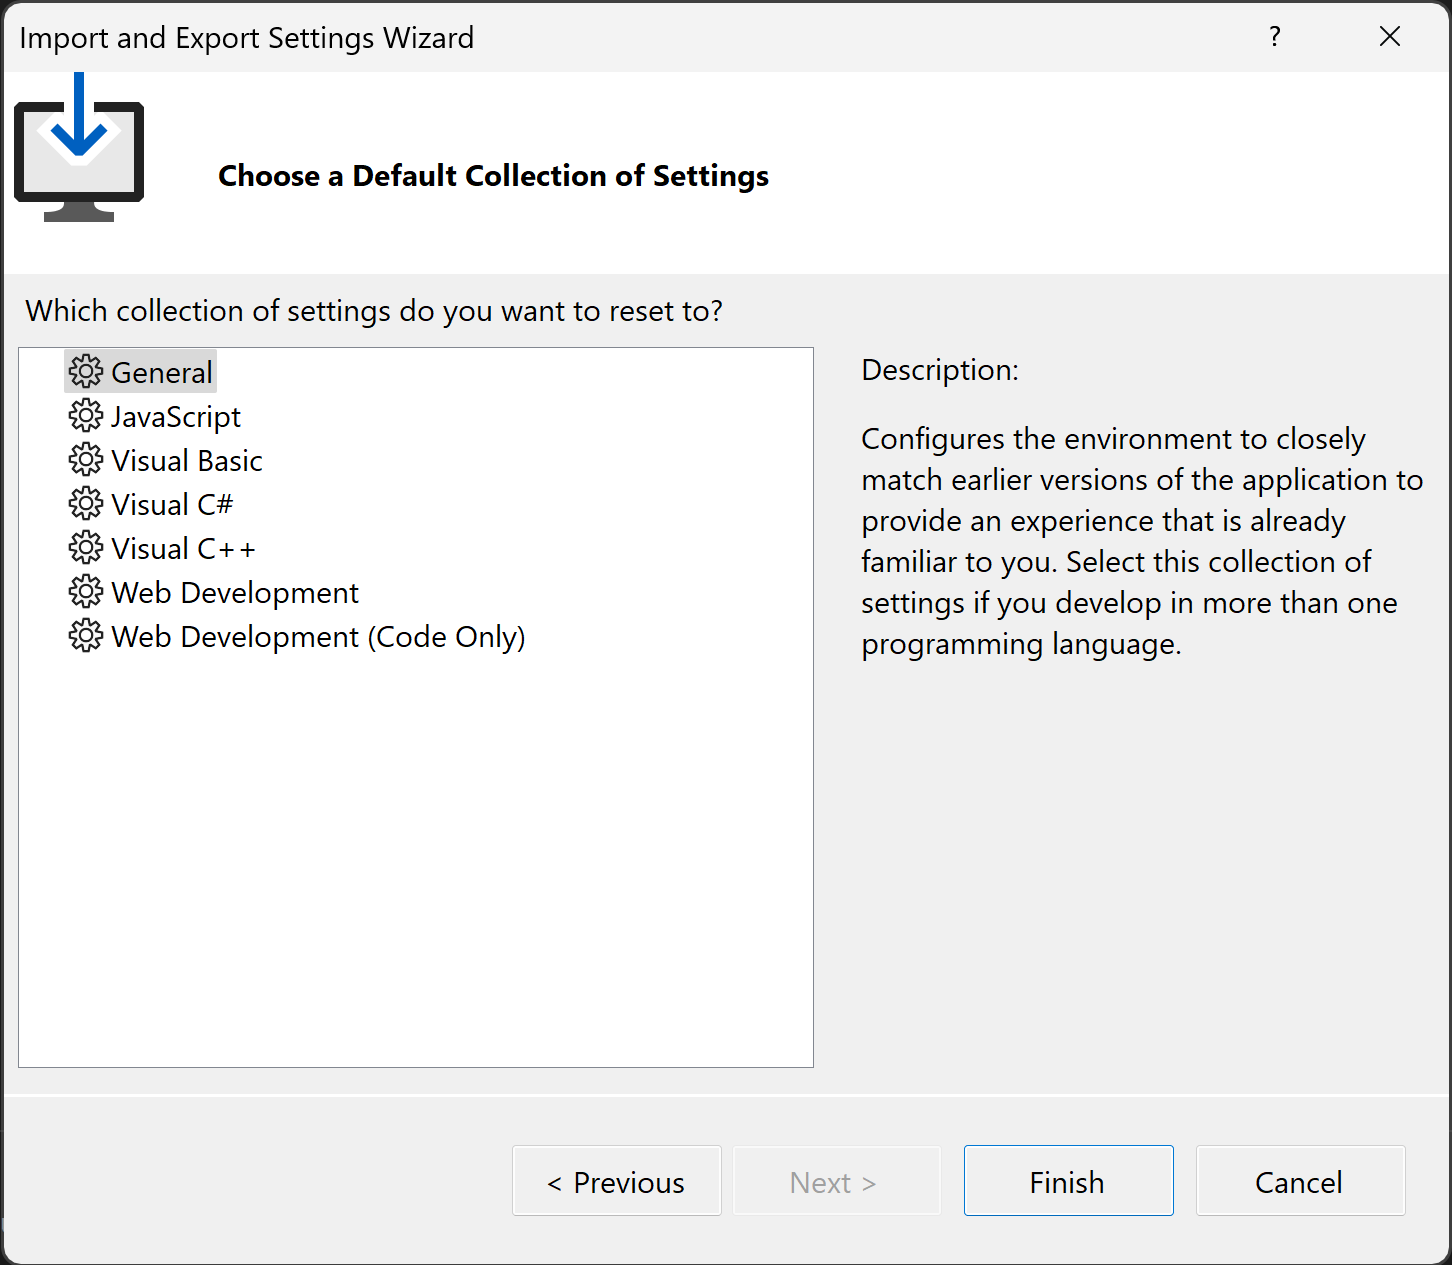
On the Choose a Default Collection of Settings page, select a collection, and then select Finish.

On the Reset Complete page, select Close.
General environment options
Many personalization options are exposed through the Environment Options dialog box. There are two ways to access this dialog box:
On the menu bar, choose Tools > Options, and if necessary, expand the Environment node.
Press Ctrl+Q, enter environment in the search box, and then select Environment > General from the results.
Tip
When the Options dialog box appears, you can select F1 for help on the various settings on that page.
Environment color themes
To change the color theme between Dark, Light, Blue, and Blue (Extra Contrast), enter theme in the search box, and then choose Environment > General. In the Options dialog box, change the Color theme option.
To change colorization options in the editor, enter environment in the search box, and then choose Environment > Fonts and Colors. See Change fonts, colors, and themes.
You can also use the Tools > Options > Environment > Fonts and Colors to establish a custom font and color scheme for various user interface elements in the integrated development environment (IDE). See the reference page on Fonts and Colors, Environment, Options dialog box.
Customize menus and toolbars
To add or remove menu or toolbar items, see Customize menus and toolbars.
Main menu casing
You can change the main menu casing between Title Case ("File") and All Caps ("FILE"). Enter environment in the search box, select Environment > General, and then change the Apply title case styling to menu bar option.
Window layouts
You can define and save multiple window layouts and switch between them. For example, you can define one layout for coding and one for debugging. To arrange window positions and behavior and save custom layouts, see Customize window layouts and personalize tabs.
External tools
You can customize the Tools menu to launch external tools. For more information, see Manage external tools.