Visual Studio Installer Projects Extension and .NET
Packaging applications as an MSI is often accomplished using the Visual Studio Installer Projects Extension.
This article applies to apps targeting .NET Core 3.1 and .NET 5 or later versions.
You can download the extension here:
Update for .NET Core and .NET
.NET Core and .NET 5+ have two different models for publishing.
Framework-dependent deployments
Self-contained applications include the runtime.
To learn more about these deployment strategies, see .NET application publishing overview.
Create a setup project
From Visual Studio, choose Extensions > Manage Extensions, and search for "Visual Studio Installer Projects". Or, download the extension directly from the Marketplace.
From the Start window, choose Create a new project, and then type "setup" in the search box. Choose a Setup project, and follow instructions.
For a detailed example showing how to create and build a Setup project, see Walkthrough: Deploying a Windows-based Application.
For general information on Setup projects (*.vsproj), see Setup and Deployment projects.
For information on deployment properties, see Deployment properties.
Workflow changes for .NET Core 3.1 and .NET 5 or later
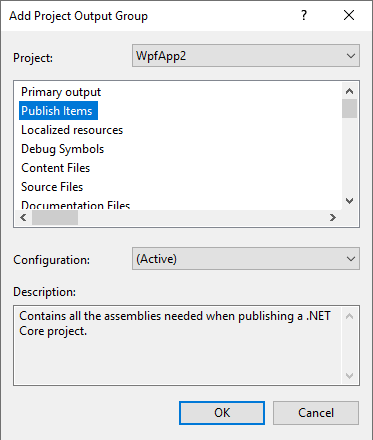
To get the correct output for .NET Core 3.1 and .NET 5.0 or later projects, select Publish Items instead of Primary Output in the Add Project Output Group dialog box. To open this dialog, select Add > Project Output... from the Setup project's context menu.

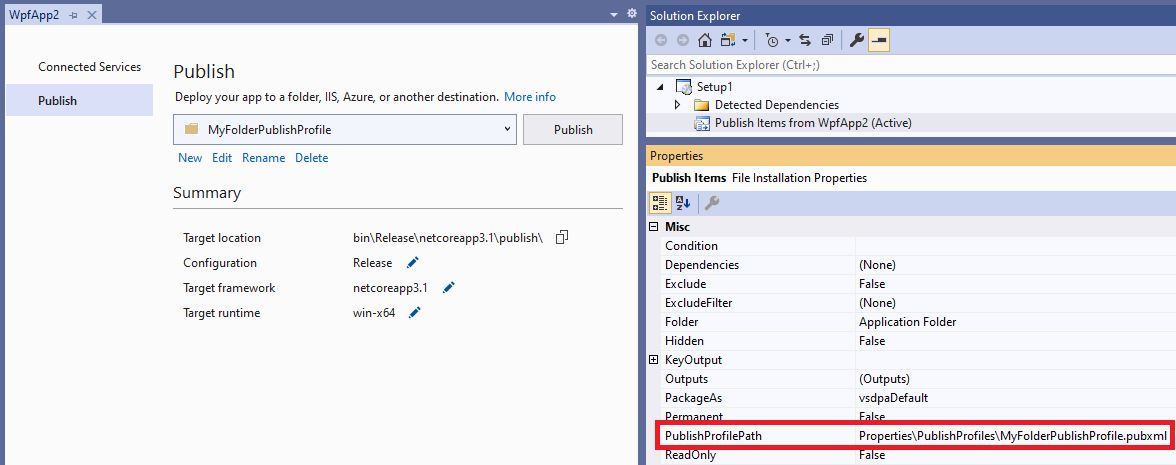
To create a self-contained installer, set the PublishProfilePath property on the Publish Items node in the Setup project, using the relative path of a publish profile with the correct properties set.

Before you can set this property, create a publish profile from the application project by choosing Publish from the application project's context menu in Solution Explorer, and deploy the application to a folder.
Note
This workflow is not supported for ASP.NET Core applications, only Windows Desktop applications.
Prerequisites
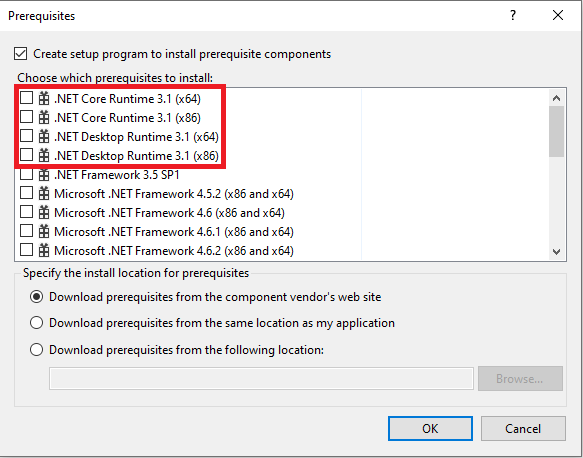
If you would like your installer to be able to install the necessary runtime for a framework-dependent .NET Core 3.1 or .NET 5.0+ app, you can do this using prerequisites. From the properties dialog of your installer project, open the Prerequisites... dialog and you'll see the following entries:

The .NET Core Runtime... option should be selected for console applications, .NET Desktop Runtime... should be selected for WPF and WinForms applications.
Note
These items are present starting with the Visual Studio 2019 Update 7 release.
