Install Code Map and Live Dependency Validation
Applies to: ![]() Visual Studio
Visual Studio ![]() Visual Studio for Mac
Visual Studio for Mac
Note
This article applies to Visual Studio 2017. If you're looking for the latest Visual Studio documentation, see Visual Studio documentation. We recommend upgrading to the latest version of Visual Studio. Download it here
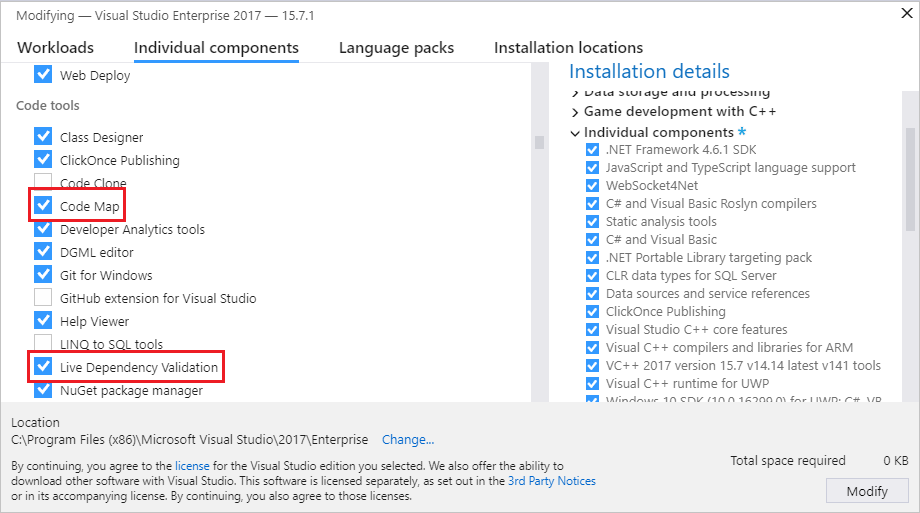
To create a code map in Visual Studio, first install the Code Map and Live Dependency Validation components:
Open Visual Studio Installer. You can open it from the Windows Start menu, or within Visual Studio by selecting Tools > Get Tools and Features.
Select the Individual components tab.
Scroll down to the Code tools section and select Code Map and Live Dependency Validation.

Select Modify.
The Code Map and Live Dependency Validation components begin installing. You may be asked to close Visual Studio.